

How to Remove a Rear Windshield Without Breaking It
Embarking on the journey of removing a rear windshield can be both challenging and rewarding. In vehicle maintenance, possessing the knowledge to safely and effectively perform this task is valuable. Whether you are a seasoned DIY enthusiast or a professional, the process demands a careful approach to prevent damage.
At Texas Reliable Auto Glass, we recognize the significance of empowering individuals with the expertise to handle rear windshield removal. This comprehensive guide aims to provide a step-by-step walkthrough, essential tips, and insights, ensuring you can successfully remove a rear windshield without the risk of breakage. Let’s delve into the intricacies of this task, unraveling the nuances to make the process as seamless as possible.
Essential Tools and Materials
Before diving into the intricacies of rear windshield removal, gathering the tools and materials that will pave the way for a successful and damage-free process is crucial. Here’s a comprehensive list to ensure you’re well-prepared:
Tools:
Sealant Cutter:To cut through the adhesive or sealant holding the windshield in place.
Protective Gloves and Eyewear:Ensure your safety with high-quality gloves and protective eyewear to shield against debris.
Trim Pad Remover:Useful for gently removing any surrounding trim without causing damage.
Utility Knife:For precision cutting and additional control during the removal process.
Suction Cup Handles:Provides a secure grip on the windshield, aiding in controlled handling.
Plastic Trim Tools:It prevents scratches or damage to the vehicle’s body while working around the windshield.
Materials:High-Quality Replacement Sealant:
Ensure the new windshield is securely resealed with a top-notch adhesive.
Disposable Plastic Sheets:
Protect the interior of the vehicle from debris and potential damage during removal.
Clean Rags or Towels:
Wipe down surfaces and keep the work area clean throughout the process.
Windshield Setting Blocks:
Provide support to the windshield during installation.
Glass Cleaner:
To thoroughly clean the new windshield before installation.
Primer:
Enhances the bond between the windshield and the adhesive.
Razor Blades:
It helps remove any residual glue or sealant after the windshield is detached.
Having these tools and materials at your disposal ensures a well-equipped and organized approach to rear windshield removal. Each item serves a specific purpose in facilitating a smooth and efficient process, ultimately contributing to the success of your endeavor.
Step-by-Step Guide
Now that you have gathered the necessary tools and materials let’s dive into the step-by-step process of removing a rear windshield. Follow these detailed instructions to ensure a smooth and damage-free removal:
Step 1: Preparation
Begin by parking the vehicle on a level surface and using the brake. Clean the exterior of the windshield to make the removal process more manageable. Place disposable plastic sheets inside the vehicle to protect the interior from debris.
Step 2: Safety First
Equip yourself with protective gloves and eyewear before starting the removal process. Safety should always be a priority, especially when dealing with glass and potentially sharp tools.
Step 3: Trim Removal
Use the trim pad remover and plastic trim tools to remove any surrounding trim near the windshield gently. Take your time to avoid causing damage to the vehicle’s body.
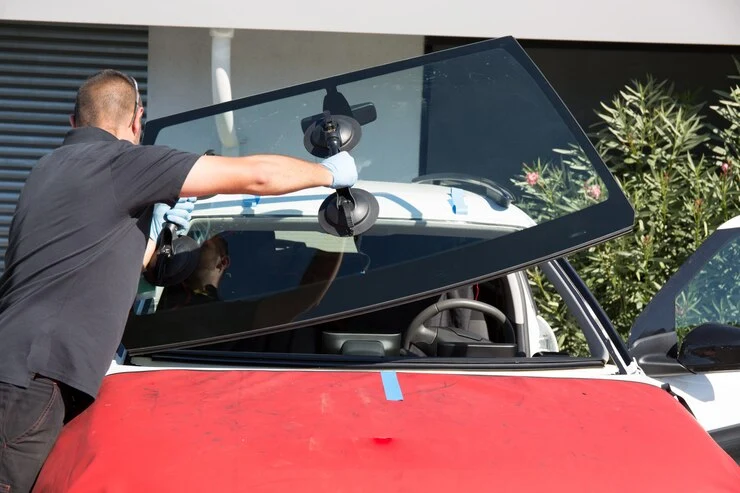
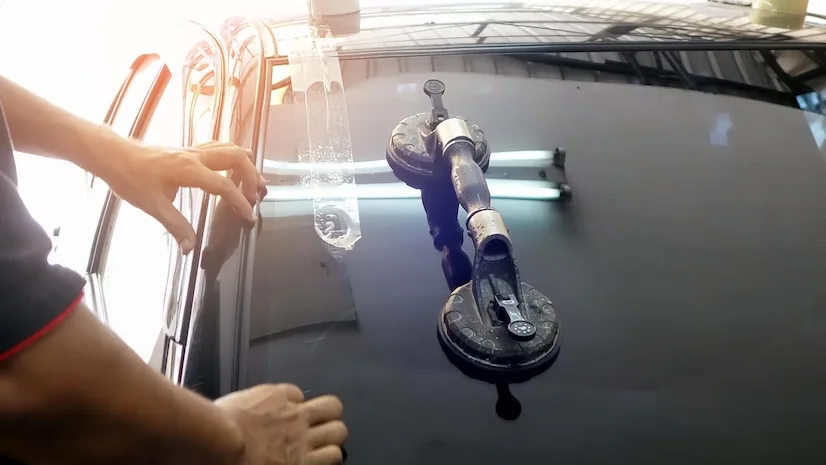
Step 4: Suction Cup Application
Attach the suction cup handles to the windshield. Ensure a secure grip, and use them to lift the windshield slightly. This step is crucial for creating space to insert the windshield removal tool.
Step 5: Adhesive Cutting
Use the windshield removal tool to cut through the adhesive or sealant holding the windshield in place. Take care to follow the contour of the windshield to minimize the risk of damage.
Step 6: Slow and Controlled Detachment
Once the adhesive is cut, carefully and slowly detach the windshield from the vehicle. Ensure that the suction cups provide additional support during this process.
Step 7: Clean Surfaces
Clean the vehicle’s body and the windshield setting area thoroughly with the windshield removed. Use clean rags or towels to wipe away any remaining debris or adhesive.
Step 8: Adhesive Residue Removal
Inspect the windshield setting for any residual adhesive. Use a razor blade to remove any leftover glue carefully, ensuring a clean surface for the new windshield.
Step 9: Applying Primer
Apply a thin layer of primer to the windshield setting area. This enhances the bond between the new windshield and the adhesive, promoting a secure fit.
Step 10: New Windshield Placement
Carefully place the new windshield onto the setting blocks. Ensure proper alignment and press it gently into place.
Step 11: Sealing the Windshield
Apply a high-quality replacement sealant around the edges of the windshield. This creates a solid and secure bond between the windshield and the vehicle.
Step 12: Final Checks
Double-check the alignment and cleanliness of the windshield. Clean any excess sealant, and inspect the entire installation for a professional finish.
By following these steps diligently, you can successfully remove a rear windshield without the risk of breakage. Remember to prioritize safety, take your time during each step, and consider seeking professional assistance if needed.
Best Practices from Texas Reliable Auto Glass
At Texas Reliable Auto Glass, our experts have accumulated valuable insights and best practices for ensuring a seamless and damage-free rear windshield removal process. Follow these guidelines to enhance your skills and achieve professional results:
Thorough Inspection is Key
Before initiating the removal, thoroughly inspect the rear windshield and its surroundings. Look for any existing damage or irregularities that might affect the process. Identifying potential issues beforehand allows for better preparation and prevents complications during removal.
Precision Tools for Precision Work
Invest in high-quality tools designed explicitly for windshield removal. Precision is paramount, and using the right tools ensures a clean cut through the adhesive without compromising the integrity of the glass or the vehicle’s body.
Team Up for Efficiency
Consider working in pairs for more complex removals, especially in vehicles with panoramic sunroofs. Having an extra set of hands ensures better control during critical stages of the process and minimizes the risk of accidents or damage.
Protective Measures for Trim Removal
When removing surrounding trim, prioritize protective measures. Use plastic trim tools and trim pad removers to prevent scratches or dents on the vehicle’s body. Taking care during this step contributes to a professional finish.
Temperature Matters
Be mindful of the ambient temperature. Extreme heat or cold can affect the adhesive’s properties and removal process. Aim for moderate temperatures to ensure optimal conditions for successful windshield removal.
Efficient Adhesive Removal
When removing residual adhesive after detaching the windshield, take your time. Use a razor blade with precision to avoid damaging the vehicle’s body. A clean setting area is crucial for properly installing the new windshield.
Prioritize Safety Gear
Ensure you and your team have the necessary safety gear, including gloves and protective eyewear. Safety remains paramount throughout the entire process, safeguarding against potential injuries.
Expertise in Panoramic Sunroof Vehicles
For SUVs with panoramic sunroofs, rely on the expertise of professionals like Texas Reliable Auto Glass. These vehicles often present unique challenges, and our experts have honed their skills to handle them precisely.
Sealant Quality Matters
Use only high-quality replacement sealant. The longevity and effectiveness of the new windshield’s seal depend on the quality of the adhesive. Opting for a trusted brand ensures a durable bond.
Post-Installation Quality Checks
After installing the new windshield:
- Conduct thorough quality checks.
- Ensure proper alignment, cleanliness, and a secure seal.
- Address any issues immediately to guarantee a professional and long-lasting result.
By incorporating these best practices into your rear windshield removal process, you elevate your skills and increase the likelihood of success. Texas Reliable Auto Glass stands by these guidelines, ensuring the satisfaction of our clients and the longevity of their vehicle’s glass components.
SUVs with Panoramic Sunroofs and Windshield Removal
Understanding SUVs’ unique challenges with panoramic sunroofs in windshield removal, we seamlessly transition to the importance of internal linking. This section sheds light on the connection between windshield removal and these specific vehicle features and guides you toward valuable resources on the Texas Reliable Auto Glass website.
SUVs equipped with panoramic sunroofs present additional complexities during windshield removal. The intricate design of these sunroofs requires a nuanced approach to ensure a successful and damage-free process. As we navigate this topic, it becomes evident that expertise in handling such vehicles is paramount.
Conclusion
Mastering removing a rear windshield without breaking it is a valuable skill for any vehicle owner or enthusiast. This guide has walked you through essential steps, from preparation and safety precautions to the intricacies of the removal process. Texas Reliable Auto Glass has shared expert insights and best practices to ensure a seamless experience.
Remember, precision and care are paramount at every stage. The tools and materials you use and adherence to safety measures contribute to a successful removal. Whether tackling this task as a DIY project or seeking professional assistance, the knowledge gained here empowers you.
For SUVs with panoramic sunroofs, the challenges may be more significant, and that’s where the expertise of Texas Reliable Auto Glass shines. Our commitment to providing top-notch service extends to equipping you with the knowledge needed to navigate specific challenges associated with these vehicles.
FAQs Related to Rear Windshield Removal
Can I remove the rear windshield on my own?
While it’s technically possible, we strongly recommend seeking professional assistance. Rear windshield removal requires precision and expertise to avoid damage.
What tools do I need for rear windshield removal?
Essential tools include:
- A windshield removal tool.
- Sealant cutter.
- Protective gear.
- Suction cup handles.
- Trim pad remover.
- Plastic trim tools.
Is it challenging to remove a rear windshield with a panoramic sunroof?
Yes, the complexity increases when dealing with panoramic sunroofs. Professional assistance is advisable, especially from experts like Texas Reliable Auto Glass.
How long does the rear windshield removal process take?
The duration varies depending on the vehicle type and any unforeseen challenges. On average, it may take a few hours to complete.
Can I reuse the rear windshield after removal?
Reusing a windshield is not recommended due to the potential for damage during the removal process. Opting for a new, undamaged windshield for safety and structural integrity is advisable.