

Tesla Model 3 windshield replacement is crucial for maintaining both the safety and performance of your vehicle. The windshield plays a vital role in protecting occupants during collisions and ensuring optimal visibility under various driving conditions. Regular maintenance and timely replacement of the windshield not only preserve the structural integrity of the Model 3 but also contribute to the vehicle’s advanced safety features, such as its driver assistance systems. Keeping the windshield in excellent condition helps prevent potential issues like reduced visibility, which could lead to unsafe driving conditions.
Tesla Model 3 Front Windshield Replacement
Replacing the front windshield on a Tesla Model 3 involves a detailed process due to its unique features and the integration of advanced technology. Here’s an overview of the specifics, differences from rear windshield replacement, and the step-by-step replacement process.
Key Differences Between Front and Rear Windshield Replacement
Technological Integration:
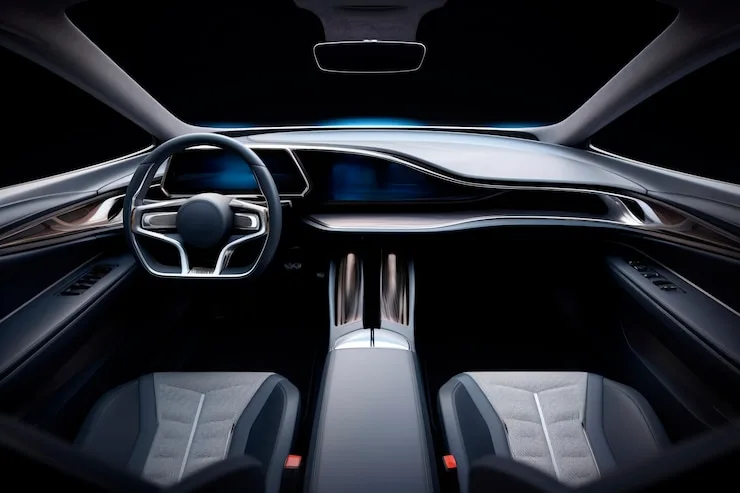
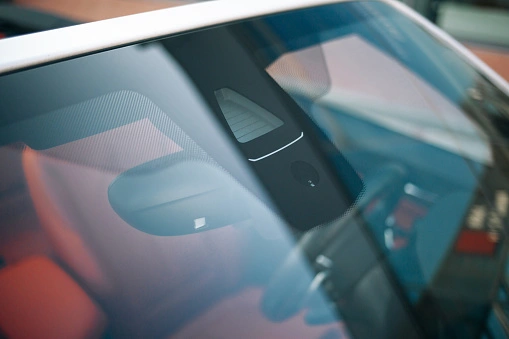
- Front Windshield: The front windshield of the Tesla Model 3 is equipped with various sensors and cameras crucial for the vehicle’s Autopilot and advanced driver assistance systems. These include a forward-facing camera, radar, and other sensors that are calibrated as part of the replacement process.
- Rear Windshield: The rear windshield generally lacks such complex integrations, with its primary function being to provide visibility and support for the rear defroster. It does not require the same level of calibration or sensor alignment.
Structural Role:
- Front Windshield: It contributes significantly to the vehicle’s structural integrity and safety. It is an integral part of the car’s crumple zone and provides crucial support in the event of a rollover accident.
- Rear Windshield: While it also plays a role in the vehicle’s overall structure, it is less critical compared to the front windshield in terms of crash safety.
Unique Features of the Tesla Model 3 Front Windshield
Sensors and Cameras:
- The front windshield integrates various sensors and cameras used for Tesla’s Autopilot and other driver assistance features. These components need to be carefully reinstalled and calibrated to ensure proper functionality.
Heated Elements:
- Some versions of the Model 3 front windshield have heating elements embedded to prevent fogging and improve visibility in cold conditions.
Advanced Bonding:
- Tesla uses a high-strength adhesive for the windshield, which is designed to provide better structural support and ensure safety.
Step-by-Step Replacement Process
Preparation
Tools and Materials Required:
- Replacement windshield compatible with Tesla Model 3
- Specialized glass removal tools (e.g., cold knife or wire saw)
- Adhesive remover
- New adhesive (OEM recommended)
- Calibration tools (if needed)
- Safety gear (gloves, safety glasses)
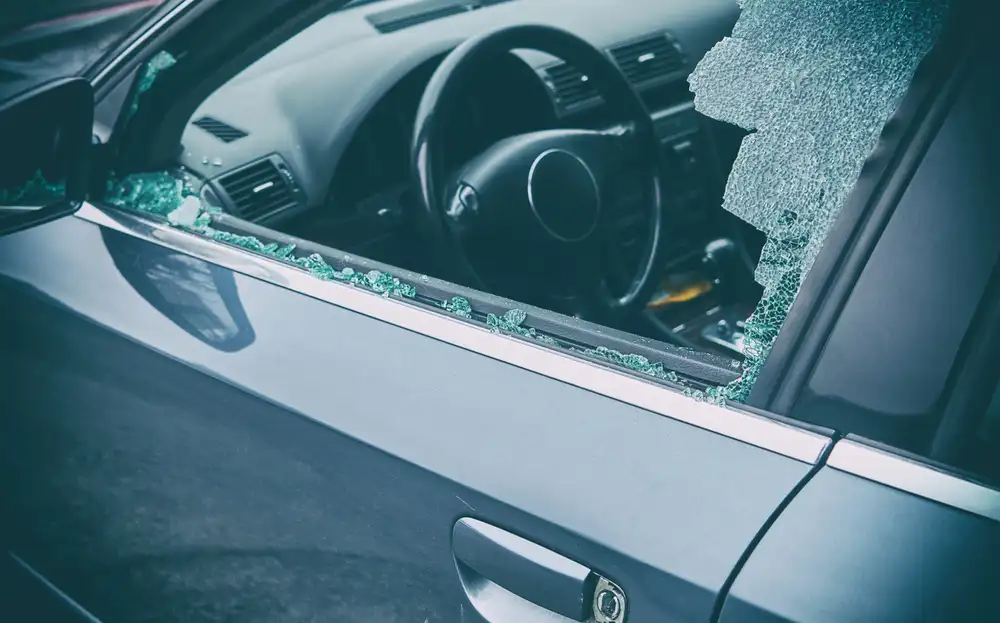
Removal of the Old Windshield
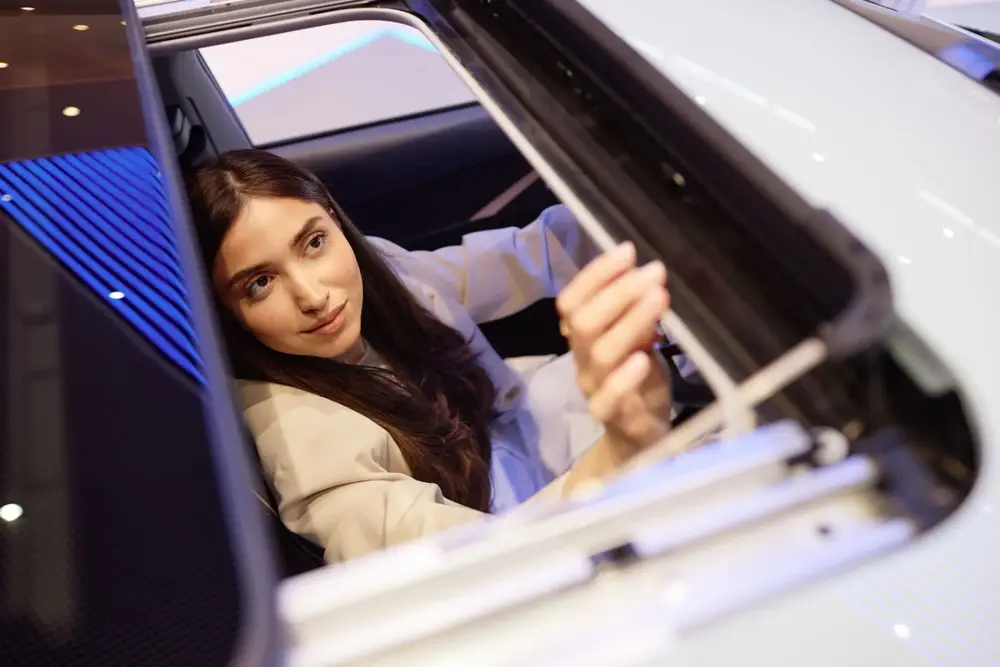
- Remove the Interior Trim: Carefully remove the interior trim and moldings around the windshield. This may require trim removal tools to avoid damage.
- Disconnect Sensors and Wires: Disconnect any wiring and sensors attached to the windshield. Handle these components with care to avoid damage.
- Cut the Old Adhesive: Use a cold knife or wire saw to cut through the adhesive around the old windshield. This requires precision to avoid damaging the vehicle frame.
- Remove the Old Windshield: Gently lift out the old windshield. This may require assistance due to its size and fragility.
Preparing the Vehicle
- Clean the Frame: Remove any old adhesive residue from the frame of the vehicle. Ensure that the surface is clean and smooth for proper adhesion of the new windshield.
- Inspect for Damage: Check the frame and surrounding areas for any damage that may need repair before installing the new windshield.
Installation of the New Windshield
- Apply New Adhesive: Apply a bead of new adhesive to the vehicle frame. Ensure that the adhesive is evenly distributed to provide a strong bond.
- Position the New Windshield: Carefully place the new windshield into position. Make sure it is aligned properly with the vehicle frame.
- Secure and Press: Press the windshield into place to ensure a good bond with the adhesive. Follow the adhesive manufacturer’s instructions regarding curing time.
Reconnect Sensors and Wires
- Reattach all sensors and wiring to the new windshield. Ensure that everything is connected securely and correctly.
Reinstall Interior Trim
- Reinstall the interior trim and moldings that were removed earlier. Ensure that all clips and fasteners are properly secured.
Calibration and Testing
- If necessary, perform calibration of the sensors and cameras according to Tesla’s specifications. This step is crucial for maintaining the functionality of advanced driver assistance systems.
- Test the windshield to ensure proper installation and operation of all features.
Challenges of Tesla Model 3 Windshield Replacement
Replacing the windshield on a Tesla Model 3 presents several unique challenges due to its advanced technology and the precision required for proper installation. Understanding these challenges can help ensure a successful replacement and maintain the vehicle’s safety and functionality.
Complexity of the Replacement Process
Integration of Advanced Technology
- Autopilot Cameras and Sensors: The front windshield of the Tesla Model 3 is integrated with various cameras and sensors essential for Tesla’s Autopilot and driver assistance systems. This includes a forward-facing camera, radar, and several sensors that monitor the road and surroundings. During replacement, it is crucial to carefully handle and reconnect these components to ensure that they function correctly after installation.
- Calibration: After replacing the windshield, the sensors and cameras must be calibrated to ensure that the vehicle’s driver assistance systems operate as intended. This calibration process is complex and often requires specialized equipment and software. Failure to calibrate correctly can lead to malfunctioning of safety features like lane-keeping assist and adaptive cruise control.
Precision Required for Proper Installation
- Adhesive Bonding: The Tesla Model 3 uses a high-strength adhesive to bond the windshield to the vehicle. Proper application of this adhesive is critical for maintaining the vehicle’s structural integrity and ensuring that the windshield is securely attached. Any misalignment or improper bonding can compromise safety and result in leaks or poor fit.
- Alignment and Fit: The windshield must be precisely aligned with the vehicle frame to ensure a proper seal and alignment with other components such as the trim and moldings. Even slight deviations can cause issues with fit, function, and appearance.
Common Issues
Issues with Sensor Recalibration
- Sensor Misalignment: If the sensors and cameras are not reinstalled correctly, or if they are not calibrated accurately, it can lead to issues such as incorrect readings or malfunctioning of the Autopilot system. This can impact the vehicle’s safety features and driver assistance systems, making recalibration a critical step in the replacement process.
- Calibration Errors: The calibration process itself can be intricate, requiring precise adjustments and verification. Errors in calibration can result in the vehicle’s driver assistance systems not functioning properly, which may lead to unsafe driving conditions.
Fit and Alignment Problems
- Seal and Fit Issues: If the windshield is not properly aligned or if the adhesive does not bond correctly, it can lead to water leaks, wind noise, or vibrations. Ensuring a proper seal is essential to avoid these problems and maintain the integrity of the vehicle’s cabin environment.
- Trim and Molding Fit: Misalignment of the windshield can also affect the fit of interior trim and moldings, leading to aesthetic issues and potential gaps that could affect performance.
Handling Uncommon Scenarios
Dealing with Extensive Damage
Frame Damage: If the vehicle frame has sustained significant damage, it may require repair before a new windshield can be installed. Frame damage can complicate the replacement process, requiring additional repairs to ensure that the new windshield fits properly and that the vehicle’s structural integrity is maintained.
Repair vs Replacement: In cases of extensive damage, a professional assessment is necessary to determine whether the frame can be repaired or if more extensive work is needed. This might include straightening the frame or addressing underlying issues that could impact the windshield installation. If you want more information about tesla glass repair then visit Tesla Glass Repair.
Tesla Model 3 Windshield Replacement Cost
The cost of replacing a Tesla Model 3 windshield can vary significantly based on several factors. Understanding these variables can help you better estimate the overall expense and plan accordingly.
Factors Affecting Cost
Price Differences Between OEM and Aftermarket Windshields
- OEM Windshields: Original Equipment Manufacturer (OEM) windshields are made by the same manufacturer as the original part and are designed to meet Tesla’s specifications. They are generally more expensive but offer higher quality and compatibility. OEM windshields often come with features specifically tailored to the Model 3, such as integrated sensors and heating elements.
- Aftermarket Windshields: Aftermarket windshields are produced by third-party manufacturers and may be less expensive. While they can offer a cost-saving option, they might not always match the exact specifications of the OEM parts. This can affect the fit and integration of advanced features like sensors and cameras, potentially impacting the performance of Tesla’s Autopilot system.
Labor Costs and Regional Price Variations
- Labor Costs: The cost of labor can vary depending on the complexity of the replacement and the expertise of the technician. Tesla vehicles, with their advanced technology and precise installation requirements, may incur higher labor costs compared to standard vehicles.
- Regional Variations: Prices can vary by region due to differences in cost of living, local labor rates, and availability of specialized technicians. Urban areas or regions with higher costs of living may see higher prices for both parts and labor.
Additional Costs
Costs Associated with Sensor Recalibration
- Calibration Services: After replacing the windshield, the sensors and cameras must be recalibrated to ensure that the Autopilot and other driver assistance systems function correctly. This recalibration often requires specialized equipment and software, which can add a significant cost to the replacement process.
- Professional Calibration: Calibration is typically performed by specialized technicians at certified service centers. The cost of calibration can vary but is an essential part of the replacement process to ensure all systems are correctly aligned and operational.
Possible Additional Repairs or Adjustments Needed
- Frame Repairs: If there is damage to the vehicle’s frame or surrounding area, additional repairs may be necessary before the new windshield can be installed. This could involve straightening or reinforcing the frame, which can add to the overall cost.
- Trim and Molding Adjustments: The installation of a new windshield may also require adjustments or replacement of interior trim and moldings. If these components are damaged or do not fit correctly after the windshield is installed, additional costs for repairs or replacements might be incurred.
You can also read about Car Window Replacement Cost.
FAQs
What Is Involved In A Tesla Model 3 Windshield Replacement?
Replacing a Tesla Model 3 windshield involves removing the damaged windshield, cleaning and preparing the vehicle frame, installing a new windshield, and recalibrating any sensors and cameras integrated into the windshield. The process requires precision to ensure proper fit and functionality of advanced driver assistance systems.
How Much Does A Tesla Model 3 Windshield Replacement Cost?
The cost of replacing a Tesla Model 3 windshield can vary depending on factors such as the choice between OEM and aftermarket windshields, labor rates, regional price differences, and additional services like sensor recalibration. On average, you can expect to pay between $500 and $1,500, including parts and labor.
What Is The Difference Between Oem And Aftermarket Windshields For The Tesla Model 3?
OEM windshields are manufactured by Tesla or approved suppliers and are designed to meet the exact specifications of the original part. They generally cost more but offer better compatibility and integration with the vehicle’s advanced systems. Aftermarket windshields are produced by third-party manufacturers and may be less expensive but could have variations in quality or fit.
Why Is Sensor Recalibration Necessary After A Windshield Replacement?
The Tesla Model 3’s front windshield houses several sensors and cameras crucial for Autopilot and other driver assistance features. Recalibration is necessary to ensure that these systems function correctly with the new windshield. Incorrect calibration can lead to malfunctioning safety features and reduced vehicle performance.
Can I Drive My Tesla Model 3 Immediately After The Windshield Is Replaced?
After the windshield replacement, you should wait for the adhesive to fully cure before driving the vehicle. The curing time can vary depending on the adhesive used and environmental conditions but generally takes 24 to 48 hours. Sensor recalibration may also require additional time and testing.
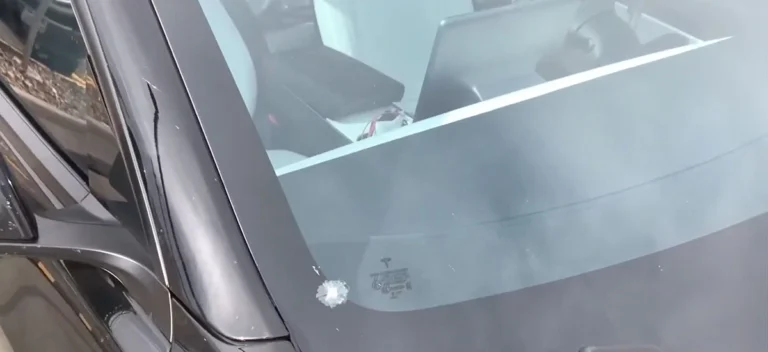
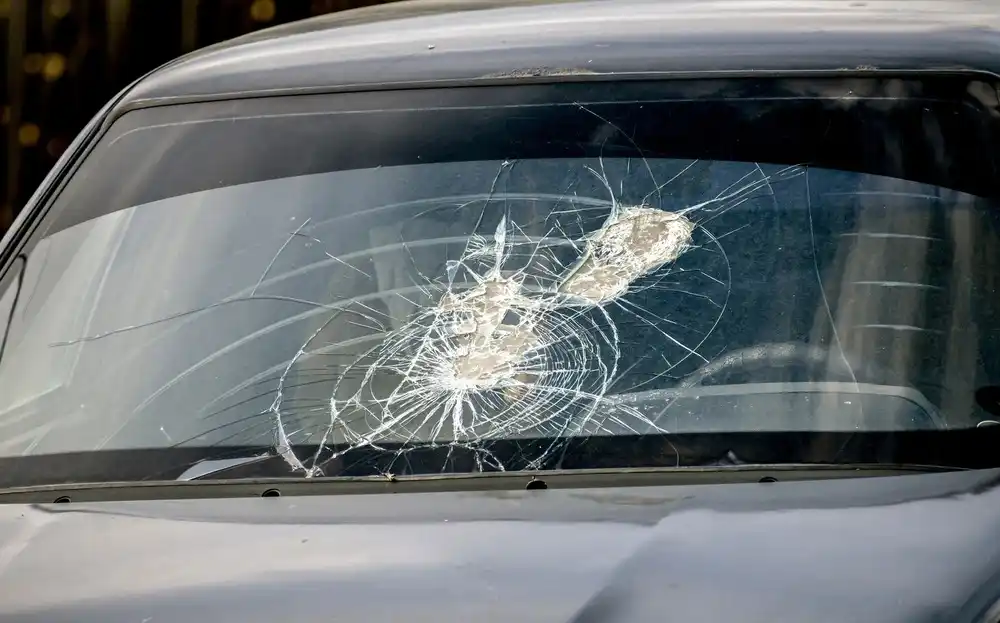
What Should I Do If My Tesla Model 3 Windshield Has Minor Damage?
For minor damage, such as small chips or cracks, it may be possible to repair the windshield rather than replace it. However, if the damage obstructs the driver’s view or is located in a critical area, replacement may be necessary. Consult a professional to assess the damage and recommend the best course of action.

")