 Skip to content

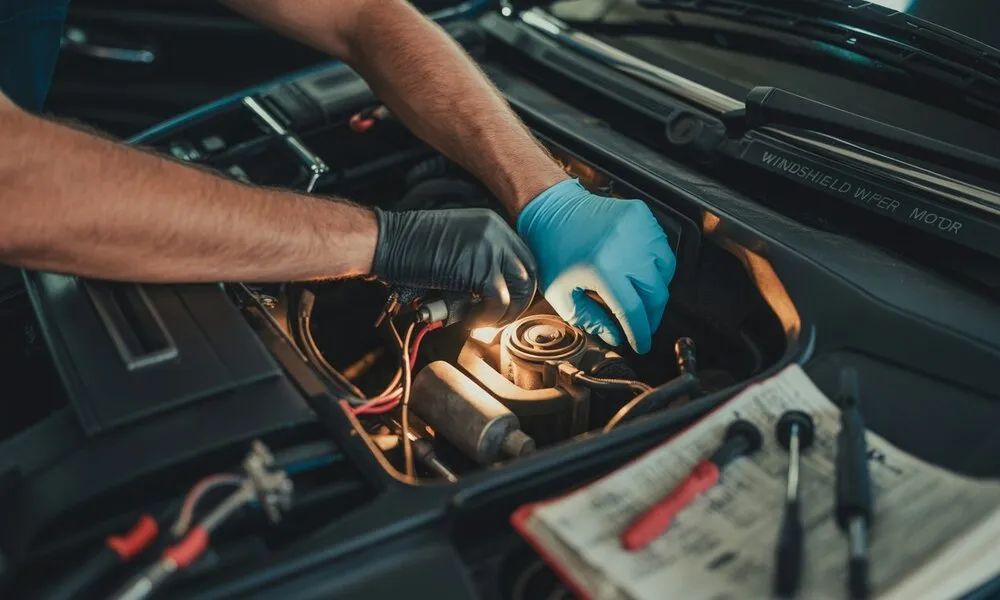
How To Replace Windshield Wiper Motor | Step-by-Step Guide
How To Replace Windshield Wiper Motor is a task you can handle if you follow the right steps and safety rules. In most cars, the job takes one to two hours and basic tools. The key is to confirm the motor is bad before replacing it and to install the new motor in the correct parked position. If your windshield wipers stopped working, moved slowly, or parked in the wrong spot, the wiper motor may be the issue. This guide explains how the system works, how to diagnose faults, and how to replace the motor without causing damage. What Does a Windshield Wiper Motor Do? A windshield wiper motor is a small electric motor that moves your wipers across the glass. It connects to a linkage or transmission that turns motor rotation into back-and-forth motion. When you turn the wiper switch, power flows from the battery through a fuse and relay to the motor. The motor spins and moves the wiper arms at low or high speed. Most modern cars use a DC motor with built-in park control. This lets the wipers stop at the bottom of the windshield. There are two main setups: Front windshield wiper motor for the main glass Rear wiper motor for hatchbacks and SUVs Each setup has different access points and steps. What Can Go Wrong with a Windshield Wiper Motor? Most drivers think that if the wipers stop moving, the motor is dead. This is not always true. Sometimes the wiper motor replacement is the last thing you need. Problems often start in the wiring or the mechanical joints. One common issue is seized linkage bushings. Over time, dirt and salt get into the metal joints of the transmission. This makes it very hard for the motor to move the arms. If you hear a humming sound but nothing moves, your motor might be trying to work against a stuck linkage. Another frequent failure is the internal park switch. This tiny part inside the motor tells the blades when to stop at the bottom of the glass. If this switch fails, your wipers might stop right in your field of vision or refuse to turn off at all. This is a clear sign you need a windshield wiper motor replacement. How to Identify a Faulty Windshield Wiper Motor Before you spend money on parts, you must be sure the motor is the problem. Many people buy a new motor only to find out they had a blown fuse. Follow these diagnostic steps to save time and money. Check the Fuse and Relay Open your fuse box. Look for a fuse labeled “Wiper” or “WASH.” If the metal wire inside the fuse is broken, replace it with one of the same color and number. If the fuse is fine, check the wiper relay. A bad relay can prevent power from reaching the motor. You can often swap the wiper relay with a matching one from the horn or AC to see if the wipers start working. The Multimeter Test If the fuses are good, it is time to test for 12 volts at the motor itself. Locate the electrical connector on the motor. Unplug the harness. Turn the ignition on and set the wipers to “High.” Use a multi-meter set to DC volts. Touch the red probe to the power pin in the harness and the black probe to a clean ground wire or metal part of the frame. If the meter shows 12 volts but the motor doesn’t move when plugged in, the motor is faulty. Inspect the Splines Sometimes the motor is spinning, but the blades aren’t moving. This often happens because the splines (the tiny teeth) on the pivot shaft have stripped. If the nut holding the wiper arm is loose, the arm will just slide over the teeth instead of moving with them. Tools and Safety Checklist Before You Start Prepare first to avoid mistakes. Basic tools Socket set Screwdrivers Wiper arm puller Trim removal tool Multimeter Safety steps Park the car on level ground Turn ignition off Disconnect the battery Mark wiper arm position with tape Disconnecting the battery protects electronics and airbag sensors near the cowl. Steps How To Replace Windshield Wiper Motor Now that you are sure the motor is bad, follow these steps to install the new one. Work slowly to avoid cracking your windshield or breaking plastic clips. 1. Mark Your Alignment Before removing anything, place a small piece of painter’s tape on the glass where the blades sit. This helps with spline alignment later. If you don’t do this, your wipers might slap the side of the car or sit too high when you finish. 2. Remove the Wiper Arms Pop off the plastic nut cover at the base of each arm. Use your socket to remove the nut. If the arm is stuck, do not pry against the glass. Use a wiper arm puller or gently wiggle the arm at the hinge until it pops off the pivot shaft. 3. Take Off the Cowl The cowl is the plastic grill between the hood and the glass. It is held by cowl clips or small screws. Carefully remove these and lift the cowl away. Be careful with the washer fluid hoses; you may need to unplug them to move the cowl out of the way. 4. Disconnect and Unbolt the Motor Find the electrical plug and press the tab to pull it out. Next, unbolt the motor from the car frame. In most cars, the motor is attached to the wiper transmission by one main bolt. Unbolt this link and lift the motor out. 5. Prepare the New Motor This is the most important step. Most new motors do not come in the “park” position. Plug the new motor into the wiring before installing it. Turn the car on and cycle the wipers once. Let the motor stop on its own. Now the motor is in the correct park position. 6. Installation Bolt the
How To Replace Windshield Wiper Motor | Step-by-Step Guide Read More »
