

")
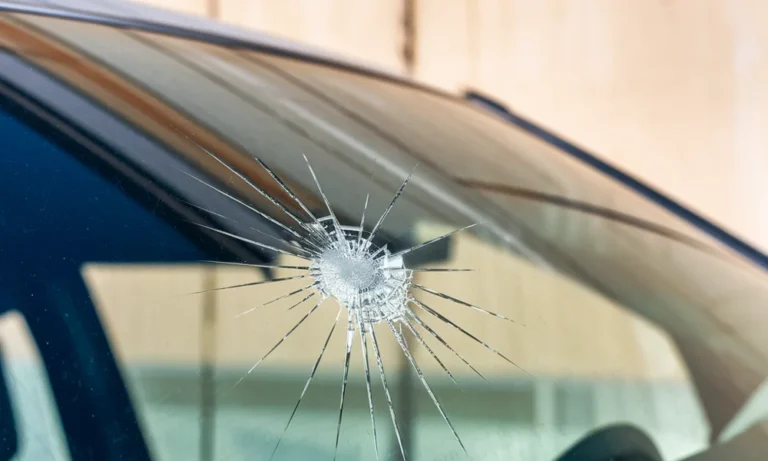
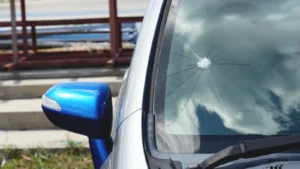
You’re driving down the highway and all of a sudden a rock slams into your windshield. At first, it just looks like a little dot, but that small chip can turn into a big crack in a matter of hours if you don’t get it fixed. Weathering, road vibrations, and moisture data compound the damage.
Early repair of chipped windshield damage can save you hundreds of dollars and keep you safe. In this guide, you will learn everything from the different types of chips, to whether or not you can repair chipped windshields yourself and when a professional chipped windshield fix is the best option.
Understanding Windshield Chips
A chip is a tiny spot of broken glass on your windshield, generally a result of a rock, gravel, or other debris hitting your windshield. Although the damage looks cosmetic, even a small chip weakens the glass and can spread rapidly.
Common Types of Windshield Chips
Various types of damage need different treatments to deal with chips:
- Bull’s Eye Chips
Round damage with a black dot in the center, commonly the result of circular matter. - Star Breaks
Cracks that look like a starburst. These jump more quickly than almost all other fractures are known to do so. - Combination Breaks
Two or more different chip designs, usually means more difficult repair. - Partial Bull’s Eye
It’s like a bull’s eye but it isn’t is not all circular, this one is more simple to fix.
Does Size and Location Matter?
Yes, size and location are both critical in making the fix or replace windshield chip choices.
Size:
Chips smaller than a quarter can often be repaired. Major damage usually calls for full windshield replacement.
If you’re looking for the best windshield replacement in Austin, Texas, contact us for affordable, reliable, and professional service you can trust.
Location:
Chips at or near the edge of your windshield are more dangerous because that’s a greater threat to your car’s structural integrity. Damage in the drivers line of sight should also receive special attention.
How to Repair Chipped Windshield in 7 Easy Steps
Small chips can often be fixed at home with a windshield repair kit. Follow the instructions.
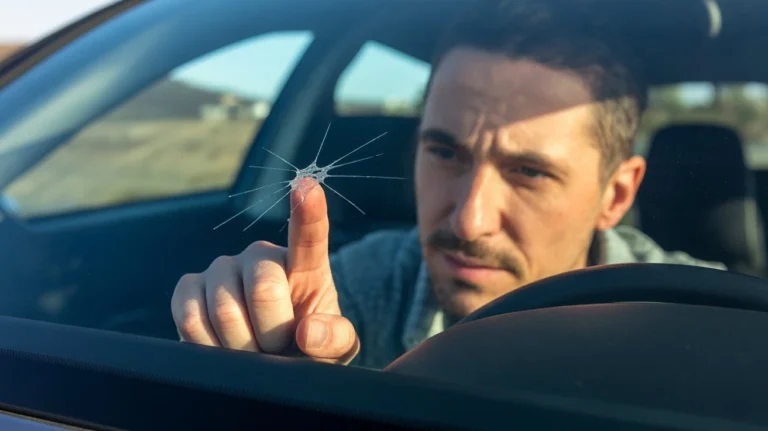
Step 1: Inspect the Damage
Measure the chip and make sure it hasn’t reached the edge of the windshield. If the damage has penetrated both layers of glass, then you should get professional chipped glass repair.
Step 2: Get a Windshield Repair Kit
Most kits are priced around $10-20 and contain resin, applicator, curing strips and a razor blade.
Step 3: Clean the Area
Clean the dirt and moisture with glass cleaner and a lint-free cloth. Any debris left inside the chip will cause the repair to weaken.
Step 4: Apply the Resin
Center the applicator over the chip and slowly inject the resin. This resin holds the damaged area together and bonds the glass.
Step 5: Remove Air Bubbles
Pressure on and off several times to force air out of the chip. Clear resin means the repair is working properly.
Step 6: Cure the Resin
Place the curing strip on top of the repair, and allow it to cure in direct sunlight for 15 to 30 minutes, or under a UV lamp, if available.
Step 7: Finish the Surface
Use a razor blade to scrape up any superfluous resin from the glass. That repaired spot should feel smooth and be a lot less obvious to the eye.
Read More: Can A 12 Inch Crack In Windshield Be Repaired?
What Happens If You Don’t Repair a Chip?
Result of neglecting to fix your windshield chip:
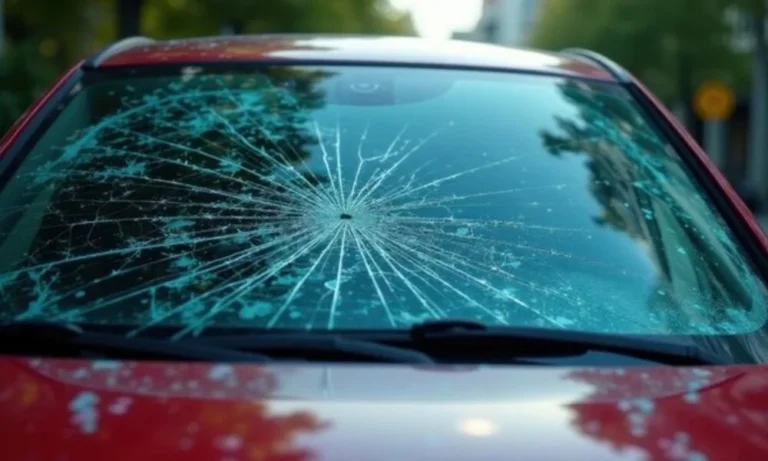
Chips Turn Into Cracks
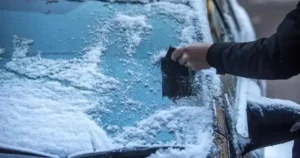
Glass expands and contracts as the temperature changes, and this can turn small chips into large cracks.
Water and Moisture Damage
Moisture within the chip weakens and dulls the windshield.
Failed Safety Inspections
Most states won’t allow you to drive if your windshield is cracked or badly damaged.
Safety Risks
Your windshield helps provide structural support for your vehicle in the event of an accident, and it is necessary for proper airbag deployment. And damage lessens that protection.
DIY vs Professional Chipped Windshield Repair

DIY repair kits can be an effective solution for minor, uncomplicated damage, but professional repair has the obvious advantages.
Why Professionals Do It Better
- All air with advanced vacuum tools
- Stronger bonds with better resin
- Clearer and longer lasting
- There is warranty coverage included.
Insurance Coverage
The majority of insurance policies will pay for professional repair services to chip and crack windshields on glass even without a deductible, so you may be able to get the expert repair service at no charge.

How Much To Repair Windshield Chip In Austin
The average cost to repair a windshield chip is between $50 and $150, but it can be more or less depending on your location and the shop you take it to.
Additional chips can add $10-$20 to the total cost. Mobile repairs might cost a little more, but can be more convenient.
DIY kits are less expensive up front but come with no guarantee. However, if the repair doesn’t work, you may still want to get professional assistance.
Final Tips to Prevent Future Chips
- Keep your distance from trucks and construction vehicles
- Stay off gravel roads if you can
- Fix chips as soon as you can
- Replace old windshield wipers
- Park in the Garage or Shade
- Apply special glass protection
The easiest way to avoid bank-breaking, multiple repairs to a chipped windshield is to prevent them from occurring in the first place.
You can read about: How Much Is It To Repair A Windshield Crack
Conclusion
How to quickly repair a chipped windshield Knowing how to easily fix a chipped windshield can save you money, keep a crack from expanding, and keep you safe. Small chips can be treated at home with kits, but professional chipped glass repair is more effective and long-lasting and covered by contact lenses.
If you go the seamless repair route or choose to have your windshield replaced, the important thing is to do it quickly. Don’t let a tiny chip turn into a big replacement bill. Fix it early, drive safe, and keep your windshield durable for the road ahead.
For fast, affordable rock chip repair in Ausitn, trust Texas Reliable Auto Glass to stop damage before it spreads.
We deliver reliable, professional repairs that save you time and money—done right the first time.
Call Texas Reliable Auto Glass today or book now and get back on the road with confidence.
FAQs
Can you fix a windshield chip yourself?
Yes, you can fix small chips yourself using a repair kit. The chip must be smaller than a quarter and not at the windshield’s edge. DIY repairs work best on simple bull’s eye chips. Complex star breaks or large chips need professional repair.
How long does a windshield chip repair take?
A DIY repair takes about one hour including prep time and curing. Professional repairs take 30 minutes or less. Most of the time is spent waiting for the resin to cure in sunlight.
Can a chip turn into a crack overnight?
Yes, temperature changes overnight can turn chips into cracks. Cold weather is especially risky. If temperatures drop below freezing, moisture in the chip can expand and cause cracking. Fix chips before the weather changes.
What size chip is too big to repair?
Chips larger than a quarter typically need professional assessment. Anything bigger than a dollar bill usually requires windshield replacement. The chip’s location also matters. Edge chips and chips in your direct line of sight might need replacement even if they’re small.
How do you stop a windshield chip from spreading?
Apply clear tape over the chip immediately. This keeps dirt and moisture out. Avoid temperature extremes. Don’t use your defroster on high and keep your car out of direct sunlight. Get the chip repaired within 24 hours.


")