
Replacing a windshield wiper motor is possible as a DIY repair on many vehicles, but the exact procedure depends on the vehicle’s design. Some motors are accessible beneath the cowl near the base of the windshield, while others are integrated with a motor and linkage assembly.
The wiper motor supplies the mechanical power that moves the windshield wipers across the glass. Ford describes it as an electric motor that converts electrical energy into the movement needed to clear rain, snow, and debris from the windshield.
Before replacing it, make sure the motor is actually the problem. A blown fuse, faulty wiring, defective switch, seized linkage, or poor electrical connection can produce similar symptoms.
Quick Answer
To replace a windshield wiper motor, disconnect the battery, remove the wiper arms and cowl panel, disconnect the motor wiring and linkage, remove the old motor, install the replacement, and reassemble everything. The exact procedure varies by vehicle, so check the manufacturer’s service instructions for motor location, fasteners, torque specifications, and wiper arm positioning.
How Do You Know the Wiper Motor Needs Replacement?
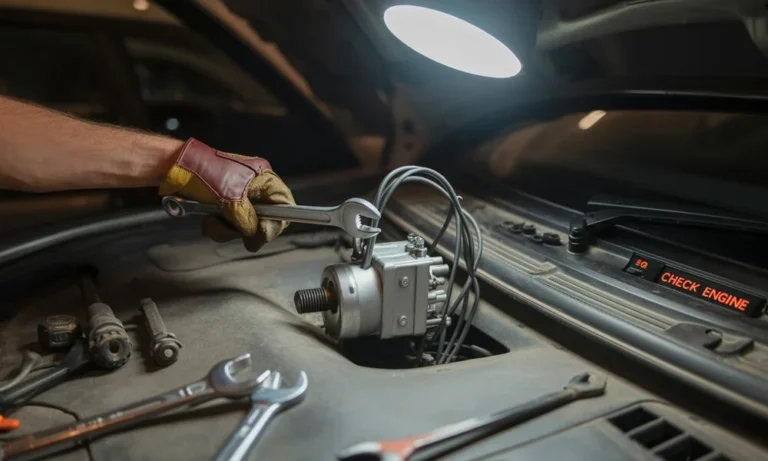
A failed or worn motor can cause the windshield wipers to move slowly, stop working, or fail to move at all. Ford lists slow or completely inoperative wipers among the signs that may indicate a failed wiper motor.
Common symptoms include:
- Wipers stop moving completely.
- Wipers move much more slowly than normal.
- Wipers stop partway across the windshield.
- The motor makes unusual sounds but the wipers do not move correctly.
- Wipers work intermittently.
- The wiper motor becomes noisy or struggles under normal operation.
However, these symptoms do not automatically mean the motor is defective.
Check the Linkage Before Replacing the Motor
If you can hear the motor running but the wiper blades do not move, the linkage may be broken or disconnected. Ford specifically identifies a broken or disconnected wiper linkage as a possible cause in this situation.
The linkage is the mechanical system that transfers movement from the motor to the wiper arms. Replacing the motor will not solve a failed linkage.
What Tools Do You Need?
The tools depend on your vehicle, but a typical windshield wiper motor replacement may require:
- Socket and ratchet set
- Screwdrivers
- Trim removal tools
- Wiper arm puller, if required
- Pliers
- Marker or masking tape
- Replacement wiper motor
- Work gloves
- Vehicle-specific service information
You may also need a torque wrench because some fasteners require a specific tightening specification.
Do not rely on a generic torque value. Use the specification provided for your particular vehicle.
Steps for Windshield Wiper Motor Replacement
1. Confirm the Correct Replacement Motor
Before removing anything, verify that the replacement motor matches your vehicle’s year, make, model, and configuration.
Some vehicles use a motor by itself, while others use a motor and linkage assembly. Toyota, for example, sells applications where the front wiper motor and linkage are supplied together as an assembly.
Check the part number whenever possible before starting the repair.
2. Park the Wipers in Their Normal Position
Turn the wipers off and allow them to return to their normal parked position if they still operate.
This makes it easier to reinstall the wiper arms in the correct location.
If the motor is completely inoperative, mark the current position of the wiper arms on the windshield with masking tape. This gives you a reference when reinstalling them.
Some manufacturer procedures specifically instruct technicians to verify the motor is in the PARK position before installing the wiper arms.
3. Disconnect the Battery
Turn the vehicle off and disconnect the negative battery cable when the vehicle’s service procedure calls for battery disconnection.
This helps prevent accidental electrical operation while you are working around the motor and wiring.
Follow the vehicle manufacturer’s instructions because some modern vehicles have additional procedures to follow when disconnecting battery power.
4. Remove the Wiper Arms
Lift the protective covers over the wiper arm nuts if your vehicle has them.
Remove the retaining nuts and carefully separate the wiper arms from their pivot shafts.
Do not force or manually twist the arms aggressively. Some manufacturer instructions warn against manually rotating wiper pivot arms because this can damage the wiper motor or related components.
If an arm is stuck to the shaft, use an appropriate wiper arm removal tool rather than excessive force.
5. Remove the Cowl Panel
The cowl is the trim panel located near the bottom of the windshield.
Depending on the vehicle, you may need to remove clips, screws, weatherstripping, or other trim pieces before the panel can be lifted away.
Keep the fasteners organized because several clips can look similar but fit in specific locations.
Once the cowl is removed, you should have access to the wiper motor and linkage assembly.
6. Disconnect the Wiper Motor Connector
Locate the electrical connector attached to the motor.
Release the connector lock and disconnect it carefully.
Do not pull directly on the wiring. Work with the connector itself to avoid damaging the terminals or harness.
Before continuing, inspect the connector for corrosion, damaged pins, loose terminals, or signs of overheating.
If the electrical connection is damaged, replacing the motor alone may not solve the problem.
7. Disconnect the Motor From the Linkage
The motor is connected to the wiper linkage through a mechanical connection.
Depending on the vehicle, you may need to remove a retaining nut, bolt, clip, or other fastener.
Take a photo before disassembly if the linkage position is difficult to understand. This can make reassembly easier.
Remember that the exact connection varies by vehicle. Some replacement parts are sold as a motor only, while others include the linkage assembly.
8. Remove the Old Motor
Remove the bolts or nuts securing the motor to its mounting location.
Support the assembly as you remove the final fastener so it does not fall or place unnecessary stress on nearby components.
Once the mounting hardware is removed, take the old motor out of the vehicle.
Compare the old and replacement units before installation.
Check:
- Mounting holes
- Electrical connector
- Shaft position
- Linkage connection
- Part number
- Overall shape and orientation
If anything does not match, stop and verify the replacement part before continuing.
9. Install the Replacement Motor
Position the new motor in the original mounting location.
Install the mounting hardware and tighten it according to the manufacturer’s specifications.
Do not guess the torque specification. Over-tightening can damage components, while insufficient tightening can allow the motor to move during operation.
Reconnect the motor to the linkage and make sure the mechanical connection is secure.
10. Reconnect the Electrical Connector
Reconnect the wiring connector until it is properly seated and locked.
Check that the wiring is routed away from moving components.
The linkage and motor move when the wipers operate, so loose wiring should not be allowed to interfere with the mechanism.
11. Reinstall the Cowl and Wiper Arms
Before installing the wiper arms, make sure the motor is in the correct parked position.
Reinstall the cowl panel and its fasteners.
Then position each wiper arm according to the marks you made earlier or the vehicle manufacturer’s specified blade position.
Install the retaining nuts and tighten them to the specified torque.
Do not guess the torque value because wiper arm fasteners vary by vehicle.
12. Test the Wiper System
Reconnect the battery if it was disconnected.
Turn the ignition on and test the wipers at each available speed.
Check that:
- Both wiper arms move correctly.
- The blades return to the proper park position.
- The wipers do not hit the hood or trim.
- The arms do not collide with each other.
- The motor does not make unusual noises.
- The wipers move smoothly across the windshield.
Test the washer system as well if it shares components or wiring with the wiper system.
If the wipers do not park correctly, stop using them and recheck the motor position and wiper arm alignment.
You should also know about: How To Replace A Sunroof Motor.
What If the New Wiper Motor Does Not Work?
If the replacement motor does not operate, do not immediately assume that the new motor is defective.
Check the system systematically.
Check the Fuse
A blown fuse can prevent the motor from receiving power. Replace a fuse only with the correct type and rating specified for the vehicle.
If the replacement fuse blows again, there may be an electrical fault that needs diagnosis.
Check the Electrical Connector
Make sure the motor connector is fully seated.
Look for corrosion, bent terminals, damaged wires, or loose connections.
Check the Wiper Switch
A faulty switch or control module can prevent the motor from receiving the correct command.
This is especially relevant when the motor itself tests correctly.
Check the Linkage
If the motor runs but the wipers do not move properly, inspect the linkage.
A broken or disconnected linkage can create symptoms that look like motor failure.
Check for Mechanical Binding
Debris, corrosion, or a seized pivot can place excessive load on the motor.
If the linkage or pivot mechanism cannot move freely, installing another motor may not fix the underlying problem.
Common Mistakes When Replacing a Wiper Motor
Several mistakes can create problems after a windshield wiper motor replacement.
Installing the wrong motor: Always verify compatibility before removing the original component.
Skipping diagnosis: A blown fuse or damaged linkage can look like a motor failure.
Forgetting the park position: Incorrect motor or arm positioning can cause the blades to stop in the wrong location.
Forcing the wiper arms: Stuck arms should be removed with the appropriate tool rather than excessive force.
Guessing torque specifications: Use the vehicle-specific service information.
Testing without checking clearance: Make sure the wiper arms cannot strike the hood, windshield trim, or each other.
When Should You Let a Professional Handle the Repair?
DIY wiper motor replacement can be manageable when the motor is easily accessible and you have the correct tools and vehicle-specific instructions.
Professional help is a better option when:
- You cannot identify whether the motor or linkage has failed.
- The vehicle has a complicated cowl or wiper assembly.
- Electrical diagnosis is required.
- The wiper system uses a control module that needs diagnosis.
- The replacement requires specialized tools.
- You cannot verify the correct installation or park position.
- The wipers are needed for safe driving and the repair cannot be completed correctly.
A windshield wiper system is a visibility-related safety system. If the wipers do not operate reliably, avoid driving in rain or other conditions where clear windshield visibility is necessary.
How Much Does Wiper Motor Replacement Cost?
The total cost depends on the vehicle, replacement motor, labor, and whether additional components such as the linkage need replacement.
The motor itself can be sold separately or as part of a motor and linkage assembly. Toyota, for example, lists a front wiper motor and link assembly as a vehicle-specific replacement component, while Ford offers application-specific wiper motors and assemblies.
For an accurate estimate, compare the cost of the correct replacement part with the labor required for your particular vehicle.
Key Takeaways
- How to replace a windshield wiper motor depends on the vehicle’s design and motor location.
- Diagnose the motor before replacing it because fuses, wiring, switches, and linkages can cause similar symptoms.
- Disconnect the battery when required by the vehicle’s service procedure.
- Mark the wiper arm position before removing the arms.
- Use the manufacturer’s torque and installation specifications rather than guessing.
- Test the motor, wiper movement, park position, and blade clearance after installation.
- If the motor runs but the blades do not move, inspect the linkage before replacing additional parts.
Conclusion
Learning how to replace a windshield wiper motor can help you handle a common vehicle repair, but the correct procedure depends heavily on your vehicle. The basic process involves diagnosing the problem, disconnecting power when required, removing the wiper arms and cowl, disconnecting the motor and linkage, installing the correct replacement, and carefully testing the system.
If the problem turns out to involve the windshield, glass, or another visibility-related component rather than the motor itself, Texas Reliable Auto Glass can help you determine the appropriate service. For vehicles that need glass replacement, you can also explore Windshield Replacement In Austin TX.

Frequently Asked Questions
How do I know if my windshield wiper motor is bad?
Common signs include wipers that move slowly, stop completely, work intermittently, or stop in an unusual position. However, a blown fuse, faulty switch, wiring problem, or damaged linkage can produce similar symptoms, so diagnosis is important before replacing the motor.
Can I replace a windshield wiper motor myself?
Yes, many vehicle owners can perform the repair with basic tools and vehicle-specific instructions. The difficulty varies significantly between vehicles because motor access, cowl design, linkage connections, and electrical systems are different.
How long does it take to replace a windshield wiper motor?
The time varies by vehicle. A motor that is easily accessible may be relatively straightforward to replace, while vehicles requiring extensive cowl or linkage removal can take considerably longer. Check the service procedure for your specific vehicle before estimating the job.
What happens if the wiper motor is replaced but the wipers still do not work?
Check the fuse, wiring connector, wiper switch, linkage, and mechanical pivots. If the motor runs but the arms remain stationary, the linkage may be disconnected or damaged.
Should I replace the wiper motor and linkage together?
Not necessarily. If only the motor has failed and the linkage is in good condition, replacing the motor alone may be appropriate. If the linkage is damaged or the vehicle uses an integrated motor and linkage assembly, replacing the complete assembly may make more sense.
Why are my windshield wipers slow after replacing the motor?
Slow operation can result from mechanical binding, a damaged linkage, poor electrical connections, incorrect installation, or a problem with the replacement motor. Check that the linkage and pivot points move freely and that the electrical connection is secure.
Do I need to disconnect the battery when replacing a wiper motor?
Battery disconnection depends on the vehicle and manufacturer’s service procedure. If the procedure calls for it, disconnect the battery before working on the electrical components. Follow the instructions for your specific vehicle.
Can a bad wiper linkage damage the motor?
A binding or damaged linkage can place additional mechanical load on the motor. If the linkage is not moving freely, it should be inspected before installing another motor.