
A damaged wiper arm ruins road visibility during sudden downpours by leaving thick, dangerous blind spots across your front glass. Unlike worn rubber blades, a bent metal arm loses its spring tension and fails to hold equal downforce.
Knowing How To Change A Windshield Wiper Arm at home saves you high repair shop labor costs and prevents metal from scratching your glass. This quick fix restores clear vision in under twenty minutes with basic garage tools.
What Is a Windshield Wiper Arm?
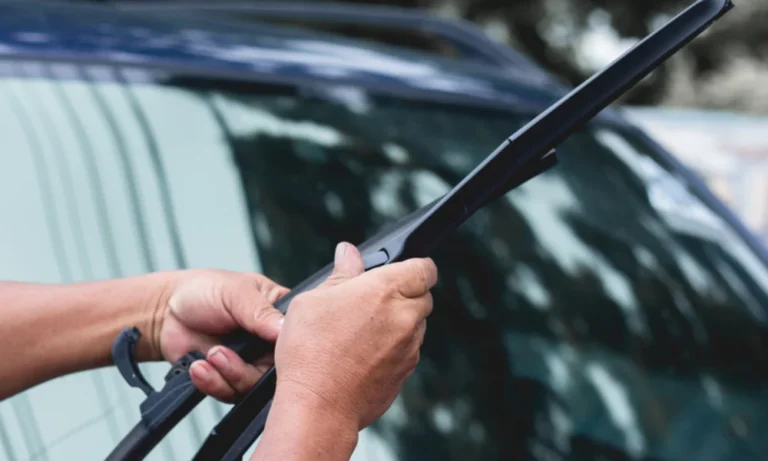
The wiper arm is a long metal bar that connects your car wiper motor to the rubber wiper blade. It transfers mechanical motion from the linkage post under the hood directly across your front glass. Most vehicles use steel or aluminum arms built with a heavy internal spring.
This internal spring applies constant pressure against the glass surface. Proper spring tension helps the rubber blade push water, snow, and slush off your windshield evenly. The base of the wiper arm sits on a splined drive shaft. Small grooves inside the arm base lock onto that splined post. A metal nut holds the assembly tight so the arm sweeps without slipping.
Signs You Need to Replace a Windshield Wiper Arm
Wiper blades wear out often, but wiper arms can also fail over time. Bent metal or weak tension springs ruin your view of the road during storms. Spotting these early warnings protects your windshield glass from deep scratches.
Chattering or Skipping Across Glass: A bent arm changes the angle of the blade against the glass surface. The blade hops instead of sliding smoothly across the wet windshield.
Streaks in the Center of the Sweep: Weak internal springs lose their holding strength over time. The arm cannot press the middle of the rubber blade against the glass.
Wiper Arm Hits the Hood or Frame: Loose splines allow the arm to slip out of position. The metal body slams against your car paint or lower windshield trim.
Visible Rust or Cracks at the Base: Corrosion weakens the metal pivot point at the bottom of the arm. Rust can freeze the spring or snap the base during heavy snow.
Loose Fit on the Drive Shaft: If the motor spins but the arm stays still, the inner splines are stripped. You need a complete windshield wiper arm replacement to restore movement.
Tools You Need to Change a Windshield Wiper Arm
Gathering your tools before starting makes the job quick and easy. You do not need expensive shop equipment to do a wiper arm replacement.
Socket Set and Ratchet: Most wiper retaining nuts require a ten to fifteen millimeter socket.
Flathead Screwdriver: Helpful for lifting protective plastic caps at the base of the arm.
Painter’s Tape or Masking Tape: Used to mark the resting place of your old wiper blade on the glass.
Penetrating Oil: Spraying rust remover breaks up corrosion on stubborn drive shafts.
Wiper Arm Puller Tool: A small, inexpensive tool that pops stubborn arms off tapered splines safely.
Thick Shop Towel: Protects the bare windshield glass from damage if the arm snaps down accidentally.
Work Gloves: Keeps your hands safe from sharp metal edges and grease deposits.
How to Change a Windshield Wiper Arm (Step-by-Step Instructions)
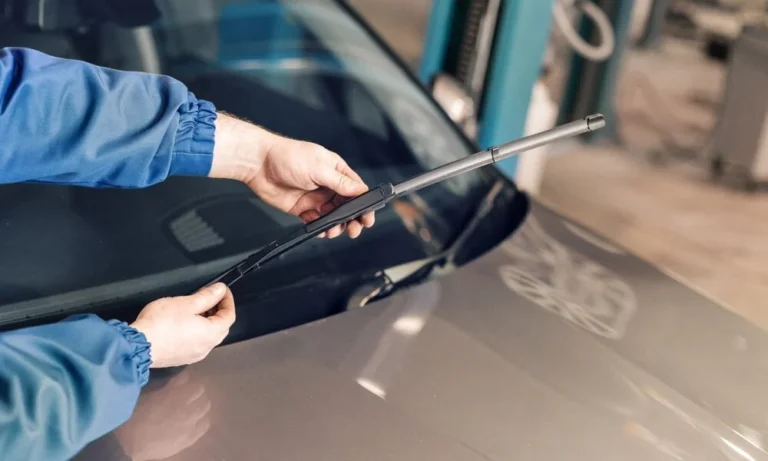
Replacing this part takes only a few simple steps. Follow these directions carefully to install your new part correctly.
Step 1: Mark the Current Wiper Position
Turn your ignition on and run the wipers once to return them to the parking spot. Turn the engine off completely. Place a piece of painter’s tape along the bottom edge of the old rubber blade. This tape line shows you where the new blade must rest on the glass.
Step 2: Protect Your Windshield Glass
Fold a thick shop towel and place it on the windshield directly under the arm pivot. Bare metal wiper posts can crack laminated windshield glass if they snap back down. Working over a padded towel prevents expensive accidental glass breaks.
Step 3: Remove the Protective Cover and Nut
Pry up the small plastic cover at the base of the arm using a flathead screwdriver. This action reveals the retaining nut underneath. Attach your socket to the ratchet and loosen the nut counterclockwise. Spin the nut off by hand and set it in a safe spot.
Step 4: Detach the Old Wiper Arm
Lift the main arm hinge away from the glass slightly to release tension. Gently wiggle the base back and forth while pulling upward. The arm should pop free from the splined drive shaft. Refer to the section below if the metal feels stuck.
Step 5: Transfer the Wiper Blade
Unclip your existing wiper blade from the hook on the old arm. Slide the blade firmly onto the hook of the new replacement arm until it clicks into place. Learning how to replace a wiper arm is easier when you attach the blade first.
Step 6: Install and Align the New Arm
Position the base of the new arm over the splined post. Align the attached rubber blade directly with your tape line on the lower windshield. Press the base down firmly onto the splines. Thread the nut back onto the post and tighten it securely with your socket wrench. Snap the plastic cover back on.
Step 7: Test Your Work
Remove the tape and towel from your glass. Turn on your car washer fluid to test the wipe pattern. Check that the new arm sweeps across the glass smoothly without striking the windshield frame.
You can read about Windshield Wiper Scratch Repair.
How to Remove a Stuck Windshield Wiper Arm
Road salt, rain, and dirt cause galvanic corrosion between steel posts and aluminum arms over time. This corrosion welds the base of the arm to the splined drive shaft. Never use a metal claw hammer to pry off a frozen arm. Heavy leverage against your windshield will shatter the delicate glass edge.
First, soak the exposed splined post with penetrating liquid. Let the oil soak into the metal grooves for fifteen minutes. Lift the arm hinge straight up and press down near the hinge joint repeatedly. This flexing motion breaks up rust bonds inside the tapered spline socket.
If the arm stays stuck, use a universal wiper arm puller tool. Slide the two lower hooks of the puller tool under the base of the arm. Center the threaded center bolt directly against the top of the wiper post. Turn the puller bolt clockwise with a wrench. The tool applies steady upward force, lifting the frozen base off the post without stressing your windshield glass.
Common Mistakes to Avoid When Replacing a Wiper Arm
Replacing wiper components is simple, but small errors cause big problems later. Avoiding these common traps keeps your car safe and reduces repair bills.
Skipping the Glass Protection Step: Never leave a bare metal wiper shaft sticking up without padding. If the spring snaps down, the metal tip will crack your windshield.
Misaligning the Parking Position: Installing the base at the wrong angle causes the blade to sweep past the glass. It may slam into the outer frame or park too high across your field of view.
Overtightening the Base Nut: Excess force strips soft metal threads on the wiper linkage post. Snug the nut down firmly without forcing it past its natural stopping point.
Ignoring Damaged Drive Splines: If the metal grooves on the drive post are ground smooth, a new arm will slip. You must clean or replace stripped drive posts before installing new parts.
Buying the Wrong Size Replacement: Arms vary by side and vehicle model. Driver side arms are often longer or curved differently than passenger side arms.
Can You Replace a Windshield Wiper Arm Yourself?
Yes, almost any vehicle owner can handle a windshield wipers arm replacement at home. It is one of the easiest DIY auto maintenance projects you can perform. The job requires basic tools, zero electrical knowledge, and minimal physical effort.
Doing the repair yourself saves money and gets your car road-ready immediately. You do not need to leave your vehicle at an auto repair shop for hours. Reviewing the steps for How To Change A Windshield Wiper Arm gives you the confidence to fix wiper problems quickly.
However, consult a professional mechanic if your wiper motor linkage is broken inside the cowl. If the splined drive shaft moves loosely in circles, the inner linkage rods may require replacement.
How Much Does It Cost to Replace a Windshield Wiper Arm?
Replacing a wiper arm is affordable compared to major brake or engine repairs. Total costs depend on whether you buy original parts or hire a shop.
DIY Replacement Cost: A new original equipment or aftermarket wiper arm costs between twenty and fifty dollars. A new wiper blade adds fifteen to twenty-five dollars. Your total expense ranges from thirty-five to seventy-five dollars.
Professional Repair Shop Cost: Auto repair shops charge standard labor rates for installation. Mechanic labor costs range from fifty to one hundred dollars for fifteen minutes of work. Total shop prices run between ninety and one hundred seventy dollars per arm.
Knowing how to replace wiper arm assemblies on your own keeps money in your pocket. You pay only for the replacement part itself.
How to Maintain Your Windshield Wiper Arms
Proper care extends the lifespan of your wiper arms and prevents corrosion. Simple routine habits protect the metal finish and keep spring tension strong.
Lift Arms Carefully During Winter: Do not pull frozen wiper blades off icy glass by force. The extra strain bends the metal arm or damages the rubber blade edge.
Clean the Hinge Pivots: Spray silicone lubricant onto the spring hinge every six months. Smooth hinges keep proper downforce on your windshield.
Clear Heavy Snow Before Driving: Do not use your wipers to clear thick, wet snow from your windshield. The heavy load strips drive splines and bends metal arm joints.
Inspect the Protective Cap: Make sure the plastic nut cover stays snapped shut. Keeping water out prevents rust from locking the base nut to the post.
Wiper Arm vs Wiper Blade: Key Differences
Drivers often confuse wiper arms with wiper blades. Understanding the difference helps you order the correct replacement part.
The Wiper Blade: The removable rubber strip attached to a plastic or thin metal frame. It touches the glass directly to wipe away water. Most drivers replace blades every six to twelve months.
The Wiper Arm: The thick metal support structure attached to the vehicle body. It holds the blade and applies pressure to the glass. Arms last for many years unless damaged by ice, car washes, or rust.
When Should You Replace the Entire Wiper System?
Replacing a single arm fixes local bending or tension issues. However, systemic wiper failures require deeper repairs. You should inspect the complete wiper motor and linkage system under these conditions:
Both Arms Move Out of Sync: Internal linkage bushings are worn out or broken.
Wiper Motor Makes Grinding Noises: Internal gears inside the motor housing are stripped.
Wipers Stop Moving Mid-Sweep: The electric motor has failed or blown a fuse.
If the wiper linkage posts wobble freely inside the cowl panel, replacing just the arm will not solve the issue. You must replace the inner linkage assembly to ensure smooth movement.
Final Thoughts
Learning How To Change A Windshield Wiper Arm gives you full control over basic auto maintenance. Replacing a bent part restores clear road vision and protects your windshield glass from deep scratches. Follow the simple alignment steps, use a towel for protection, and tighten the base nut securely.
If your windshield glass was damaged by a broken metal arm, professional glass repair is essential. Contact Texas Reliable Auto Glass for complete Windshield Replacement in Austin to restore clear visibility and drive safely in all weather conditions.
FAQs
How do I know what size wiper arm my car needs?
Check your vehicle owner manual or look up your specific make, model, and year at an auto parts store. Wiper arms are designed for specific vehicle fitment.
Can a automatic car wash damage my wiper arms?
Yes, high-pressure brushes and drying blowers can catch on the arm. This force can bend the metal or pull the base off its splines.
Why does my new wiper arm leave a streak in the middle?
A streak in the center usually means the arm nut is loose or the blade is dirty. Tighten the nut and clean your glass surface thoroughly.