
Reliable Auto Glass

Auto Glass Care & Maintenance

How Long to Leave Tape on After Windshield Replacement?

How Long To Leave Tape On After Windshield Replacement

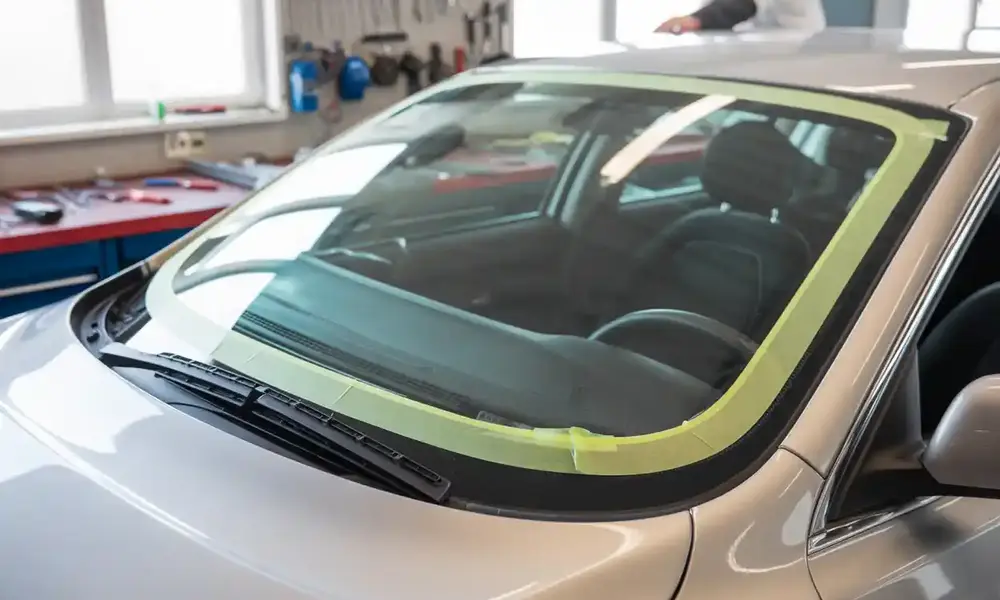
How long to leave tape on after windshield replacement is usually 24 to 48 hours, depending on the adhesive type and weather conditions. Often referred to as windscreen repair tape or windscreen tape, this tape aids in keeping the glass in place while the seal cures. Leaving the tape on ensures that dust, moisture, or air doesn’t interfere with the bonding process. It also prevents the windshield from shifting due to driving or sudden movement. Removing it too early can cause leaks, poor sealing, or even a loose fit. Curing time is crucial for safety and long-term durability. That’s why experts recommend keeping the tape on until the adhesive is fully set. Why Use Tape in Windshield Replacement? Tape plays a critical role in windshield replacement—even if it looks like a small step, it makes a big difference in how well your new windshield performs over time. 1. Role of Tape in Stabilizing the New Windshield After a new windshield is installed, windshield repair tape is used to hold it in place while the adhesive cures. This helps prevent any shifting due to vibrations, driving, or wind pressure. The tape ensures the glass stays aligned with the vehicle’s frame, keeping everything tight and secure. 2. Protection Against Moisture, Dust, and Shifting One major reason professionals apply tape on windshield after replacement is to protect the fresh seal from outside contaminants. The adhesive used for windshield bonding is sensitive during the curing process. Dust, water, and even small debris can weaken the seal. The tape acts as a barrier to keep all that out. 3. Ensures Adhesive Seal Cures Correctly Adhesive curing is what actually “locks in” your windshield for long-term safety. The tape on windshield time after replacement usually ranges from 24 to 48 hours, depending on the type of adhesive used. Leaving the tape in place for the recommended time helps ensure the urethane sets properly—making the bond strong enough to handle weather, speed, and accidents. You can also read about What If It Rains After Windshield Replacement. How Long to Leave Tape on After Windshield Replacement After replacing the tape, you should leave it on your windscreen for 24 to 48 hours. This timeframe allows the adhesive used during installation to properly cure and set, securing your new windshield in place for long-term durability and safety. Standard Time Recommendation: 24 to 48 Hours Professional auto glass installers agree that 24 hours is the bare minimum, while 48 hours offers the safest curing window. This tape isn’t just there to look like the job’s still in progress—it serves a real purpose in protecting the seal as it dries. So, if you’re wondering about the tape on windshield time after replacement, just know that the longer it stays on within that safe window, the better your results. Tips From Auto Glass Professionals Here are a few simple but important reminders: Park indoors if possible, to reduce exposure to rain, sun, or wind. Avoid driving on bumpy roads or slamming your car doors, as sudden shocks can misalign the glass. Don’t touch or adjust the tape for windshield after installation, even if it starts to peel slightly. Some technicians might use masking tape, while others use high-resistance glass tape—both are designed to hold the glass steady while the adhesive cures. What Happens If the Tape Is Removed Too Early? Taking the tape off before the recommended time can cause a variety of problems: Misalignment: The windshield may shift out of place, even slightly, which can lead to wind noise, leaks, or unsafe fitting. Seal failure: Exposure to moisture, dirt, and even pollen before the adhesive fully cures can compromise the seal. Weakened bond: An improperly cured adhesive might not hold up in the event of an accident or rollover. Bottom line: even if the tape looks unnecessary, it’s your windshield’s first line of defense in the curing stage. It supports the glass, seals out debris, and ensures long-term safety. Final Advice from the Pros When you get your windshield replaced, ask your technician how long to leave the tape on—and follow their instructions closely. Most shops, like Texas Reliable Auto Glass, use top-grade adhesives and professional tape for windshield replacements, but even the best materials need time to work. Leaving the tape on for just a bit longer can help avoid rework, leaks, and future repairs. What Can Affect Curing Time? Curing time after a windshield replacement isn’t always the same. Several factors can influence how quickly the adhesive sets and how long you need to leave the windshield replacement tape in place. Understanding these factors can help you avoid issues like leaks, misalignment, or seal failure. Weather Conditions: Temperature, Humidity, and Rain Temperature and humidity play a major role in how fast the adhesive cures. Hot, dry weather usually helps the adhesive set faster. Cold or humid conditions can slow down the curing process, sometimes requiring extra hours or even an extra day. If it rains shortly after installation, moisture can interfere with the bonding process unless the windshield replacement tape is properly applied. In such cases, professionals often recommend extending the tape on windshield time after replacement to ensure a strong seal forms completely. Type of Adhesive Used (Urethane vs. Others) Most auto glass shops use urethane adhesive, which is known for its strength and quick bonding time. However: Fast-cure urethane may dry within 1 hour, but it still benefits from the added security of tape. Standard urethane often requires a full 24–48 hours to completely cure. Different adhesives have different cure windows, and using the right tape on windshield helps protect that bond while it’s stabilizing. Driving Immediately After Installation Driving too soon can disrupt the curing process. Even if your installer says it’s safe after one hour (common with fast-cure adhesives), the windshield replacement tape should remain on the vehicle: It prevents minor shifts caused by vibrations and wind pressure. It supports the adhesive as it sets deeper, even while you’re on the move. If you

How Long To Leave Tape On After Windshield Replacement Read More »

Will Windshield Wiper Fluid Hurt a Radiator? Find Out

Will Windshield Wiper Fluid Hurt a Radiator? Find Out

Every driver has had that moment when they’re multitasking, distracted, or otherwise not quite focused on the road ahead. Before you know it, you’ve put windshield washer fluid in the gas tank. So an important question is: Will windshield wiper fluid hurt a radiator? Yes, the short answer is yes, it can, and the damage can get out of hand if you let it. Windshield washer fluid is made from methanol, detergents, dyes, and other ingredients that are fantastic for cleaning glass but can cause problems if they get into a vehicle’s cooling system. When contaminants pass through the radiator, they can corrode metals, degrade seals, and impede the flow of coolant . Whether you were researching what happens in this hearing or accidentally said, I put windshield wiper fluid in the coolant this guide will tell you everything you need to know — including how long the damage takes, how to repair it, and how to keep it from causing bigger engine problems. Why Windshield Washer Fluid Doesn’t Belong in a Radiator Windshield washer fluid is meant to clean the glass. Coolant is formulated to control extreme engine heat. These two products are NOT interchangeable in any way. Washer Fluid Chemistry Destroys Radiator Parts Washer fluid has such ingredients as: Methanol – Very corrosive to rubber and metal when heated Detergents – produce foam & scarify that sticky film Water + dye – doesn’t protect against heat These chemicals disrupt the ability of the coolant to regulate temperature when introduced into the cooling system. Heat Alters the Chemistry In a hot engine, methanol starts to vaporise immediately. This leads to: Rapid pressure changes Bubbles in the cooling system Boiling early, because methanol boils at a temperature much lower than that of the coolant These reactions ultimately clog radiator passages and diminish cooling efficiency. Risk of Corrosion and Seal Failure As the washer fluid erodes these parts, it can cause leaks, and overheating is more probable. The short answer is yes — windshield washer fluid can damage a radiator, and the longer it’s left inside the system, the worse the damage gets. You should also read about:  Can You Put Water In Windshield Wiper Fluid? What Happens If You Put Windshield Washer Fluid in a Radiator? There are a lot of people who panic and ask, What if I put windshield washer fluid in the radiator by mistake? The result depends on how much fluid was put in and if the engine was running afterward. If Only a Small Amount Was Added A small amount of washer fluid (less than a cup) will likely not cause an immediate emergency. It can still cause: Slight foaming Minor Corrosion Over Time Decreased heat transfer Nevertheless, the radiator should be flushed to avoid long-term damage. If a Single Moderate Amount Was Added One to four cups of washer fluid can cause: Increasing engine temperatures Foamy coolant in the overflow tank Cloudy or off-color coolant Increased system pressure This degree of contamination nearly always calls for a professional coolant flush. If a Large Amount Was Added Adding a quart or more can result in: Overheating Clogging of the radiator Damage to the water pump Coolant is leaking from weakened seals At this point-sized vessel was an unsafe vehicle, maybe undriveable need to drain-and-fill cooling system. This is also when the Drivers begin to ask, How long will windshield washer fluid hurt your radiator? The truth: chemical damage “starts the moment the engine gets hot.” You can also read about:  Windshield Wiper Fluid. Signs You Might Have Washer Fluid in the Coolant Even if you’re not definitive, a few signs indicate contamination is present: Sweet but chemical-like smell around the hood Foam or bubbles in the coolant tank Rising temperature gauge Coolant that is milky or viscous Weak or inconsistent heat from cabin vents Occasional steam in the vicinity of the radiator These are to be regarded as warnings to investigate the system prior to having serious engine damage. What to Do Immediately After Adding Washer Fluid to the Radiator Whether or not the engine was running entirely determines your answer. If the Engine Was NOT Running That’s the best-case scenario. From the reservoir, pump, turkey baster, or siphon out all the contaminated fluid. Refill with the proper coolant mix. Keep an eye on engine temps for the next few days. That can stymie most long-term effects. If the Engine Was Running or Being Driven Pollutant is now flowing through the block, radiator, and heater core. You need to: Get a full coolant flush Refill with coolant recommended by the manufacturer Purge the system of any air pockets A flush removes methanol, detergents, foaming agents, and potentially corrosive residues. What To Do If You Poured Washer Fluid Into Coolant Reservoir? So you just realized you dumped washer fluid where it doesn’t belong. First thing—don’t panic. What you need to do next really comes down to one thing: did you start the car or not? If You Haven’t Started the Engine This is actually the best scenario you could hope for. That windshield wiper fluid in radiator reservoir hasn’t gotten pumped through your engine yet. It’s just sitting there in the overflow tank, minding its own business. Grab something like a turkey baster from the kitchen or one of those small hand pumps and just suck it all out. Get as much as you possibly can. Once you’ve emptied that tank, fill it back up with actual coolant—the stuff that’s supposed to be in there. If You Already Drove the Car Okay, this is trickier. Once you’ve run that engine, the fluid’s circulated everywhere—radiator, engine block, heater core, the whole nine yards. You can’t just suck it out anymore. You need to take it to a shop and get a full coolant flush done. The mechanic’s gonna hook up a machine that forces all that contaminated crap out of your system. Then they’ll run clean water through everything to rinse it, and finally refill it with fresh coolant mixed properly. That’s literally the only way to guarantee you got all the soap and alcohol out of there. Don’t skip this step or you’re asking for problems down the road. Can Mixing Washer Fluid and Coolant Cause Permanent Damage? Effects of mixing windshield washer fluid and antifreeze: Premature

Will Windshield Wiper Fluid Hurt a Radiator? Find Out Read More »

How to Get Ice Off Windshield Without Scraper | Easy Tips

How To Get Ice Off Windshield Without Scraper

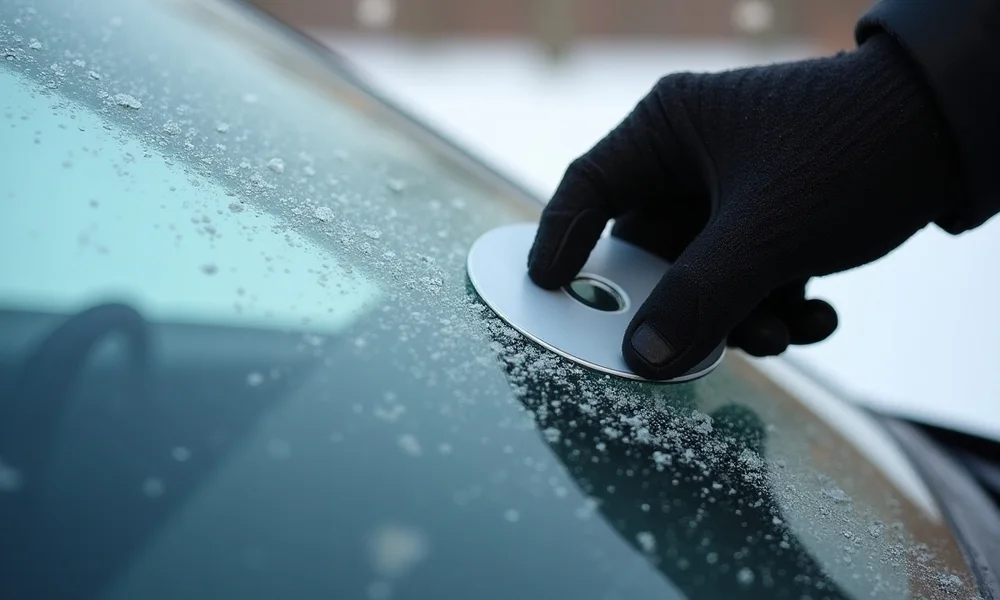
How to get ice off windshield without scraper is a common concern for drivers facing icy mornings without the right tools. When a windshield snow remover isn’t available, and scraping ice off car windows feels like a hassle or even risks scratching the glass it’s helpful to know alternative solutions. Fortunately, there are quick and effective ways to clear frost using everyday household items. From DIY de-icing sprays to preventive techniques that stop ice from forming in the first place, these tips will help you get on the road faster while keeping your windshield safe from damage. Why You May Want to Avoid a Scraper When Scraping Ice Off Car Scraping ice off your car might seem like a quick fix, but relying solely on a scraper isn’t always the best way to get ice off car surfaces. Here’s why: 1. Risk of Scratching the Glass Using a hard plastic or metal scraper can easily scratch your windshield or windows, especially if there’s hidden dirt or debris under the ice. Over time, these scratches can weaken your auto glass, eventually requiring costly repairs or even a full replacement. 2. Not Always Accessible Many drivers forget to keep a scraper in the car, or it gets misplaced during the warmer months. In sudden weather shifts, you might find yourself stuck without one—making scraping ice off car both frustrating and ineffective. 3. Cold Exposure and Inconvenience Standing outside in freezing temperatures, hunched over your windshield while scraping ice off car surfaces, can be extremely uncomfortable and even risky in severe cold. It’s not just inconvenient—it can also be unsafe for those with health conditions. What’s the Best Way to Get Ice Off Car Without Scratching? Instead of scraping, try these safer alternatives: Start your engine and use the defroster: Warm air softens ice so it slides off easily. Use a de-icing spray: A mix of rubbing alcohol and water (2:1 ratio) works well. Cover your windshield overnight: Prevents ice buildup in the first place. You can read about How to Get Sap Off Windshield. 10 Different Ways of How to Get Ice Off Windshield Without Scraper Wondering how to get ice off windshield without scraper on freezing mornings? You’re not alone. Many drivers find themselves without a windshield snow remover or simply prefer to avoid scraping ice off car surfaces altogether. Luckily, there are safe and effective alternatives that won’t scratch your glass or waste time. Below are 10 clever techniques to clear frost and ice even if you’re caught without traditional tools. 1. Homemade De-Icer Spray (Alcohol + Water) In a spray bottle, combine one part water and two parts rubbing alcohol. Spray it directly onto the icy windshield, and watch the ice melt in seconds. It’s one of the best ways to get ice off car windows fast, without needing to scrape. 2. Vinegar & Water Prevention Spray Combine three parts vinegar with one part water and spray it on your windshield the night before. This preventive step reduces ice buildup, making it easier to get ice off windshield without scraper in the morning. 3. Lukewarm Water Trick – Be Careful Lightly mist your windscreen with lukewarm (not hot!) water. While this aids in melting the ice, boiling water should never be used as it might shatter glass. A quick and easy option when you’re short on time or tools. 4. Use Your Car’s Defrost Setting Turn on the defroster to high and start your car. Give it five to ten minutes to run. The interior heat softens the ice from within, making it much easier to remove without using a windshield snow remover. 5. Cover Your Windshield Overnight Place a towel, blanket, or specialized windshield cover over the glass before bedtime. You won’t have to deal with scraping ice off car windows in the morning because this prevents frost and ice from accumulating. 6. Credit Card or Plastic Spatula (Emergency Option)  If you’re stuck without a scraper, use a plastic card or spatula to gently chip away at the ice. Avoid metal tools that could scratch the glass. This DIY solution works in a pinch when you really need to get ice off windshield without scraper tools. 7. Straight Rubbing Alcohol Spray For stubborn ice patches, spray undiluted rubbing alcohol directly on the windshield. It evaporates quickly and breaks down ice efficiently one of the best ways to get ice off car windows without risking scratches. 8. Battery-Powered Hair Dryer or Car Heater A portable heater or battery-operated hair dryer can help melt the ice using warm air. This gentle method avoids harsh contact and saves your windshield from unnecessary wear and tear. 9. Microwave Rice Sock Method Fill a sock with uncooked rice and microwave it for about 30 seconds. Press it lightly on the inside of your windshield to warm the glass, which loosens the ice from the outer surface. It’s a surprisingly effective method no scraping ice off car required. 10. Let the Sun Help – Park Facing East Whenever possible, park your car facing the sunrise. The early sun naturally warms the windshield and helps melt overnight ice. It’s a simple trick that reduces the need for manual de-icing. How to Prevent Ice on Windshield Overnight Waking up to a frozen windshield can slow down your morning. Instead of scraping ice off car surfaces in the cold, try these simple tips to prevent ice on your windshield overnight—saving time and protecting your glass. 1. Use a Windshield Cover or Tarp Your windscreen is shielded from the weather with a specialised windscreen snow remover cover or simply a plain tarp. In the morning, just remove the cover—no ice, no hassle. 2. Park in a Garage or Under Cover Parking your car in a garage or under a carport keeps it protected from frost and snow. This is one of the most effective ways to avoid scraping ice off car glass altogether. 3. Apply Anti-Frost Sprays or Rain Repellents Use a store-bought anti-frost spray or a

How To Get Ice Off Windshield Without Scraper Read More »

Can You Tint Your Windshield? Texas Laws Explained

Can You Tint Your Windshield

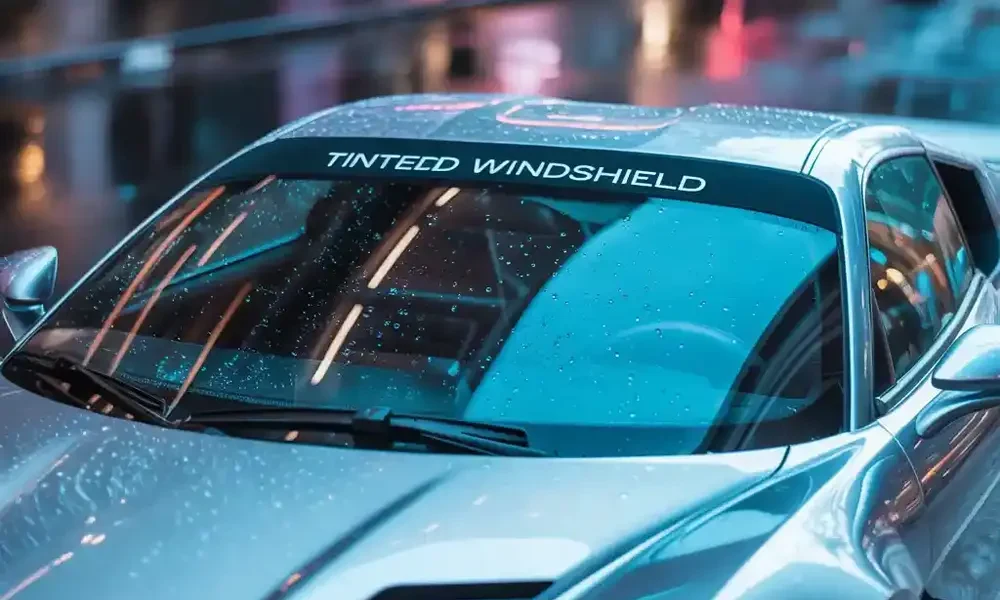
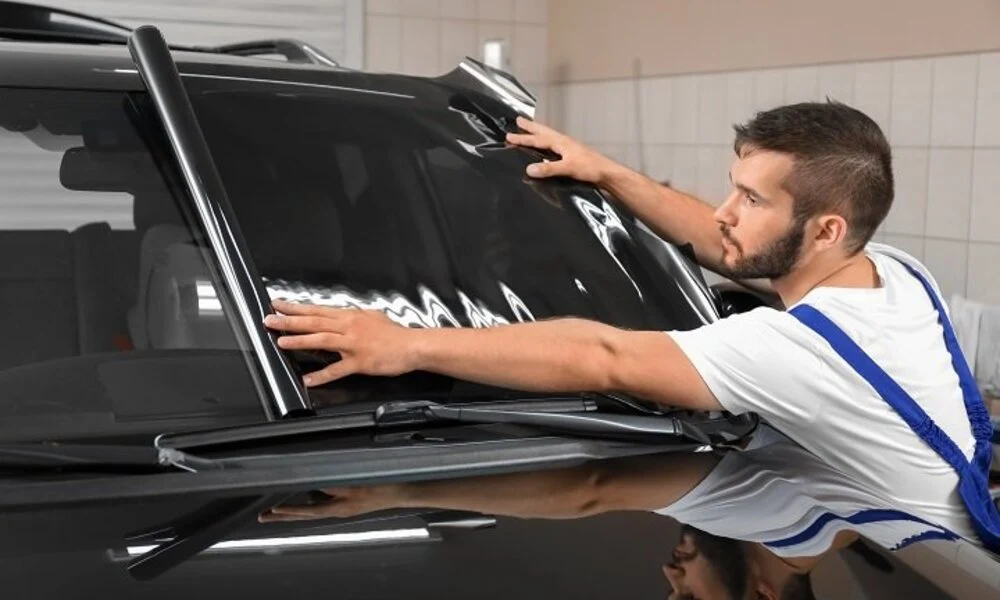
Can you tint your windshield? Yes, but with very specific limits depending on where you live. In addition to keeping your car cooler, a tinted windscreen can assist cut down on glare and filter dangerous UV rays. However, windshield tinting also raises important questions about road safety, visibility at night, and—most importantly—legal compliance. In many states, including Texas, there are strict rules about how much of your windshield can be tinted and how dark that tint can be. Drivers must follow these laws to avoid fines, inspection issues, or even orders to remove the tint. Texas, in particular, has clear regulations about where and how windshield tinting is allowed, especially when it comes to the front windshield and visibility lines like the AS-1 mark. Can You Tint Your Windshield? It is legal to tint your windscreen, but only in certain circumstances. Most U.S. states permit front windshield tint as long as it meets visibility standards and doesn’t interfere with driver safety. The key is knowing how much tint is legal where you live. Federal vs. State Laws on Windshield Tinting   Federal Guidelines: The Federal Motor Vehicle Safety Standards (FMVSS) require all auto glass to allow at least 70% of visible light transmission (VLT). This guarantees that drivers can see clearly, particularly in bad weather or at night. State-Specific Laws: States interpret these federal guidelines differently. For example: California only permits a 4-inch non-reflective tint strip on the front windscreen. Texas also permits a 5-inch strip or above the AS-1 line (whichever is more restrictive). Florida requires at least 70% VLT on the windshield. Check your state’s Department of Transportation or DMV website to know what’s allowed in your area. Common Types of Windshield Tints Knowing your alternatives is helpful if you’re thinking about tinting your windscreen: 1. Ceramic Tint High heat rejection UV and glare protection No signal interference More expensive but offers superior clarity 2. Dyed Film Least expensive option Absorbs heat and reduces glare Wears out faster and may fade over time 3. Clear UV Films (Invisible Tint) No dark shade—keeps the windshield clear Blocks up to 99% of UV rays Ideal if you want protection without darkening Because they adhere to visibility regulations, these are frequently used for legal front windscreen tinting. Benefits of Tinting a Windshield Blocks harmful UV rays Reduces glare from sunlight and headlights Keeps your car cooler Protects your dashboard and interior from fading Enhances comfort and safety You can also read about Different Types Of Auto Window Tint. Can You Tint Your Front Windshield in Texas? Yes, you can tint your front windscreen in Texas, but you have to abide by certain rules. Texas Law on Front Windshield Tint Only the upper part of the windscreen may have front windscreen tint, according Texas Transportation Code 547.613. Usually encompassing the upper five inches of the glass, this region is referred to as the AS-1 line. Any tint below this line is not allowed unless it meets very specific conditions. What Type of Tint is Allowed? Non-reflective tint is required above the AS-1 line. The colour of the tint cannot be blue, amber, or red. No tint is permitted below the AS-1 line on the front windshield, unless you have a medical exemption. Medical Exemption for Windshield Tinting Texas does permit some people to request for a medical exemption if they have specified medical conditions. If approved, you may install darker front windshield tint to help reduce sun exposure. You must carry this exemption with you while driving. Penalties for Illegal Windshield Tint In Texas, driving with an illegal front windscreen tint can result in: A ticket or fine A requirement to remove or replace the tint Issues during vehicle inspections Why People Consider Windshield Tinting Many drivers want to tint their windshields to: Block UV rays Reduce heat inside the vehicle Reduce the amount of sun or headlight glare. Just make sure the tint you’re installing is within the legal limits. How Dark Can You Tint Your Windshield in Texas? In Texas, the law allows some windshield tinting, but there are clear rules on how dark it can be. This is measured using Visible Light Transmission (VLT). What is VLT (Visible Light Transmission)? The percentage of visible light that enters through the window is known as VLT. A deeper tint results from a lower VLT, whereas a greater VLT indicates more light passing through (lighter tint). Legal Tint Limits for Windshield Texas law only allows a tinted windshield on the top 5 inches or above the AS-1 line (whichever comes first). Type: Non-reflective tint only VLT Requirement: No specific percentage for the top strip, but the rest of the windshield must remain clear unless you have a medical exemption Front Windshield vs Front Side Windows – What’s the Difference? While the front windshield can only be lightly tinted at the top, front side windows have different rules: Window Type Allowed VLT (%) Notes Front Windshield Only above AS-1 Must be non-reflective Front Side Windows 25% VLT Must allow at least 25% of light through This implies that, provided it satisfies the VLT limit, side window tinting can be noticeably darker than windscreen tinting. What Is Considered Too Dark? For Texas, any tinted windshield that: Extends below the AS-1 line, or Uses reflective, colored, or dark film beyond what’s legal …is considered too dark and illegal under state law. Also, if your front side window tint goes below 25% VLT, it’s also too dark and could lead to: A failed vehicle inspection Fines or citations Required removal of the illegal tint Medical Exceptions A medical exception that permits darker windscreen tinting may be available to drivers with certain medical problems. This exemption needs to be carried in the car and authorised by the Texas Department of Public Safety. You can also read about Should I Remove Car Window Tint By Myself. What Are Texas Window Tint Laws? Texas has specific laws for window tinting based on which part of the vehicle you’re

Can You Tint Your Windshield Read More »

What Is Panoramic Moonroof? Everything You Need to Know

What Is Panoramic Moonroof

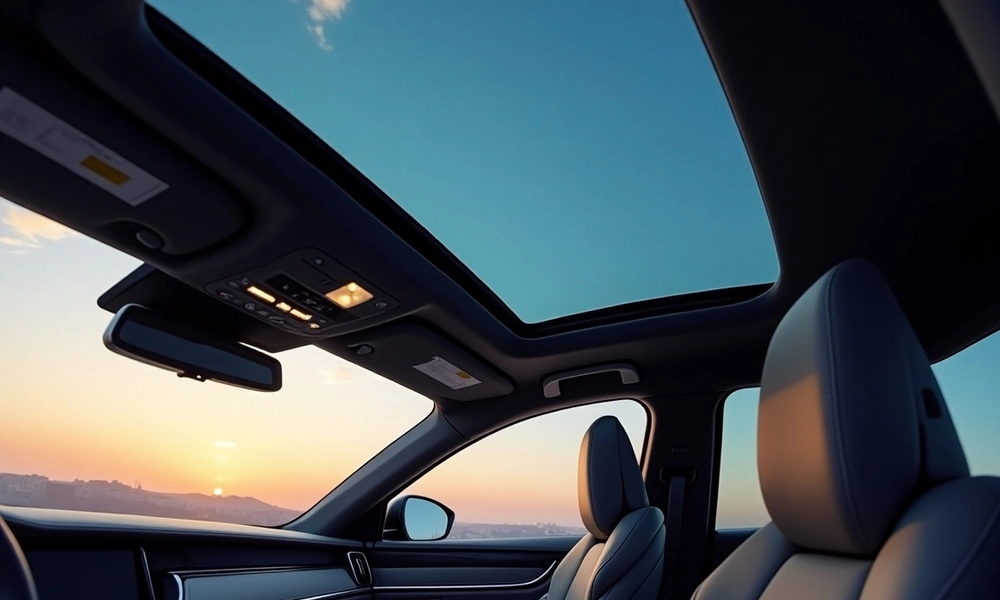
What is panoramic moonroof and how does it differ from a standard moonroof or sunroof? A panoramic moonroof is a large glass panel or a set of panels that spans a significant portion of a car’s roof—often stretching from the front to the back seats. Unlike traditional moonroofs, which are usually smaller and only open above the front seats, a cars panoramic moonroof offers a more expansive, airy feel for all passengers. The panoramic roof in cars has become increasingly popular in modern vehicles, especially in SUVs and luxury models, because it enhances natural light, improves cabin aesthetics, and creates a premium driving experience What is Panoramic Moonroof? A panoramic moonroof is a large, multi-panel glass roof that covers most or all of a car’s roof, offering an extended view of the sky for both front and rear passengers. It is typically found in cars with panoramic sunroof options, especially SUVs and luxury vehicles. Design and Functionality A panoramic moonroof usually consists of two or more glass panels: Front panel: Often movable, it can tilt or slide open. Rear panel(s): Usually fixed in place, allowing light in but not opening. This setup creates a spacious and airy cabin feel, letting in natural light and giving passengers a better outside view, even when the roof is closed. Where You’ll Find It You’ll commonly see cars panoramic moonroof features in: SUVs like the Hyundai Tucson, Ford Edge, or Toyota RAV4 Luxury sedans like Mercedes-Benz E-Class or BMW 5 Series Electric vehicles such as the Tesla Model Y and Ford Mustang Mach-E Visual Description Imagine a car with a panoramic sunroof parked on a sunny day — you look up and instead of a solid roof, you see glass stretching from above the dashboard to the rear seats. When the front panel opens, it feels like the outdoors is part of the ride. Moonroof vs Sunroof vs Panoramic Sunroof When shopping for a new vehicle, terms like moonroof, sunroof, and panoramic sunroof often come up. Though they may sound similar, they have distinct features. Below is a clear breakdown using simple terms and real-world examples to help you understand which roof type suits your needs best. Definitions Sunroof Material: Solid metal or opaque panel Function: Manually or electronically tiltable, sometimes removable Visibility: Closed when not in use — blocks all light Example: Found in older sedans like Honda Accord (pre-2000s) Moonroof Material: Tinted glass panel Function: Tilts or slides open Visibility: Allows light in even when closed Example: Common in modern cars like Toyota Camry or Honda Civic Panoramic Sunroof Material: Multiple large glass panels Function: Covers both front and rear seats; front glass often opens, rear stays fixed Visibility: Expansive view of the sky, open or closed Example: Seen in many SUVs and premium vehicles like the Hyundai Palisade, Tesla Model Y, and BMW X5 Comparison Chart Feature Sunroof Moonroof Panoramic Sunroof Material Metal or opaque panel Glass panel Multiple glass panels Opens Tilts or removes Tilts or slides Front slides; rear fixed Light when closed No Yes Yes View coverage Front seat only Front seat only Front and rear seats Common in Older cars Most modern sedans SUVs, luxury cars Example Vehicle 2001 Toyota Corolla 2023 Honda Accord Any car with panoramic sunroof Practical Examples If you’re looking for a basic feature to let in some fresh air occasionally, a sunroof works well. Want a touch of luxury without the full glass roof? A moonroof is more common and lets in natural light. For a spacious, open-sky feeling ideal for passengers in both rows, choose a panoramic sunroof – especially popular with families and road-trippers. You’ll notice many cars with a panoramic sunroof now come with retractable shades to manage sunlight and heat. The panoramic roof in cars is not just about looks — it enhances the driving experience by making the cabin feel bigger and brighter. You can also read about What Is The Difference Between A Sunroof And A Moonroof. Advantages and Disadvantages Of Panoramic Sunroof Advantages of a Panoramic Moonroof A panoramic moonroof brings several advantages that elevate the overall driving experience. Here are the key benefits: 1. Enhanced Natural Lighting A panoramic moonroof brings an abundance of natural light into the vehicle, making the cabin feel brighter and more welcoming. The expansive glass panels provide a clear view of the sky, reducing the feeling of being in a dark, enclosed space. 2. Airflow and Ventilation One of the practical advantages of a panoramic moonroof is the ability to open the front panel for fresh air. This allows natural ventilation, which can be particularly refreshing on a nice day, offering better airflow compared to traditional windows. 3. Open, Spacious Cabin Feel The large glass panels of a panoramic moonroof create an illusion of a more spacious cabin. Even with the roof closed, the expansive view above makes the interior feel more open and airy, contributing to a pleasant and less claustrophobic environment. 4. Premium Look and Appeal A panoramic moonroof adds a sleek, modern look to your car, giving it a luxurious and high-end appearance. It enhances the vehicle’s design, making it stand out from the crowd, and is often a desirable feature in many SUVs and luxury cars. 5. Better Passenger Experience Passengers, especially those in the back seat, benefit from the expansive views provided by the panoramic moonroof. It enhances their experience, making long drives or road trips more enjoyable by offering a scenic, open-sky feel. Disadvantages of a Panoramic Moonroof While a panoramic moonroof offers plenty of benefits, there are some disadvantages to consider. Here’s a look at the potential drawbacks: 1. Higher Vehicle Cost One significant disadvantage of a panoramic moonroof is the higher upfront cost. Cars equipped with this feature tend to be more expensive due to the added design and technology, making them less budget-friendly than models without this feature. 2. Potential for Leaks or Wind Noise If not properly maintained, panoramic moonroofs can develop leaks, allowing water to seep into

What Is Panoramic Moonroof Read More »

How Do You Stop Car Windows from Fogging Up in Easy Steps?

How Do You Stop Car Windows From Fogging Up

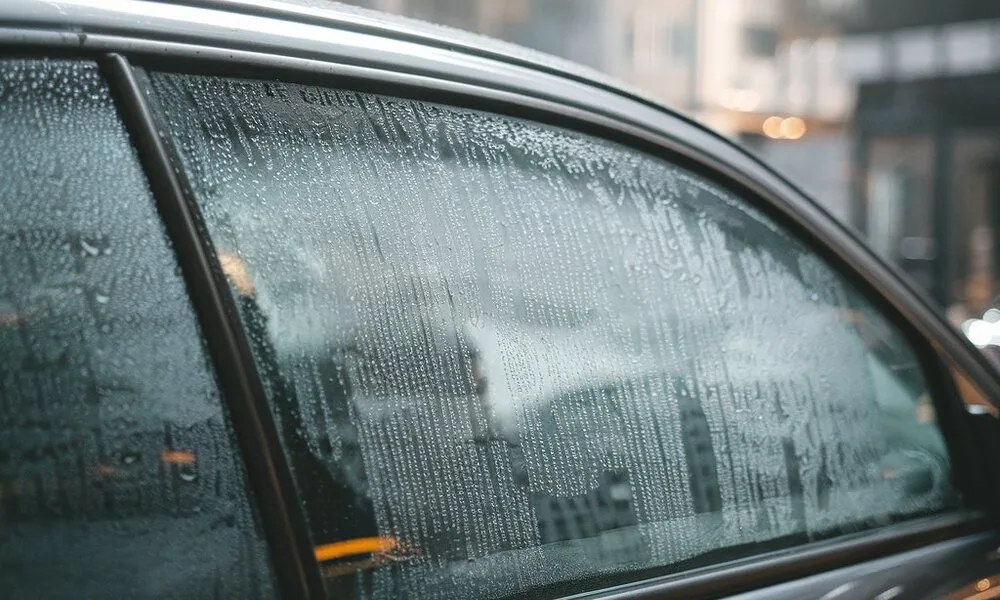
Few driving situations are more frustrating than getting into your vehicle on a cold morning or during a rainstorm and finding foggy windows. A windshield covered in condensation can reduce visibility quickly and make driving unsafe. Many drivers search for How Do You Stop Car Windows From Fogging Up because it often happens during winter, humid weather, or rainy seasons. Wiping the glass may help for a moment, but it does not fix the root cause.  Fogging usually comes from moisture and temperature differences inside the car. Understanding why your windshield is foggy and controlling interior humidity can keep your view clear. At Texas Reliable Auto Glass, we help identify whether it is simple moisture buildup or an auto glass issue like leaks or damaged seals.  How Do You Stop Car Windows From Fogging Up? (Quick Answer) If you need a quick solution, the best way to stop car windows from fogging up is to reduce humidity inside the cabin while increasing airflow across the glass. Turn On the Defroster Your front and rear defrosters are designed specifically to clear condensation from glass surfaces. They direct warm air onto the windshield and help evaporate moisture quickly. Use the Air Conditioner Many people associate air conditioning with hot weather, but it is also one of the most effective tools for removing humidity. Running the A/C with the defroster helps eliminate moisture from the cabin air. Increase Air Circulation Good airflow prevents moisture from settling on your windows. Adjust vents toward the windshield and side windows for faster results. Open the Windows Slightly When weather conditions permit, opening the windows a small amount can help balance temperature and humidity levels inside and outside the vehicle. Clean the Inside of the Windshield A dirty windshield attracts moisture more easily. Dust, oils, fingerprints, and residue create surfaces where condensation can form quickly, making an inside windshield foggy situation even worse. Why Do Car Windows Fog Up in the First Place? Understanding the cause of fogging is the first step toward preventing it. What Causes Condensation on Car Glass? Window fog is caused by condensation. When warm, moist air comes into contact with a cooler glass surface, water vapor turns into tiny droplets of water. This is the most common reason drivers experience condensation windshield inside issues during colder months. Warm Air vs. Cold Glass Explained Imagine taking a cold drink outside on a hot day. Water droplets form on the outside of the glass because warm air touches a cold surface. The same thing happens inside your vehicle. Warm cabin air meets a cold windshield, causing moisture to collect on the glass. This is why an inside windshield foggy condition is especially common during winter mornings. Common Causes of Window Fogging Excess Moisture Inside the Vehicle Passengers constantly release moisture into the air through breathing. Wet Floor Mats and Clothing Rain-soaked shoes, jackets, umbrellas, and floor mats increase humidity levels inside the vehicle. Dirty Windows A dirty windshield provides more surfaces for condensation to cling to. Poor Ventilation Restricted airflow allows moisture to accumulate inside the cabin. Faulty Cabin Air Filter A clogged cabin air filter limits airflow and reduces the HVAC system’s ability to remove moisture effectively. 8 Effective Ways to Prevent Car Windows From Fogging Up Preventing fog is easier than constantly removing it. Keep Your Windshield and Windows Clean A clean windshield is less likely to collect moisture. Regular cleaning removes oils and residue that contribute to fog buildup. Use Anti-Fog Sprays or Wipes An anti fog windshield treatment creates a protective barrier that helps reduce condensation. Many drivers find these products useful during rainy seasons and winter weather. Remove Excess Moisture From the Cabin Inspect your vehicle regularly for wet floor mats, damp carpets, or standing water. Reducing interior moisture is one of the best ways to learn how to stop car from fogging up effectively. Replace a Dirty Cabin Air Filter A clean cabin air filter improves airflow and helps your climate control system remove moisture efficiently. Avoid Leaving Wet Items Inside Wet clothing, gym bags, sports equipment, and umbrellas continuously release moisture into the cabin. Use Moisture Absorbers Silica gel packs and moisture-absorbing products can help lower humidity levels inside parked vehicles. Run the Air Conditioner Regularly Even in winter, running the A/C occasionally removes moisture from cabin air. Maintain Proper Ventilation Good ventilation remains one of the most effective ways to prevent foggy car windows throughout the year. At Texas Reliable Auto Glass, we often recommend combining proper ventilation with routine windshield inspections to ensure drivers maintain maximum visibility. How to Defog Car Windows Fast While Driving When your visibility suddenly decreases, acting quickly is important. Best Climate Control Settings Turn on the defroster, set the temperature to warm, and activate the air conditioner. This combination removes moisture while warming the glass. When to Use Fresh Air Mode Fresh air mode introduces drier outside air into the cabin. This can significantly reduce condensation windshield inside problems. Why Recirculation Mode Can Make Fog Worse Recirculation mode traps humid air inside the vehicle. Although it improves heating and cooling efficiency, it can make foggy car windows worse during damp conditions. Mistakes Drivers Should Avoid Wiping the windshield with your hand Ignoring wet floor mats Running recirculation mode continuously Neglecting cabin air filter maintenance Using heat without proper airflow How to Stop Car Windows From Fogging Up in Rain Rainy weather often creates ideal conditions for window fogging. Adjust Climate Control Properly Use the defroster and air conditioner together whenever possible. Turn Off Recirculation Mode Fresh outside air helps reduce humidity levels. Keep the Cabin Dry Remove standing water and dry wet floor mats regularly. Improve Airflow and Ventilation Maintaining consistent airflow reduces moisture accumulation. Use Anti-Fog Treatments Applying an anti fog windshield product before rainy weather can help keep your windows clearer for longer periods. How to Stop Windshield Fogging During Winter Winter conditions create some of the most challenging visibility issues for drivers. Preheat the Vehicle Properly

How Do You Stop Car Windows From Fogging Up Read More »

How to Fix Electric Car Window | Step-by-Step Guide

How To Fix Electric Car Window

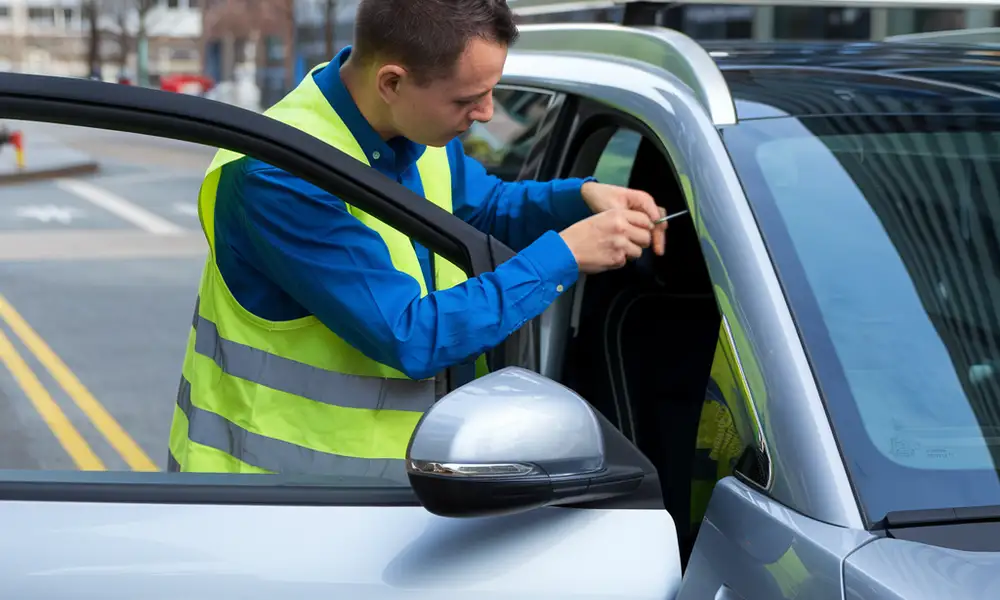
How to fix electric car window issues has become a growing concern for many EV owners as electric vehicles continue to rise in popularity. These vehicles often use advanced electronic systems for window control, unlike traditional cars. Common problems include windows getting stuck, moving slowly, or not responding to switch commands. A basic car electric window repair might involve checking fuses, cleaning tracks, or resetting the system. As EVs become more sophisticated, understanding how to fix electric car window issues is essential for proper maintenance. Regular inspections and prompt repairs can help prevent minor issues from turning into costly replacements. For model-specific answers, always refer to the handbook or a qualified technician. Common Reasons Why an Electric Car Window Stops Working Dealing with a stuck electric car window? Don’t worry—you can often handle it yourself. Here’s how to fix electric car window issues in six simple steps before calling in a professional for a full window electric repair. Step 1: Inspect the Window Switch Start by checking the window switch. Dirt, wear, or electrical issues can cause the switch to fail. Press it up and down a few times to see if the window responds. If it feels loose or doesn’t click, this could be the problem. Step 2: Check the Fuse Box for Blown Fuses Next, open your car’s fuse box and look for any blown fuses related to the power windows. A blown fuse is a common reason why you need to fix electric windows. Test the window once more after replacing the fuse with one of the same rating. Step 3: Listen for Motor Noise (Diagnose Motor/Regulator) While paying close attention, turn the ignition to the “on” position and press the window switch. If you hear a noise but the window doesn’t move, the motor might be working, but the regulator could be broken. If there’s no sound at all, you might need a complete window electric repair to replace the motor. Step 4: Try a Reset (Turn Car On/Off or Power Cycle) Sometimes, the system just needs a reset. Turn your car off, wait a few minutes, and then turn it back on. You can also try power cycling by disconnecting and reconnecting the car battery. This can sometimes fix electric car window problems caused by temporary glitches. Step 5: Manually Lift the Window (If Stuck Midway) If your window is stuck halfway, you might be able to manually lift it by gripping it firmly and pulling upward while pressing the switch. Be gentle—forcing it can cause more damage, leading to a bigger window electric repair job later. Step 6: Clean Tracks and Lubricate Edges Lastly, thoroughly clean the window tracks to get rid of any dirt or debris. Spray a silicone-based lubricant along the edges where the window slides. This can reduce friction and help fix electric windows that are sticking or moving slowly. You can also read about How To Replace Car Window Regulator. How to Fix Electric Car Window That Won’t Go Up When to Call a Professional | Electric Car Window Services in Austin If your electric car window is stuck in the down position, it can be frustrating—especially during bad weather or when parking. Here’s how to fix electric car window issues step by step, and when to consider a professional car electric window repair. Step 1: Perform a Quick Diagnostic Check Without starting the engine, begin by setting the ignition to the “on” position. Try pressing the window switch multiple times and listen closely: If you hear a clicking or buzzing sound, the switch might be working, but the motor or regulator could be jammed or weak. If there’s no sound at all, the problem might be the window switch, a blown fuse, or a dead motor. Swap the switch with one from another working window (if possible) to test it. This can help you isolate whether the issue lies in the switch or the motor. Step 2: Check the Fuse and Wiring Locate your vehicle’s fuse box and look for the fuse that controls the power windows. Any blown fuses should be replaced with fuses of the same amperage. If the fuse keeps blowing, there may be a deeper wiring issue—this is where professional car electric window repair is recommended. Step 3: Try to Bypass the Switch (Advanced Users Only) If you’re comfortable working with car electronics, you can try bypassing the window switch to send power directly to the motor. This can help determine if the motor is still functional. Safety Note: Always disconnect the car battery before working with wiring or connectors to avoid electric shock or short circuits. Step 4: Temporary Fixes to Secure the Window Until you can fully fix electric car window problems, use a temporary solution to keep the window secure and your car protected: Use clear packing tape or plastic sheeting: Seal the window from the inside to keep rain out. Wedge a small rubber block or eraser between the window and door panel** to prevent it from sliding down further. Avoid parking outdoors if possible, or use a car cover to prevent water damage. Step 5: When to Call a Pro If you’ve tried the above steps and the window is still stuck, it’s time to contact a trusted experts like Texas Reliable Auto Glass. A trained technician can replace the motor, regulator, or wiring without causing additional damage to the door panel. Bottom Line: When your window won’t go up, start by checking the switch, fuse, and motor. Use temporary weatherproofing if needed, and don’t delay calling a pro if DIY steps don’t work. Getting the right car electric window repair early prevents bigger issues later. you can read about Fix Broken Car Window Glass If your electric window is stuck, moves slowly, or won’t respond at all, it’s time to stop guessing and call a professional car electric window repair service from Texas Reliable Auto Glass in Austin. While some issues can be fixed with DIY steps, others require

How To Fix Electric Car Window Read More »

Different Types of Auto Window Tint Explained

Different Types Of Auto Window Tint

Different types of auto window tint not only enhance the look of your car but also serve important functions like protecting you from UV rays, reducing heat, and improving privacy. Whether you’re considering a subtle tint or something more advanced, it’s important to know the different window tints available and how they perform under real-world conditions. In this guide, you’ll learn about the different types of auto window tint, what makes each one unique, and how to choose the best option based on your needs, budget, and lifestyle. We’ll also touch on key factors like local laws and tinting regulations specific to Austin, Texas, so you stay safe and compliant on the road. What is Car Window Tinting? Applying a thin, translucent substance known as window film to the inside of your automobile’s windows is known as car window tinting. This film can be clear or dark, depending on the types of window tint you choose. It’s a simple upgrade that brings multiple benefits for both your car’s comfort and safety. Why Do People Tint Car Windows? Here’s what car window tinting does: Heat Rejection: Tinted windows help keep your car cooler by blocking out the sun’s heat. This means less need for AC and more comfortable drives, especially in hot climates like Texas. UV Protection: The window film blocks up to 99% of harmful UV rays. This protects your skin and also prevents your car’s interior from fading or cracking over time. Privacy: By making it more difficult for others to see inside your automobile, tinted windows increase your privacy. Some options, like privacy glass, are darker and commonly used on rear windows. Glare Reduction: When driving, sun glare might be harmful. Tinted windows reduce glare, helping you see the road clearly without squinting. Safety: The tint film keeps the shattered glass together in the event of an accident, keeping potentially harmful fragments from flying into the vehicle. Different Types of Tint You Can Choose From There are different types of tint available, each offering a unique level of performance and appearance. Common options include: Dyed Window Film: Good for basic privacy and reasonably priced. Metalized Film: uses metal particles to block heat, but it may disrupt phone and GPS signals. Carbon Tint: Offers excellent heat reduction without signal issues. Ceramic Tint: Premium option that blocks the most heat and UV rays while staying clear and signal-friendly. Different Types of Auto Window Tint When choosing the right tint for your vehicle, it’s important to understand the different types of tint available. Each type offers unique benefits in terms of cost, performance, and appearance. Below, we break down the different types of auto window tint so you can make the best choice for your needs. 4.1 Dyed Window Tint The least expensive of the several tint options is dyed window tint. It is created by sandwiching a layer of dye between a protective top coating and an adhesive layer. Reduces glare and improves driving visibility Adds privacy by darkening the windows Budget-friendly choice Over time, it may fade or discolor with sun exposure Best for: Drivers looking for a low-cost solution with decent privacy and glare reduction. 4.2 Metalized Window Tint This kind blocks heat and reflects sunlight using metallic particles inserted in the film. It’s more durable than dyed tints. Offers excellent heat rejection Adds strength to windows (helps prevent shattering) Strong and long-lasting May cause interference with GPS, phone, and radio signals Best for: Drivers who want long-lasting tint with strong performance—but don’t rely heavily on electronic devices. 4.3 Carbon Window Tint Carbon tint has a non-reflective finish and contains carbon particles that block both infrared light and UV rays. Keeps the car cooler by reducing heat buildup Prevents interior fading due to UV exposure Stylish matte look No signal issues Best for: Those who want better thermal insulation without signal interference. 4.4 Ceramic Window Tint Ceramic is the highest-performing option among all the different types of tint. It contains non-metallic, non-conductive ceramic particles. Blocks 99% of UV rays and most heat and infrared rays Maintains clear visibility, even at night No interference with electronics or signals Superior durability and clarity Best for: Car owners looking for the best protection, comfort, and appearance—worth the premium price. 4.5 Hybrid Tint (Dyed + Metalized) Hybrid tint combines dyed and metalized layers to offer a balanced performance between the two. Moderate heat and UV protection Less fading than dyed-only tints Fewer signal issues than full metalized versions Cost-effective with improved durability Best for: Those who want a mid-range tint with better performance than dyed film but less risk of interference than full metalized options. You can also read about How Much Does It Cost To Tint A Sunroof. Factors to Consider When Choosing Car Window Tint Before picking the right tint for your car, it’s important to consider a few key factors. With so many different window tints available, your choice should depend on your needs, vehicle type, and driving habits. Let’s break down what to keep in mind when comparing different types of auto window tint. Budget: Affordable vs. Premium Films Your budget will play a big role in the tint you choose. Some different window tints, like dyed film, are low-cost and great for basic privacy. On the other hand, premium options like ceramic tint offer top-tier heat rejection and clarity but come at a higher price. Think about what you’re willing to spend based on how long you plan to keep the vehicle and your comfort needs. Privacy Needs: Tint Levels for Visibility All different types of auto window tint offer varying levels of privacy. Darker tints block more visibility from the outside, which is ideal for those who value privacy while driving or parked. However, you’ll need to stay within local tint laws to avoid fines. If privacy is your priority, options like carbon tint or privacy glass offer a good balance. Heat Rejection & UV Protection: Especially in Texas If you’re driving in a hot

Different Types Of Auto Window Tint Read More »

How to Get Sticker Residue Off Car Window DIY Tips

How To Get Sticker Residue Off Car Window

How to get sticker residue off car window without scratching or damaging the glass? It’s a common headache—whether it’s from inspection stickers, parking permits, or kids’ decals, that leftover sticky goo can ruin the clean look of your car. But don’t worry, you don’t need harsh tools or expensive products. In this quick guide, we’ll walk you through simple, safe, and effective methods to get rid of sticker residue from car window surfaces without leaving a trace. Save your time, protect your glass, and bring back that spotless shine with ease. Why Sticker Residue Sticks to Car Windows Sticker residue sticks to car windows mainly because of the type of adhesive used, the effects of UV exposure, and how long the sticker has been on the glass. When you’re trying to get sticker residue off glass, it helps to understand why it’s so stubborn in the first place. Adhesive Types Used in Bumper and Window Stickers Most bumper and window decals use pressure-sensitive adhesives (PSA). These adhesives bond with the glass surface when pressed down and become harder to remove over time. Some stickers are designed for long-term use and use stronger, solvent-based glues. These can leave behind thick, sticky adhesive residue even after the sticker itself is peeled off. Over time, these adhesives break down or cure—meaning they chemically bond tighter with the surface—especially in outdoor conditions. That’s why getting sticker residue off glass becomes more difficult the longer the sticker stays on. Effects of Heat, UV, and Time Sunlight plays a major role in making sticker residue harder to remove. Prolonged UV exposure and heat can melt or “bake” the adhesive into the glass. That’s especially true in hot climates like Texas, where the sun is intense year-round. Over time, the decal glue becomes brittle, dry, or gooey—depending on the adhesive type—and bonds more aggressively with the window. This is why how to get sticker residue off often depends on how long the sticker has been there and the exposure to sun and weather. The longer it sits, the more likely it is to smear, flake, or leave a cloudy patch behind. Why Proper Removal Matters Improper removal can leave behind smears, cloudy patches, or even scratches if you use the wrong tools. Scraping with a metal blade, for example, can damage the glass surface, especially if dirt particles are trapped underneath. Residue also affects visibility, especially on windshields and rear windows, which can become a safety issue while driving. Using the right method ensures that no adhesive residue is left behind and the glass looks clean. This also prevents long-term buildup and makes future sticker removal easier. Tools & Materials You’ll Need Before getting sticker residue off glass, it’s important to gather the right tools. These are safe for auto glass and commonly found in most households: Rubbing Alcohol / Isopropyl Alcohol – Helps break down sticky adhesive residue quickly without damaging the glass surface. White Vinegar – A natural, non-toxic option for loosening decal glue and sticky spots caused by UV exposure over time. WD-40 – Works well on tough residue by softening old adhesive and making it easier to wipe away. Razor Blade or Plastic Scraper – A plastic scraper is safer for getting sticker residue off glass without scratching. Use a razor blade carefully and only on flat glass surfaces. Microfiber Cloth – Gently wipes away loosened glue and avoids smearing or scratching the window. Warm Water + Dish Soap – Use as a first step or final rinse. Excellent for surface preparation or removing lighter residue. These tools are perfect whether you’re learning how to get sticker residue off car windows or dealing with years-old bumper sticker glue. You can also read about How To Remove Sticker From Car Window. Step-by-Step: How to Remove Sticker Residue from Car Window Stickers on your car windows may seem harmless—until it’s time to take them off. If you’re struggling with sticky marks, here are four proven methods to remove adhesive residue from glass safely and effectively. Method 1: Using Rubbing Alcohol (Safe & Effective) Best for: Most types of sticker residue, especially fresh or medium-strength adhesives. Spray or dab on alcohol – Apply isopropyl alcohol directly onto the sticker glue using a spray bottle or soaked cloth. Let it soak – Give it 2–5 minutes to break down the adhesive residue. Clean using a cloth – Scrub gently with a microfiber cloth. Repeat if needed – Older stickers may require a second round. This is one of the safest ways to get sticker residue off glass without causing any surface damage. Method 2: Vinegar + Dish Soap Best for: Eco-conscious users or milder adhesive types baked in by sun or time. Spray vinegar – White vinegar functions as a solvent for natural adhesives. Spray directly on the sticky area. Wait 5–10 minutes – This enables the glue to be loosened by the acid. Rub off residue – Use a cloth or soft sponge to remove the loosened adhesive. Rinse glass – Wash with warm water and dish soap to clear any film. It’s a great DIY way to remove adhesive residue from glass if you’re avoiding harsh chemicals. Method 3: WD-40 Spray Best for: Older or weather-exposed stickers and thick adhesive buildup. Apply WD-40 – Apply liberally on the sticker residue. Let it loosen adhesive – Wait 5 minutes for the product to penetrate the glue. Use cloth or scraper gently – Wipe away the glue, or use a plastic scraper for tougher areas. Clean with soap afterward – Remove oily residue with warm soapy water or window cleaner. WD-40 is a powerful sticker remover and works well when other methods fail. Method 4: Plastic Scraper for Stubborn Residue Best for: Thick, dried glue or decals that have been on for years. When to use it – Only after softening the glue with alcohol, vinegar, or WD-40. Never use dry. How to avoid scratching – Use a plastic razor blade scraper or plastic card. Never

How To Get Sticker Residue Off Car Window Read More »

How to Get Rid of Window Scratches | Easy DIY Tips

How To Get Rid Of Window Scratches

How to get rid of window scratches is a question many car owners face when they notice small marks or lines across their vehicle’s glass. These scratches are more than just a cosmetic issue—they can obstruct your view while driving, impact the overall look of your car, and even lead to long-term damage if not addressed properly. The good news is, there are several ways to fix scratched glass, whether the damage is light or more noticeable. You can use DIY methods like polishing compounds or repair kits to fix window scratch issues at home. However, for deeper or widespread scratches, it’s often best to seek professional help to restore the glass safely and effectively. Understanding the Types of Car Window Scratches Car windows can get scratched from road debris, wipers, or improper cleaning. Knowing the type of scratch helps you decide how to fix it—some can be handled at home, while others may need professional care. Surface Scratches These are light, cosmetic scratches on the top layer of the glass—often caused by dirty wipers or dust. How to fix: You can often remove scratch from glass at this level using polishing kits or even toothpaste. Deep Scratches These go beyond the surface and may affect visibility. They’re usually caused by hard objects or faulty window mechanisms. How to fix:You’ll likely need professional help to fix window scratch damage this deep, especially if safety is affected. Etching or Pitting These appear as small, rough spots caused by acid rain, sand, or worn wipers. How to fix:Mild cases might be polished out, but severe etching often requires glass replacement. Why It Matters Selecting the appropriate solution is ensured by determining the type of scratch. Whether it’s a simple DIY fix or professional repair, taking action early helps keep your view clear and safe. Tools and Materials Needed to Remove Scratches If you’re planning to remove scratch from glass on your car windows, having the right tools makes all the difference. Whether you’re fixing a surface mark or attempting a deeper repair, here’s what you’ll need: 1. Glass Polish or Scratch Remover These products are made specifically to take scratches out of glass safely and effectively. They’re ideal for light surface damage. 2. Cerium Oxide Polish This is a more advanced polishing compound used for deeper or stubborn scratches. It bonds with the glass and smooths out imperfections. 3. Microfiber Cloths Soft and non-abrasive, microfiber cloths are perfect for applying polish without causing more scratches. 4. Electric Buffer (Optional) For faster and more consistent results, an electric buffer can evenly spread polish and save time on larger areas. 5. Clear Nail Polish (Quick Fix) In a pinch, a small amount of clear nail polish can temporarily remove scratch from glass by filling it in and preventing further damage. 6. DIY Glass Repair Kits These all-in-one kits come with tools and instructions to take scratches out of glass—great for minor at-home fixes without professional help. You can also read about car window repair services in Austin. Step-by-Step Guide | How to Get Rid of Window Scratches Window scratches might seem minor, but they can affect visibility and vehicle value over time. Whether you’re dealing with light marks or moderate damage, this step-by-step guide will show you how to take scratches out of glass effectively at home or when to consider professional help. For Light Surface Scratches These are shallow marks that don’t affect the window’s structure but can be seen in direct light. Clean the Window ThoroughlyDust and grime can be removed with a microfiber cloth and a mild glass cleaner. This ensures you don’t rub debris into the scratch and make it worse. Apply Glass Polish or Cerium Oxide Choose a quality polish or cerium oxide compound—both are known to safely take scratches out of glass without damaging it further. Rub in Circular Motion With a clean microfiber cloth, apply the product in a circular motion over the scratch. Keep the pressure even. Wipe and Inspect Clean off any remaining product and inspect the scratch. Do it again if it’s still visible. Repeat if Needed Some light scratches may need two or three passes to fade completely. For Slightly Deeper Scratches When scratches are more visible or catch your fingernail, they require a stronger approach. Use a Glass Repair Kit These kits are designed for auto glass and include compounds that penetrate deeper into the scratch to restore clarity. Apply Compound as Directed Follow the manufacturer’s instructions closely. Usually, you’ll apply the repair compound directly to the damaged area. Use a Buffer or Cloth with Steady Pressure An electric buffer can offer better, more consistent results—but a soft cloth and some patience work too. Polish and Let It Cure After applying, allow the product to cure fully before wiping. This ensures the scratch is sealed and less likely to return. DIY Myths vs. Real Fixes It’s common to hear about household tricks, but not all of them actually take scratches out of glass effectively: Toothpaste: Offers limited success. It may slightly reduce the appearance of a scratch but won’t fix anything deep. Baking Soda: This can be too abrasive and might make the glass worse instead of better. Why Professional Products Work Better: Auto glass polishes and repair kits are formulated specifically to take scratches out of glass without adding damage or cloudiness. They also help prevent scratches from spreading. When to Seek Professional Help You should seek professional help if: The scratch is deep enough to catch your fingernail – this usually means the damage is too severe for DIY methods to take scratches out of glass safely. You notice spreading cracks or structural damage – this may compromise the strength of your auto glass and goes beyond a simple fix for scratched glass. The glass appears cloudy after polishing – often a sign that home remedies to fix scratched glass have damaged the surface further. The damage is near the edge of the window – scratches or chips near

How To Get Rid Of Window Scratches Read More »

Scroll to Top