
Reliable Auto Glass

Auto Glass Care & Maintenance

How to Clean Car Windows from Inside | Easy Steps

How To Clean Car Windows From Inside

How to clean car windows from inside is a simple task that can make a big difference in your driving experience. Many drivers focus on washing the exterior of their car but forget that cleaning inside car windows is just as important. Dirty interior glass can create glare from sunlight or headlights, reduce visibility, and even pose a safety risk. Wash inside car windows regularly to maintain clear views and prevent buildup from dust, smoke, and dashboard off-gassing. Have you ever cleaned the outside of your windshield but still struggled with blurry vision while driving? That’s usually a sign the inside glass needs attention too. Keeping both sides of your windows spotless isn’t just about looks  it’s about safe, distraction-free driving. The Reason Your Windscreen Accumulates So Much Dirt Your windscreen doesn’t get dirty from the outside only  interior grime is a real problem too. If you’ve ever noticed a hazy film building up on the glass, you’re not alone. Let’s break down the main reasons why your windshield gets so dirty from the inside, and how to handle it with the right inside car window cleaner and habits. Off-Gassing from Dashboards: A Silent Film Builder One of the biggest causes of windshield haze is off-gassing. This happens when vinyl or plastic components inside your car  especially the dashboard  release chemical vapors. Over time, these vapors settle on the inside of your windows, leaving behind a cloudy film that reduces visibility and attracts more dust. If you park your car in the sun often, this effect is even stronger. Heat speeds up the off-gassing process, making your windows foggy faster than you think. Solution: Regularly use a cleaning interior car windows spray specifically designed for automotive use. Make sure to clean the glass at least once a week, especially during hot months. The Role of Dust, Smoke, and Air Pollution Airborne particles from traffic pollution, industrial zones, and even nearby wildfires can make their way into your car. Once inside, dust and smoke cling to the off-gassed film on your windows. If you’re a smoker or live in a highly polluted area, your interior windows are likely to get dirty much faster. Tip: Keep your air filters clean and windows closed when driving through dusty or smoky areas. Use a microfiber towel along with your inside car window cleaner for a streak-free finish. Climate Control and Condensation When you run the A/C or heater, especially in changing weather, condensation can form on the inside of your windows. This moisture gives dirt, dust, and off-gassed chemicals something to stick to  turning into a thin layer of grime over time. Fix: Use your car’s defogger regularly and keep humidity under control. After running heat or A/C, wipe down the inside glass with a cleaning interior car windows solution to prevent buildup. Everyday Habits Make It Worse Believe it or not, the little things we do daily contribute to dirty windows: Touching the glass with greasy hands Letting pets stick their noses or paws near the windshield Smoking inside the car Eating messy snacks or drinks that create vapor Each of these habits adds oils, grime, or particles to your interior surfaces  and all of it ends up on your glass. Best Practice: Make it a habit to wipe your windshield with an inside car window cleaner at least once a week. If you smoke or travel with pets often, increase your cleaning frequency. You can also read about How To Clean Glue Residue From Car Window. How to Clean Car Windows from Inside in Easy Steps Keeping the inside of your car windows clean not only improves visibility but also gives your car a fresh, well-maintained feel. If you’ve been struggling with streaks, haze, or built-up grime, this simple step-by-step guide will show you how to wash inside car windows the right way. Step-by-Step Guide for Cleaning Interior Car Windows Step 1: Gather Your Supplies Before you begin, make sure you have the right tools: Microfiber cloths (at least two) A quality cleaning interior car windows spray Distilled water (optional) Spray bottle (if using a homemade mix) Avoid using paper towels or household glass cleaners, as they can leave lint and streaks or even damage tinted windows. Step 2: Park in a Shaded AreaSunlight can cause your cleaner to dry too quickly, leading to streaks. Always clean your windows in the shade or when your car is cool to the touch. Step 3: Dry Wipe the Glass First Start by using a clean, dry microfiber cloth to remove dust and loose particles from the glass. This helps prevent scratching during the actual cleaning process. Step 4: Spray Cleaner on the Cloth, Not the GlassTo avoid drips or overspray onto your dashboard, always spray your cleaning interior car windows solution directly onto your microfiber cloth  not on the glass. This method gives you better control while cleaning. Step 5: Wipe in Circular Motions Use circular motions to break down any grime, film, or fingerprints. This is especially important on the windshield, where off-gassing from dashboard plastics tends to leave a hazy buildup. Step 6: Finish with Vertical StrokesAfter loosening dirt with circular motions, go back over the glass using vertical strokes. This helps eliminate any streaks and gives your windows a clear, polished look. Step 7: Repeat on All Interior WindowsDon’t forget to wash inside car windows on all sides driver and passenger windows, rear glass, and especially the front windshield. Each surface accumulates dust, smoke, and off-gassed chemicals over time. If you have pets or smoke in your car, you may need to clean more frequently to maintain clarity. Can You Use Windex on Car Windows? Short answer: Yes, but with conditions. Windex can be used on car windows only if they’re not tinted and you’re using the right formula. The classic blue Windex contains ammonia, which can damage window tint film over time by drying it out or causing it to bubble and peel. When Is Windex Safe to Use

How To Clean Car Windows From Inside Read More »

How to Fix a Car Window Crack Full DIY Guide

How To Fix A Car Window Crack

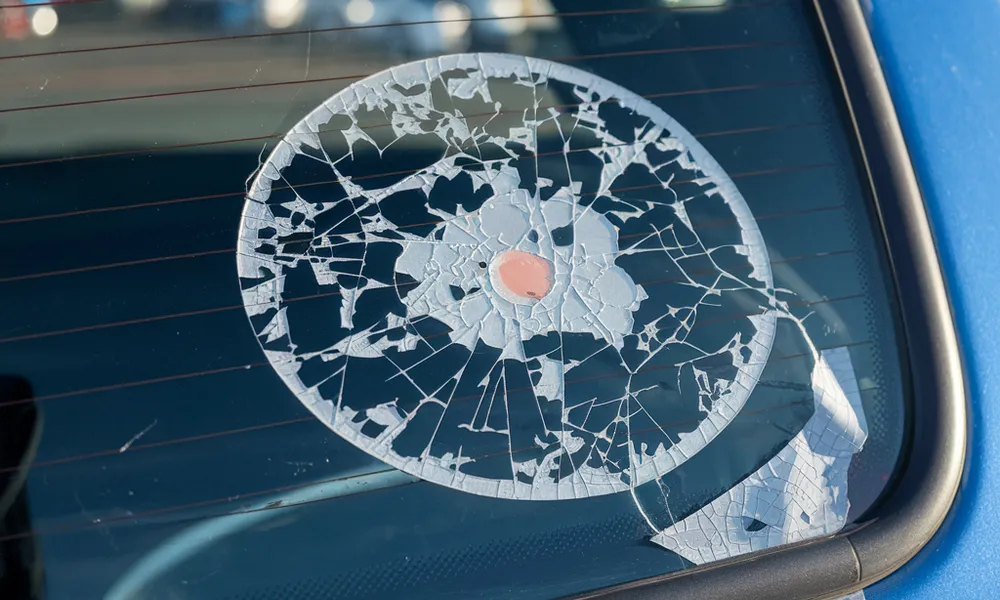
How to fix a car window crack starts with understanding just how common these issues really are. From flying road debris to sudden temperature changes, cracks and chips in car windows can happen to anyone. Ignoring them can lead to larger, more expensive problems, not to mention safety risks. That’s why it’s important to address even small damage like a chip or crack as soon as possible. In this guide, we’ll walk you through various window chip repair techniques, explain different crack types, and help you figure out when to call a pro for the job. Whether you’re a hands-on DIYer or just trying to avoid bigger repair bills, this guide has you covered. Types of Cracks in Car Window Bullseye Crack Looks like: A circular, dark-centered impact mark, usually caused by a rock.Fix Tip: Common and often fixable with a quick chipped window repair if caught early. Star Break Looks like: A central point with short, radial cracks like a starburst.Fix Tip: May spread quickly; seek chipped window repair before it worsens. Hairline Crack Looks like: A thin, single-line crack, often small but can grow with time.Fix Tip: These might seem harmless but can grow early chipped window repair is key. Combination Crack Looks like: A mix of bullseye and star break multiple patterns in one spot.Fix Tip: More complex damage. May need advanced chipped window repair or replacement. Stress Crack Looks like: Cracks starting without a clear impact point often due to temperature changes.Fix Tip: Harder to fix if it spreads too far. Get a chipped window repair assessment ASAP. Edge Crack / Floater Crack Looks like: Edge Crack: Begins within 2 inches of the window edge. Floater Crack: Starts further inside the glass.Fix Tip: Both can expand quickly; don’t delay your chipped window repair. How to Fix a Car Window Crack at Home Car glass chip repair, repair car window chip at home is easier than you might think, especially with the right tools and some patience. Here’s a quick and safe DIY guide you can follow to fix minor cracks or chips in your car window before they spread and become expensive to repair. 4.1 What You’ll Need To get started, gather the following tools: Windshield repair kit (resin-based – available at most auto stores) Razor blade – for finishing touches Safety gloves – always protect your hands Clean cloth – for wiping the surface Tape (optional) – to prep the crack area neatly 4.2 Step-by-Step DIY Instructions 1. Clean the Area Use a clean cloth to wipe away any dirt, dust, or loose glass around the crack. This helps the resin bond better and keeps the finish clear. 2. Prep the Crack and Tape Around It If the crack is in a hard-to-handle area, use tape around it to isolate the damaged spot. This keeps resin from spilling over and gives you better control during application. 3. Apply the Resin Following your repair kit instructions, inject the resin directly into the crack. Be patient and ensure it flows smoothly into every part of the chip. 4. Let It Cure (Sunlight or UV Lamp) Let the resin dry under direct sunlight for about 15–30 minutes. If you’re indoors or it’s cloudy, use a UV lamp. Curing solidifies the resin and seals the crack. 5. Scrape Off Excess Resin Once fully cured, gently use a razor blade to scrape off any extra resin on the surface. Do this slowly to avoid scratching the glass. You can also read about How to Fix a Shattered Car Window. How to Repair a Crack That Is Inside of Windows Repair car window chip, car glass chip repair may seem straightforward when the damage is on the surface but what if the crack is inside the window? Understanding the difference between surface cracks and inner-layer cracks is crucial to know whether you can fix it yourself or need professional help. Surface Cracks vs. Inner-Layer Cracks Surface Cracks:These are on the outermost glass layer. You can feel them when you run your fingers across the surface. Most DIY kits for car glass chip repair are designed to fix these types of chips and cracks using resin.   Inner-Layer Cracks (Laminated Glass): Laminated glass, often used in windshields, consists of two layers of glass with a plastic (PVB) layer in between. An inner-layer crack happens within the laminate between the glass sheets. These are not accessible from the outside, making them much harder (and usually impossible) to repair at home. Signs Your Crack Is Inside the Glass You can’t feel the crack on either the inside or outside surface of the glass.   The crack looks like it’s floating between the layers of glass.   It doesn’t change or spread when you touch the surface. Can You Fix It Yourself? In most cases, no you can’t repair a car window chip that’s inside the laminated layers. These cracks often require complete window or windshield replacement by a professional. DIY kits are made for surface-level repair car window chip scenarios, and using them on inner-layer damage won’t seal the crack properly. Bottom Line: If you suspect the damage is internal, don’t waste time trying to fix it yourself. Instead, contact a trusted local expert like Texas Reliable Auto Glass for a safe and permanent solution. Trying to ignore or delay professional service can lead to spreading cracks and reduced visibility while driving. When to Call Professionals While small chips can often be fixed with a DIY kit, there are certain situations where DIY is not safe or effective. Knowing when to stop and call experts like Texas Reliable Auto Glass can save you time, money, and potential safety risks. Call the Pros If: The crack is larger than a dollar bill Cracks this long are more likely to spread and weaken the structural integrity of your glass. It’s located in the driver’s line of vision Even a small chip here can distort your view and become a serious hazard while driving. DIY repair

How To Fix A Car Window Crack Read More »

Does the 2022 Subaru Impreza Have a Sunroof? Find Out Here

Does The 2022 Subaru Impreza Have A Sunroof

Does the 2022 Subaru Impreza have a sunroof? This is a common question among buyers looking for a compact car that blends practicality with a touch of comfort and style. The 2022 Subaru Impreza, known for its all-wheel-drive capability, solid reliability, and fuel efficiency, stands out in the competitive compact car segment. As more drivers seek added convenience and upscale features in their everyday vehicles, amenities like sunroofs have become increasingly desirable. In response to this trend, Subaru offers a power tilt/sliding glass sunroof as an available feature, but it’s not standard across all trims. You’ll find the sunroof included on higher trims like the Impreza Sport and Limited when equipped with the appropriate packages, offering a more enjoyable driving experience with extra natural light and fresh air. Overview of the 2022 Subaru Impreza Models The 2022 Subaru Impreza is a compact car that stands out in its class thanks to standard all-wheel drive across all models a rare offering among competitors. It comes in two versatile body styles: a traditional 4-door sedan and a practical 5-door hatchback, appealing to a wide range of drivers, whether you’re looking for a sleek commuter or a cargo-friendly daily driver. Available Body Styles SedanThe sedan version offers a more classic look with a traditional trunk and slightly more refined styling. It’s ideal for those who prefer a more streamlined silhouette. 5-Door HatchbackThe 5-door hatchback delivers greater flexibility, with increased cargo space and a wider rear opening. It’s a great option for active lifestyles or anyone needing extra room for gear, groceries, or luggage. Trim Levels There are four trim options available for the 2022 Impreza: Base, Premium, Sport, and Limited. Each trim offers a distinct blend of features, and all trims come with Subaru’s Symmetrical All-Wheel Drive as standard. Base The entry-level Base trim is available in both sedan and 5-door formats. It comes equipped with essentials like a 6.5-inch touchscreen infotainment system with Apple CarPlay and Android Auto, a rear-vision camera, and cloth upholstery. Subaru’s EyeSight® Driver Assist Technology is available if you choose the CVT (Continuously Variable Transmission), but a 5-speed manual transmission is standard. Premium Stepping up to the Premium trim adds a suite of convenience features. These include heated front seats, an upgraded 6-speaker audio system, automatic headlights, and Subaru STARLINK® Safety and Security features. The Premium is also offered in both body styles and comes standard with the CVT, which includes EyeSight® for added safety. Sport The Sport trim is designed for drivers who want a more engaging experience. It adds a sport-tuned suspension, 18-inch wheels, keyless access with push-button start, and interior enhancements like red stitching and upgraded materials. The Sport trim is available in both sedan and hatchback forms. A manual transmission is standard, but choosing the CVT brings in Subaru’s EyeSight® Driver Assist, along with paddle shifters and additional safety features. Limited At the top of the lineup is the Limited trim, which is only available in the 5-door hatchback configuration. It comes fully loaded with luxury touches like leather-trimmed upholstery, a power-adjustable driver’s seat, automatic climate control, and LED headlights. The Limited trim includes the CVT transmission as standard and comes equipped with EyeSight®, along with advanced safety features like reverse automatic braking and blind-spot detection with rear cross-traffic alert. Safety & Technology Every Impreza with a CVT includes Subaru’s EyeSight® Driver Assist Technology, which bundles key safety systems such as: Adaptive Cruise Control Lane Keep Assist Lane Departure and Sway Warning Pre-Collision Braking and Throttle Management EyeSight enhances driver confidence, particularly in city driving and long highway stretches. You can also read about  Can You Add A Sunroof To A Car. Sunroof Availability by Trim Level Base Trim Sunroof: Not Available The Base trim does not offer a sunroof, even as an optional upgrade. It’s designed as a more budget-conscious option with fewer add-ons. Premium Trim Sunroof: Optional A power sunroof is available as part of an optional package. This package often includes other upgrades like a power driver’s seat and upgraded infotainment features, enhancing comfort and convenience. Sport Trim Sunroof: Optional (Package) A sunroof can be added through an optional package, although availability may vary by region or transmission choice. In some markets, it’s included in a tech or value package alongside other premium features. Limited Trim Sunroof: Standard or Optional (Depending on Market) On the Limited 5-door hatchback, a sunroof is typically included as standard or available as part of a comprehensive optional package. It’s most commonly found on models with the highest level of equipment. You can also read about How Much To Install A Sunroof. Is the Sunroof Worth It on the 2022 Subaru Impreza? Pros of the Sunroof Natural Light & Ventilation A sunroof brings more sunlight into the cabin, creating an airier feel. It also provides fresh air without the wind rush of open windows. Adds a Premium Feel Even when not open, a sunroof gives the interior a more upscale and modern vibe something many drivers appreciate, especially on longer trips. Cons to Consider Added Cost The sunroof is usually bundled into an optional package, which can increase the overall vehicle price. Sometimes that package includes features you may not want or need. Reduced Headroom The added hardware can slightly lower the interior ceiling height an important detail for taller drivers or passengers. Potential Maintenance Issues Over time, sunroofs can develop issues like leaks, creaks, or faulty motors though Subaru’s build quality helps minimize those risks if properly maintained. When It’s Worth It You Enjoy Open-Air Driving If you like the feel of the wind and light on a nice day, a sunroof can really enhance your driving experience. You Want Better Resale or a Sleeker Look A sunroof can make the car more appealing to future buyers and adds a stylish touch that might sway someone choosing between similar trims. When It May Not Be Necessary You’re Sticking to a Budget If you’re trying to keep your costs down, skipping the sunroof can help

Does The 2022 Subaru Impreza Have A Sunroof Read More »

How To Repair Chipped Windshield

How to Repair Chipped Windshield: Full Guide

A rock hits your windshield on the highway and leaves a chip the size of a dime. You think about it for a day, then forget until a week later when that chip becomes a 6-inch crack you cannot ignore. This happens to thousands of Texas drivers every year, and almost all of it is preventable. Knowing how to repair chipped windshield early saves you from a full replacement that costs 3 to 4 times more. Most small chips are fixable in under 30 minutes either yourself with a $15 kit or professionally for $60 to $100. This guide covers both options honestly. How to Repair Chipped Windshield — Quick Answer If the chip is smaller than a quarter and not in the driver’s direct line of sight, you can repair it. You need a windshield chip repair resin kit, a clean chip, and about 20 to 30 minutes. The short version: Clean the chip thoroughly Apply the resin from the kit using the injector tool Let it cure in direct sunlight Peel the curing film and polish the surface That is the process. The full step-by-step below explains each stage in detail so the repair actually holds. Why You Should Repair a Windshield Chip Quickly Time is the one factor that turns a simple windshield chip repair into an expensive replacement. Dirt enters the chip fast. Once the glass breaks, the cavity is open to road debris, water, and oil from your fingers. Contaminated chips do not bond properly with repair resin. A clean chip repaired within 24 to 48 hours gives you the best result. After a week, the quality drops. After a month of driving, some chips become unrepairable. Temperature changes spread cracks. In Austin, temperatures swing 30 to 40 degrees between morning and afternoon in spring and fall. Glass expands in heat and contracts in cold. That stress concentrates at the weakest point of the chip. A chip that is stable at 70 degrees can snap into a 10-inch crack the next morning after an overnight drop to 40. Rain drives water into the chip. Water inside the chip freezes, expands, and forces the crack wider. Austin does not see heavy freezes often, but even a single cold night with moisture in the chip can cause significant spreading. It is a safety issue. Your windshield is a structural component of your vehicle. It supports roof strength in a rollover and backs the passenger airbag during deployment. A chipped windshield is weaker than an intact one. Letting the damage spread makes the structural compromise worse. What You Will Need For a DIY windshield chip repair, gather these before you start: A windshield chip repair kit (Permatex, Rain-X, and Meguiar’s are reliable brands available at AutoZone or Walmart for $10 to $20) Isopropyl alcohol at 70% or higher A clean microfiber cloth not paper towels, which leave lint A razor blade or included scraper tool Direct sunlight or a UV lamp (most kits use UV-cure resin) Clear tape (included in most kits) Do not use Windex or glass cleaner on the chip area before repair. The ammonia in glass cleaners contaminates the resin bond. Isopropyl alcohol only. How to Repair Chipped Windshield Step by Step Step 1 — Park in Shade, Then Work in Sun Start by parking in shade for 20 minutes before beginning. Hot glass expands and makes the chip cavity harder to fill cleanly. Once the glass is at a neutral temperature, move to direct sunlight for the curing stage most kits require UV light to harden the resin. Step 2 — Clean the Chip Use the razor blade or a pin to gently remove any loose glass fragments from inside the chip cavity. Do not press hard; you are clearing debris, not scraping the glass. Apply a small drop of isopropyl alcohol directly to the chip and let it evaporate completely. This removes oil, road film, and moisture. Giving it a full 5 minutes to dry rushing this step is the most common reason DIY repairs fail. Step 3 — Apply the Adhesive Patch Most kits include a clear adhesive patch or pedestal that centers over the chip and creates a sealed chamber for the resin injection. Press it firmly against the glass with no air bubbles around the edges. The center hole should align directly over the chip. Step 4 — Inject the Resin Attach the resin injector tool to the pedestal according to your kit’s instructions. Most work by pushing the plunger down to apply pressure, then pulling it back to create a vacuum that draws air out of the chip. Repeat this several times. The goal is to force resin into every part of the chip cavity and pull air bubbles out simultaneously. You will usually do 4 to 6 pressure/vacuum cycles. Step 5 — Cure in Sunlight With the resin fully in the chip, remove the injector and apply the curing strip a small piece of clear film included in the kit over the repair. Press flat with no wrinkles. Position the car so direct sunlight hits the repair for a minimum of 15 minutes. Do not rush this step with a heat gun; excess heat causes the resin to cure before it has fully settled into the chip. Step 6 — Remove Film and Polish Peel the curing strip cleanly from one corner. Use the razor blade held at a low angle to remove any excess cured resin sitting above the glass surface. Work slowly the blade should skim the glass surface, not dig in. Finish with a clean microfiber cloth and a small amount of glass polish. A successful fix windshield chip repair leaves the chip area significantly less visible and structurally sealed. It will not be completely invisible in all lighting angles, but it will be stable and bonded. Can You Completely Hide a Windshield Chip? This is the most common unrealistic expectation with DIY windshield chip repair. No repaired chip will still be visible if

How to Repair Chipped Windshield: Full Guide Read More »

How to Repair Power Window | Step-by-Step Repair Guide

How to Repair Power Window | DIY Tips for Quick Fixes

How to repair power window malfunctions is a common question for car owners, as the power window system is an essential component of modern vehicles. Power windows provide convenience and comfort, allowing drivers and passengers to easily control window movement with just a push of a button. However, like any mechanical system, power windows can experience malfunctions, such as failing to open or close properly, making unusual noises, or becoming completely unresponsive. Addressing these issues promptly is crucial, as a malfunctioning window can pose safety risks, especially in emergencies. Maintaining a functional power window system not only ensures ease of use but also contributes to the overall reliability and longevity of the vehicle. Common Reasons for Power Window Malfunctions If your power windows will not work, there are several potential causes that could be at fault. Understanding these common issues can help you identify the problem and determine whether you can fix it yourself or need professional assistance. Faulty Window SwitchA malfunctioning window switch is one of the most common reasons why a power window does not work. When the switch goes bad, it may not send the signal to raise or lower the window, even though everything else seems functional. If only one window fails to operate while others work fine, the switch is likely the culprit. Broken Power Window RegulatorThe window regulator is a mechanical component that allows the window to move up and down. The window may become stuck in place if this component fails or wears out. The regulator can fail due to wear, poor maintenance, or a sudden jolt. If the window moves slowly or makes unusual noises, the regulator might be damaged. Blown Fuses or RelaysPower windows rely on fuses and relays to ensure proper operation. If these components blow out or fail, your power window will not work. A blown fuse is usually an easy fix, but it’s important to determine why the fuse blew in the first place. Faulty relays, on the other hand, may require professional attention to diagnose and replace. Motor FailureRegular use might cause the power window motor to deteriorate over time. If your power window motor fails, the window will not respond when you press the button. Motor failure can also result from an electrical malfunction or a blockage in the window mechanism. If you hear a grinding or buzzing sound when trying to operate the window, the motor might be the issue. Worn Cables or TracksFriction and time can cause the cables or rails that control the window’s movement to deteriorate or break. When this happens, the window may struggle to move or become stuck entirely. In extreme cases, the cable might snap, leaving the window completely immobile. Regular lubrication and maintenance can help extend the life of these components. Electrical IssuesThe power window won’t operate if there are wiring problems in your car’s electrical system. These issues can range from loose connections to damaged wires that interrupt the flow of power to the window motor. Diagnosing electrical issues can be complex, and you may need a professional to inspect the wiring thoroughly. Five Best Ways to Repair a Power Window When your power window does not work, it can be frustrating, but there are several methods for repairing it yourself or deciding when to call a professional. Here’s a guide to the five best ways to perform a power window repair and keep your car’s window functioning smoothly. DIY Repairs vs Professional Help Before attempting any car power window repair, it’s important to know when to tackle the job yourself and when to seek professional help. If you’re comfortable with tools and have basic automotive knowledge, you may be able to handle simpler repairs like resetting a window switch or replacing a fuse. However, more complex issues, such as motor failure or replacing the window regulator, may require professional attention due to the intricate parts involved. Method 1: Resetting the Power Window Switch Sometimes, the issue with your power window not working could be as simple as a malfunctioning switch. If you suspect the switch is at fault, try resetting it. Here’s how to do it: Don’t start the automobile, but turn the ignition to the “on” position. Press and hold the window switch to the “down” position for several seconds, then release it. For a few more seconds, press and hold the switch in the “up” position. Test the window to see if it moves. If it works, the problem was likely a glitch in the switch, and this reset should resolve it. Method 2: Replacing the Fuse or Relay A blown fuse or faulty relay is a common reason why your power window will not work. To perform a car power window repair by replacing the fuse or relay: Find the fuse box, which is often located in the engine compartment or beneath the dashboard. Find the specific fuse or relay for the power window—you can check the car’s manual for the exact location. Inspect the fuse to see if it’s blown (a broken wire inside the fuse means it’s faulty). Replace the fuse or relay with a new one of the same amperage and type. Test the window to see if the issue is fixed. Method 3: Replacing the Window Regulator The window regulator may need to be replaced if the window moves strangely or becomes stuck. Here’s how to replace the regulator: Remove the door panel carefully using a trim removal tool to expose the power window mechanism. Disconnect the battery for safety before working on electrical components. Remove the bolts and screws that secure the regulator to the door frame. Disconnect the motor and wiring attached to the regulator. Install the new window regulator by reversing the steps, ensuring the motor is aligned and properly secured. Test the window to ensure smooth operation. Method 4: Repairing or Replacing the Motor If your power window motor has failed, it will need to be replaced. To repair or replace the motor: Disconnect

How to Repair Power Window | DIY Tips for Quick Fixes Read More »

How to Fix a Shattered Car Window | Step-by-Step Guide

How to Fix a Shattered Car Window

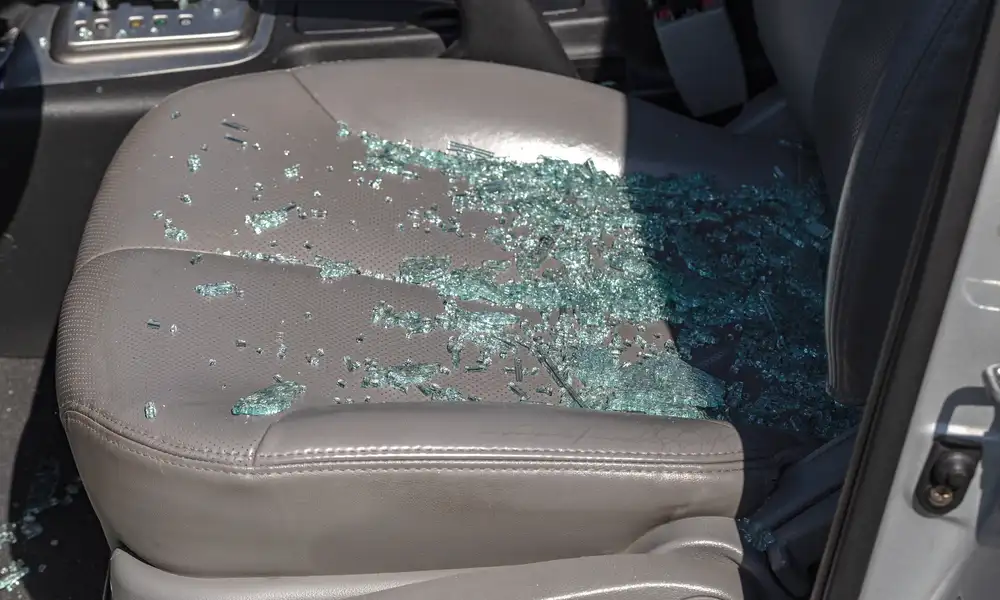
How to fix a shattered car window is an important task to address promptly after an incident. A car window can shatter due to various reasons, such as a sudden impact from debris, weather-related events like extreme temperatures, or even accidents. The impact can cause the glass to crack, break, or shatter into pieces, leaving the vehicle vulnerable to further damage or theft. Addressing a shattered window quickly is crucial not only for safety, as broken glass poses a risk to occupants, but also for security, as a damaged window can make your car an easy target for theft. This guide will walk you through the steps to temporarily secure the window, how to safely remove the glass, and explore options for professional repair or replacement, ensuring your vehicle is protected and safe once again. Understanding a Shattered Car Window A shattered car window can be a concerning experience, but it’s important to understand what causes it, the different types of windows in a car, and the difference between a shattered and cracked window. What Causes a Car Window to Shatter? A car window can shatter due to a variety of reasons, both accidental and intentional. Here are some common causes: Impact: A sudden impact, such as from a rock, debris, or even a collision, can cause a shattered car window. When a heavy object strikes the glass with enough force, it can break or shatter.   Temperature Changes: Extreme changes in temperature can put stress on the glass. For example, if a car is parked in the sun and the temperature inside the car is much higher than outside, The glass may break or crack as a result of the abrupt cooling (such as when you roll down a cold window).   Manufacturing Defects: Sometimes, defects in the glass itself can lead to breakage. Poorly tempered or incorrectly installed windows might be more susceptible to shattering.   Vandalism or Theft: A shattered car window is often the result of criminal activity, such as a break-in attempt or intentional vandalism.   Accidents or Collisions: In a crash or sudden stop, the force exerted on the car can cause the windows to shatter. This is more common with side or rear windows. Types of Windows in a Car: Side Windows, Rear Windows, Windshield There are typically three main types of windows in a car, each serving different purposes: Side Windows: These are the windows on the sides of the car. They are usually made of tempered glass, which is designed to break into small, rounded pieces if shattered. This reduces the risk of injury from sharp glass. Rear Windows: Located at the back of the car, rear windows are also usually made from tempered glass. In some cases, they can be made from laminated glass, which is designed to be more resistant to shattering but still flexible in an accident. Windshield: The front windshield is one of the most critical pieces of glass in a car. It’s typically made of laminated glass, meaning it has two layers of glass with a plastic layer in between. This design prevents the windshield from shattering into dangerous shards. Instead, it tends to crack in a spiderweb pattern, which still compromises the visibility and safety of the driver. The Difference Between a Shattered and Cracked Window A shattered car window and a cracked window may look similar but are different in terms of damage severity and appearance: Shattered Car Window: When a window shatters, it usually breaks into many small pieces or fragments. In the case of side windows, the glass may break into numerous small chunks that are not sharp, making it safer than if the glass were to break into larger, jagged shards. Shattering usually occurs due to significant impact or pressure. Cracked Window: A crack in a window is typically a single line or web-like pattern that doesn’t result in pieces of glass falling out. Cracks can form from stress, temperature changes, or minor impacts. Unlike a shattered car window, a crack may not pose an immediate safety hazard, but it can weaken the glass over time, making it more susceptible to shattering. You can also read about Ford F150 Rear Window Replacement. How to Fix a Shattered Car Window Without Replacing Talk To A Car Window Repair Expert If you’ve experienced a shattered car window, it’s not always necessary to replace the glass immediately. There are temporary fixes that can help protect the car and keep it secure until you can arrange for permanent repairs. Here’s how to fix shattered car glass without replacing it right away. Temporary Solutions for a Shattered Window A temporary fix for a shattered car window involves covering the broken glass and protecting your car from further damage. While this won’t restore the window’s original strength, it can help prevent weather damage, theft, or injury until you get the window replaced. Pros and Cons of Fixing Without Replacing Pros: Cost-Effective: Temporary fixes are cheaper than a full window replacement. Quick: If you need to use the car immediately, fixing busted car window temporarily can get you back on the road quickly. Protection: A quick fix can keep out rain, dirt, and debris, preventing further damage to the interior. Cons: Not a Permanent Solution: Temporary fixes aren’t as secure as the original window and can deteriorate over time. Visibility Issues: Some makeshift covers might obstruct your view, especially if it’s a windshield or side window. Vulnerable to Weather: Depending on the materials used, the fix might not hold up well in extreme weather conditions. Materials You’ll Need Heavy-duty tape (preferably duct tape or masking tape) Plastic sheeting (clear plastic or a thick trash bag) Sealant (to secure edges and prevent leaks) Scissors (for cutting the plastic or tape) Gloves (to shield your hands from glass fragments) Steps for Fixing Without Replacing: Step 1: Assess the Damage Before fixing a busted car window, take a moment to assess the extent of the damage. If the window is completely

How to Fix a Shattered Car Window Read More »

Should I Remove Car Window Tint by Myself? Pros & Cons

Should I Remove Car Window Tint By Myself

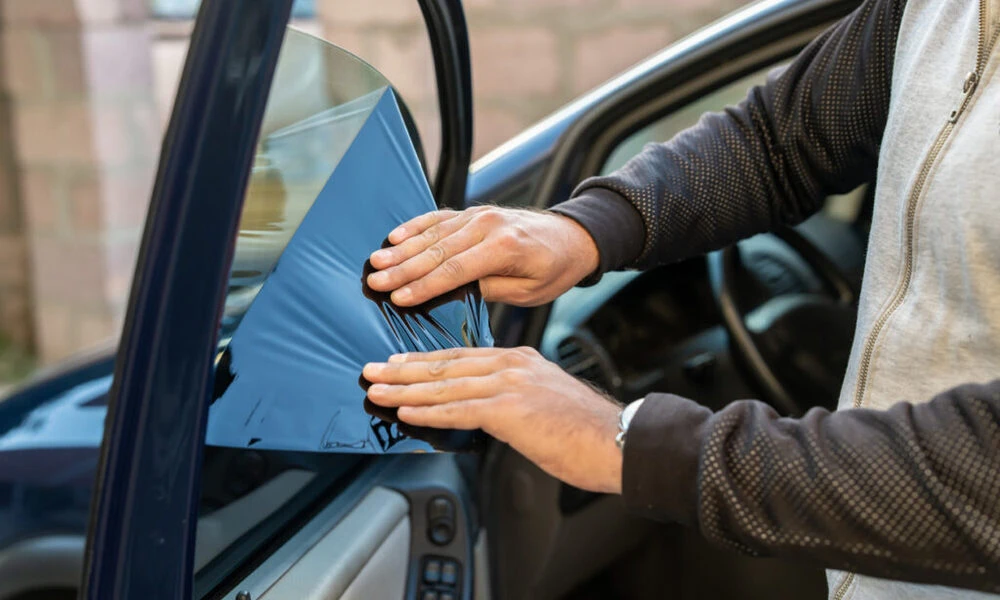
Should I remove car window tint by myself? This is a question many car owners consider when their vehicle’s tint begins to peel, fade, or they simply want a fresh change. Window tinting has become a popular modification among car owners due to its aesthetic appeal, privacy benefits, and heat reduction properties. It offers protection from harmful UV rays while keeping the car’s interior cooler. However, over time, window tint can deteriorate, leading to bubbles, cracks, or discoloration, prompting many to consider removal. While professional services are available, some car owners opt to remove the tint themselves, driven by cost-saving reasons or the desire to tackle the task independently. But is this a good idea? Let’s explore the pros and cons of removing window tint on your own. Reasons for Getting Window Tint Removed There are several reasons why car owners might decide to remove tinted car windows. Legal Issues One of the primary reasons to take off tint is when it doesn’t comply with local regulations. Tint that’s too dark can be illegal in certain areas, leading to fines or even requiring you to have it removed. If your vehicle fails to meet state or country-specific tint laws, you may need to remove tinted car windows to avoid any legal trouble. Damage to the Tint Over time, tinted windows can suffer from wear and tear. Common issues include bubbles, peeling, and discoloration, which not only degrade the appearance of the car but can also reduce visibility. If your tint has been damaged, you might be wondering, how do you take off tint? In cases like this, removing and replacing the tint could restore both the look and functionality of your windows. Changing the Look or Upgrading the Tint If you’re looking to upgrade your vehicle’s style or change the tint to something more suitable, you might consider having the old tint removed. Whether it’s a change in aesthetic preference or the need for more or less tint, removing tinted car windows is the first step in making the switch. Safety Concerns As tint ages, it can start to degrade, becoming brittle or cracked. This can be a safety issue, as damaged tint can impair your view or even obstruct your ability to see clearly when driving. If you’re dealing with old, worn-out tint, you might need to take off tint to ensure the safety of you and your passengers. Should I Remove Car Window Tint by Myself? If you’re considering whether to remove car window tint on your own, it’s important to weigh the pros and cons. Pros of Removing Tint Yourself: Cost SavingsOne of the biggest advantages of DIY window tint removal is saving money. Professional tint removal can be expensive, but by doing it yourself, you avoid the labor fees. Sense of AccomplishmentIf you enjoy hands-on projects, removing the tint yourself can give you a sense of satisfaction once it’s done. It’s a great way to learn something new and feel accomplished after completing the job. Cons of Removing Tint Yourself: Risk of Damaging the Car WindowsIf you’re not careful, trying to remove car window tint yourself can lead to scratches or cracks on your car windows. The process requires a delicate touch to avoid harming your vehicle. Possibility of Leaving Adhesive Residue After tint is removed, you might find sticky residue left on your windows. Cleaning it off can be time-consuming and requires the right tools and cleaners to ensure it’s completely gone. Time and Effort RequiredDIY window tint removal takes time and patience. If you don’t have the right tools or experience, it can turn into a frustrating process that takes longer than expected. You can also read about car window repair in Austin. Dangers of Removing Window Tint Yourself While DIY window tint removal might seem like a good idea to save money, there are several risks and dangers you should be aware of. Here’s what could go wrong: 1. Risk of Window Damage Improper removal of window tint can easily lead to scratches or even cracks in the glass. If you’re not careful with your tools or technique, you might end up damaging your car windows, which could be costly to fix. This is one of the biggest risks when deciding to remove car window tint on your own. 2. Adhesive Residue After you remove the tint, there’s a high chance that adhesive residue will be left behind on the glass. This sticky film can be tough to clean off, and if not removed properly, it can leave your windows looking messy and uneven. Getting rid of this residue takes time, and without the right cleaners, it can be a real headache. 3. Safety Risks Working with glass and sharp tools can be dangerous. There’s always the potential for injury while removing the tint, whether from the tools you’re using or the glass itself. If you’re not familiar with the process, you might hurt yourself, especially when trying to peel the tint off or deal with broken glass. 4. Mess and Inconvenience DIY window tint removal isn’t a quick or clean job. It can get messy, with pieces of film flying around or residue smearing across your car’s interior. You might also find the process frustrating, especially if things don’t go as planned or if the tint is particularly difficult to remove. Considering these risks, it’s important to think carefully before attempting to remove car window tint on your own. If you’re unsure, it might be worth calling a professional to handle the job safely and effectively. How Much Time Does Window Tint Removal Take? If you’re considering DIY window tint removal, the time it takes can vary depending on several factors. Average Time for DIY Removal On average, DIY window tint removal can take anywhere from 2 to 4 hours for a standard vehicle. This includes the time spent peeling off the tint, cleaning up adhesive residue, and ensuring that the windows are spotless. The process can take longer if the

Should I Remove Car Window Tint By Myself Read More »

Do Car Windows Block UV Light? Here's What You Should Know

Do Car Windows Block Uv Light

Do car windows block UV light? This is an important question when considering UV protection while driving. Car windows play a significant role in blocking harmful ultraviolet (UV) rays, which can contribute to skin damage and increase the risk of skin cancer. UV exposure in the car is a growing concern, especially for individuals who spend long periods of time behind the wheel. While standard car windows offer some level of UV protection, they may not completely block out all harmful rays. Factors like window tinting can enhance this protection, as tinted car windows can further reduce UV exposure. Understanding how car windows interact with UV light can help drivers make informed decisions about additional protective measures, such as using sunscreen or opting for advanced window tinting for enhanced protection. What is UV Light and Why Should You Care About It? The sun emits ultraviolet (UV) light, a form of electromagnetic energy. While we often think of sunlight as just providing warmth and brightness, it also contains UV rays, which are invisible to the naked eye. UVA, UVB, and UVC are the three categories into which these rays fall. UVA Rays: These are the longest UV rays and penetrate deeply into the skin, causing aging (wrinkles, loss of elasticity) and DNA damage over time. UVA rays are responsible for skin tanning, but they can also increase the risk of skin cancer. UVB Rays: These rays are shorter and are responsible for causing sunburn. UVB radiation is more intense than UVA and plays a significant role in the development of skin cancer. These rays can also damage the skin’s deeper layers, leading to premature aging. UVC Rays: UVC rays are the most dangerous form of UV radiation, but fortunately, they are absorbed by the Earth’s atmosphere and don’t reach the surface. Despite this, they are important to know about because they are used in certain disinfecting products. Health Risks Associated with Prolonged UV Exposure Prolonged exposure to UV rays can have a significant impact on your health, especially when you’re not adequately protected. Skin Cancer: The most serious risk from UV radiation is skin cancer. Both UVA and UVB rays damage skin cells’ DNA, which can lead to mutations and the development of cancers like melanoma, basal cell carcinoma, and squamous cell carcinoma. Premature Aging: Over time, UV exposure can cause wrinkles, sagging skin, and age spots, all signs of premature aging. This occurs because UV rays break down collagen and elastin fibers in the skin, leading to a loss of firmness and elasticity. Eye Damage: UV rays can also affect your eyes, increasing the risk of cataracts and macular degeneration. The delicate tissues in the eyes can absorb UV radiation, which can lead to long-term vision problems. Weakened Immune System: Excessive UV exposure can suppress the immune system, making your body more susceptible to infections and diseases. The Importance of UV Protection, Especially While Driving While many people are aware of the need for UV protection when they are outdoors, it’s important to remember that UV rays can still affect you even when you’re inside a car. Here’s why car window UV protection matters: UV Rays Through Windows: Most car windows, especially the standard ones, don’t block 100% of harmful UV rays. While side windows and windshields may reduce some of the UV exposure, UVA rays can still penetrate through the glass. This means if you’re driving for long periods, your skin is still exposed to harmful UV radiation, potentially increasing your risk of skin damage over time. Prolonged Exposure: For drivers and passengers, extended time spent in the car (whether commuting, on road trips, or daily driving) means prolonged exposure to UV rays, particularly on the side facing the window. This is why car window UV protection is essential to block harmful rays. Protecting Your Skin: Installing UV-blocking window films or using UV-blocking shades can significantly reduce the amount of UV radiation that enters your vehicle. Additionally, using sunscreen and wearing protective clothing can further safeguard your skin while driving. Do Car Windows Block UV Light? When it comes to protecting yourself from harmful UV radiation while driving, it’s important to understand how car windows block UV light. Standard car windows are designed with some level of UV protection, but their effectiveness can vary. Let’s break down how car windows are designed to block UV rays and how well they do it. Materials Used in Standard Car Windows and Their UV-Blocking Properties Car windows are typically made from two main types of glass: tempered glass and laminated glass. Both have different properties when it comes to blocking UV radiation. Tempered Glass: This is the most common type of glass used in car side and rear windows. While tempered glass is designed to be strong and shatter-resistant, it does not provide significant UV protection on its own. It may block some UV rays, but not enough to fully protect your skin from prolonged UV exposure. Laminated Glass: Laminated glass is typically used in windshields and consists of two layers of glass with a plastic layer in between. This type of glass offers better UV protection than tempered glass. The plastic layer can block a large percentage of UVB rays, which are responsible for sunburn. However, while laminated glass does offer a certain level of UV protection, it doesn’t completely block UVA rays, which penetrate deeper into the skin. Level of UV Protection Typically Offered by Standard Car Windows Standard car windows, especially those made with laminated glass (used in the windshield), offer some degree of car glass UV protection. Here’s a more specific look at the level of protection: Windshield (Laminated Glass): Most modern windshields block around 99% of UVB rays. This is great for preventing sunburn, but the protection from UVA rays is not as strong. UVA rays, which cause aging and deeper skin damage, can still penetrate through the windshield. Side and Rear Windows (Tempered Glass): While side and rear windows may offer some level of UV

Do Car Windows Block Uv Light Read More »

How to Remove Scratches from Car Windows | Quick Tips

How To Remove Scratches From Car Windows

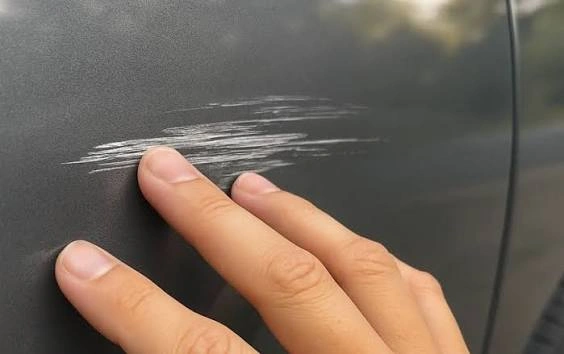
How to remove scratches from car windows is a common concern for many car owners. Scratches on car windows can be unsightly and negatively impact the overall appearance of your vehicle. More importantly, if not addressed, they can even affect visibility and safety while driving, especially if they obstruct the driver’s line of sight. Whether the scratches are minor or more severe, addressing them promptly is essential not only for maintaining the aesthetics of your car but also for ensuring clear and safe driving conditions. Understanding the Types of Scratches on Car Windows When it comes to maintaining your car, the condition of the windows plays a crucial role not only in aesthetics but also in safety. Scratches on car windows are a common issue that can arise from various sources, including debris, contact with rough surfaces, or even improper cleaning techniques. It’s important to understand the different types of scratches that can appear on your car’s glass to address them effectively. Here’s a breakdown of the types of scratches you might encounter on car windows: 1. Superficial Scratches Superficial scratches are light, surface-level abrasions that don’t penetrate deeply into the glass. These minor scratches often occur when dirt, dust, or small debris come into contact with the window’s surface. They are usually not visible from a distance but can be noticed when the light hits the glass at certain angles. Fortunately, superficial scratches are relatively easy to treat. If you want to remove glass scratches from your car, there are several DIY methods that can help buff these marks out. Special glass polish products or a simple home remedy using baking soda and water can help improve the appearance without affecting the glass integrity. 2. Deep Scratches Deep scratches are more severe abrasions that penetrate further into the glass and can sometimes cause visible lines or grooves. These types of scratches occur when sharp objects, such as rocks or hard debris, strike the window with more force. Deep scratches can impact the window’s structural integrity, making it more vulnerable to breaking or shattering. These types of scratches often require professional intervention, and in some cases, they may be too deep to completely repair. If you have a windshield with a deep scratch, it may be worth considering windshield scratch repair to prevent further damage or to maintain the strength of the glass. 3. Hazardous Scratches Hazardous scratches are the most severe and potentially dangerous type of scratch. These are often characterized by cracks, chips, or deep gouges that can compromise the safety of the vehicle. A hazardous scratch could eventually lead to glass breakage or failure under stress, such as during a collision or extreme weather conditions. These scratches can cause distorted vision or reduce the effectiveness of the glass in protecting against debris. If you notice a hazardous scratch, it’s important to address the issue immediately by consulting a professional for windshield scratch repair. Ignoring these scratches could result in higher repair costs or even the need for a full window replacement. For windshield replacement in Austin contact Texas Reliable Auto Glass. Is It Possible to Fix Scratched Auto Glass? Scratched auto glass is a common problem that many car owners face, but the good news is that in many cases, scratches can be repaired. The process of fixing scratched auto glass depends on several factors, including the type and depth of the scratch, the condition of the glass, and whether you choose to attempt a DIY repair or hire a professional. Here’s an in-depth look at the factors you should consider when deciding how to fix scratched auto glass: Factors to Consider 1. Type and Depth of the Scratch The most important factor in determining whether a scratch can be fixed is its type and depth. Minor, surface-level scratches are often more easily repaired using products like an auto glass scratch remover or DIY methods. These types of scratches typically don’t penetrate deeply into the glass and can often be buffed out, improving the appearance of the window. However, deeper scratches or those that affect the integrity of the glass are more difficult to repair and may require professional intervention. If the scratch has caused a crack or chip, it might be best to seek professional auto window scratch repair services. 2. Age of the Vehicle and Condition of the Glass The age of the vehicle and the overall condition of the glass also play a role in whether a scratch can be fixed. Older vehicles may have glass that has become more brittle over time, making it more susceptible to damage. If your vehicle’s glass is already weakened by previous damage or wear, even a small scratch could lead to larger issues down the line. In such cases, a professional repair might be necessary to prevent further damage. Additionally, if the glass has already been scratched multiple times, it could be more difficult to achieve a flawless repair. DIY vs Professional Repair DIY Repairs: Pros and Cons Pros: DIY repairs for minor scratches can be a cost-effective solution. There are a variety of products available, such as auto glass scratch removers, that claim to remove or reduce the appearance of scratches. For light, superficial scratches, many car owners find that these DIY methods can work well. DIY fixes can also be convenient since you can handle the repair at your own pace and don’t need to wait for professional services. Cons:The biggest downside to DIY repairs is that they may not always be effective, especially if the scratches are deep or numerous. Improper techniques or the use of the wrong products could potentially worsen the scratch or cause additional damage. DIY fixes also may not restore the glass to its original condition, and in some cases, they may simply mask the appearance of the scratch without fully addressing the problem. Professional Repair: Pros and Cons Pros: Professional auto window scratch repair offers a higher likelihood of a successful and long-lasting fix, especially for deep or

How To Remove Scratches From Car Windows Read More »

How to Replace Car Window Regulator | 5 Easy Steps

How To Replace Car Window Regulator

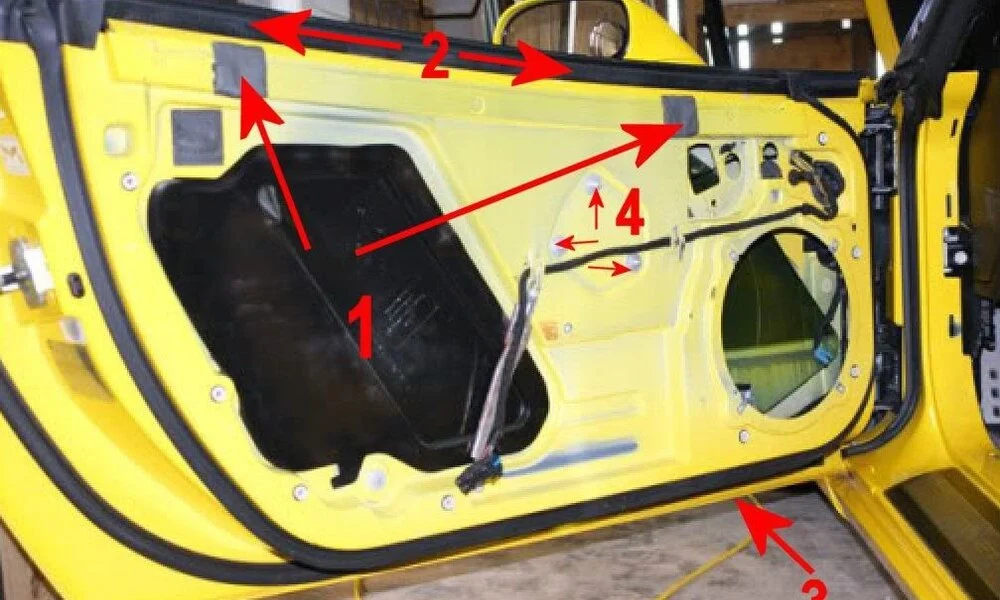
How to replace a car window regulator is an important task for anyone facing issues with their windows. A functioning window regulator is vital for smooth window operation, ensuring safety, comfort, and convenience while driving. A malfunctioning regulator can cause windows to get stuck or move slowly, leaving you with a frustrating or unsafe situation. Common signs of a broken window regulator include slow or stuck windows, or hearing strange grinding or clicking sounds. If you notice these issues, it may be time to replace a window regulator to restore proper function and prevent further damage. How Your Vehicle’s Power Windows Work Power windows in vehicles allow you to raise and lower the windows with the push of a button, offering convenience compared to manual windows. The system consists of several components that work together to make this process possible. Basic Components of Power Windows Window Motor: This is the motor that powers the movement of the window up and down. It’s usually located inside the door panel. Switch: This is the button you press to control the window. When you press the switch, it sends a signal to the motor to move the window. Window Regulator: The window regulator is an important part that physically moves the window up and down. It connects to the window and the motor, allowing the window to move smoothly within the door. Wiring and Relay: These parts connect the motor and the switch, providing electrical power to run the system. How It Works When you press the switch to open or close a window, it sends an electrical signal to the motor. The motor then turns, activating the window regulator. The regulator has a series of gears or a cable system that helps to lift or lower the window. If the window is not moving properly, it could be due to a problem with any of these parts. One common issue is a malfunctioning window regulator. Over time, the regulator can wear out, causing the window to become stuck or move unevenly. In such cases, you may need to replace the window regulator to restore the proper function of the power window. Types of Power Window Regulators There are several types of power window regulators, each with its unique mechanism and uses. Here’s an overview of the most common types: 1. Cable-Driven Regulators Cable-driven regulators use a system of cables, pulleys, and a motor to move the window up and down. The motor turns the cables, which in turn lift or lower the window. How They Function: When the motor runs, it pulls on the cables, causing the window to rise or fall. The cables are typically connected to a set of pulleys that help guide the movement of the window. Common Applications: Cable-driven regulators are often found in vehicles with compact or complex door designs where space inside the door is limited. They are also commonly used in more modern cars due to their compact size and reliability. 2. Scissor-Style Regulators Scissor-style regulators use a series of interconnected arms that operate in a scissor-like motion to move the window. These arms are connected to the window and are driven by the motor. How They Function: The motor moves the arms, which “scissor” to lift or lower the window. As the motor turns, the arms fold or unfold, causing the window to move. This design creates a smooth, even movement as the window is raised or lowered. Typical Applications: Scissor-style regulators are often found in older vehicles or those with larger window openings. They are commonly used in vehicles where the space inside the door allows for the larger, more mechanical design of the scissor arms. 3. Dual-Arm Regulators Dual-arm regulators have two arms that work together to move the window. These arms are typically arranged in parallel and are driven by a motor to raise or lower the window smoothly. How They Function: The motor turns a mechanism that moves the two arms in parallel, causing the window to rise or fall. This design helps distribute the load of the window evenly across both arms. Benefits: The dual-arm design helps with better weight distribution and can handle heavier windows more efficiently. This makes them ideal for larger windows or heavier glass. They are also generally known for providing smoother and quieter operation compared to other types of regulators. 4. Comparison of Types: Which Regulator is Suitable for Different Vehicle Models Cable-Driven Regulators: These are typically used in newer vehicles and are great for vehicles with limited space in the door. They are compact, reliable, and easier to install in modern designs. Scissor-Style Regulators: Often found in older vehicles or those with larger windows. They are good for applications where the window needs to move over a longer range, and there is enough room for the scissor mechanism. Dual-Arm Regulators: Best suited for larger, heavier windows found in vehicles like SUVs, trucks, or luxury cars. They provide smooth operation and are often used in vehicles where durability and weight capacity are important factors. For car window repair in Austin contact no other than Texas Reliable Auto Glass. 5 Easy Steps to Replace a Car Window Regulator If you’re experiencing issues with your power window, fixing a window regulator might be necessary. Here’s a simple guide to help you replace a faulty window regulator. Step 1: Gather Necessary Tools and Materials Before you start replacing the window regulator, make sure you have all the necessary tools. You’ll need: Screwdrivers (Phillips and flathead) Socket set (with various sizes) Replacement window regulator Trim panel removal tool (to remove the door panel without damaging it) Needle nose pliers (for handling clips or small fasteners) Torx drivers (in case your vehicle uses them) Having all these tools ready will make the process smoother and faster. Step 2: Remove the Door Panel The first step to accessing the window regulator is removing the door panel. Here’s how: Locate and remove screws: Start by finding any screws on the

How To Replace Car Window Regulator Read More »

Scroll to Top