
Reliable Auto Glass

Auto Glass Care & Maintenance

How to Clean Glue Residue from Car Window – Step by Step

How To Clean Glue Residue From Car Window

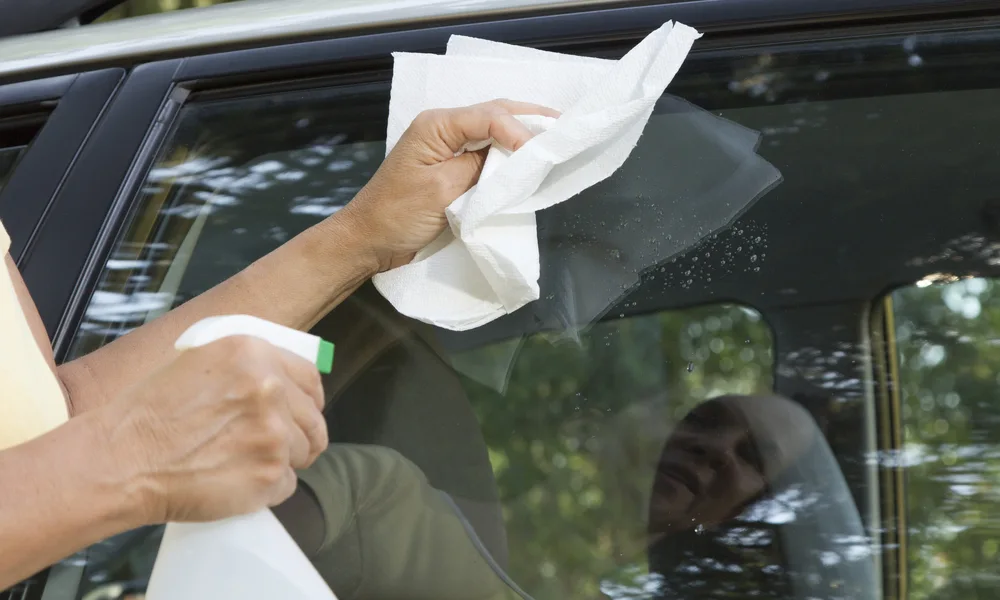
How to clean glue residue from car window properly is important to maintain clarity and avoid damage. Sticky residue from stickers or tape can attract dirt and obstruct your view, making your car look unkempt. If not cleaned correctly, it can also become harder to remove over time. Using the right cleaning techniques prevents scratches and streaks. To get rid of sticker residue from car window, use safe solvents like rubbing alcohol, vinegar, or adhesive removers. Gently scrubbing with a microfiber cloth ensures a clear, streak-free finish without harming the glass. Supplies You’ll Need to Clean Glue from Car Window Removing glue from a car window requires the right tools to ensure a clean, streak-free surface without damaging the glass. Whether it’s sticker residue, tape marks, or leftover windshield adhesive, having the right windshield adhesive remover and cleaning supplies makes the job easier. Here’s a list of essential items and why they’re useful: 1. Windshield Adhesive Remover A specialized adhesive remover is designed to break down strong automotive adhesives without harming the glass. It works effectively on stubborn glue residues, making removal easier. 2. Rubbing Alcohol (Isopropyl Alcohol) Helps dissolve adhesive residue and evaporates quickly, leaving no streaks behind. Ideal for cleaning small glue spots. 3. White Vinegar A natural and mild adhesive remover that loosens glue bonds without damaging the glass surface. It’s also safe and eco-friendly. 4. Plastic Scraper or Razor Blade Useful for carefully scraping off excess glue without scratching the window. A plastic scraper is safer, but a razor blade can work for tougher residues when used at the correct angle. 5. Microfiber Cloth Soft and non-abrasive, a microfiber cloth helps wipe away residue without leaving streaks or scratches. 6. Soapy Water (Mild Dish Soap & Warm Water) A gentle solution for initial cleaning and removing loosened glue particles after applying an adhesive remover. 7. Glass Cleaner After removing the glue, a glass cleaner ensures a clear, spotless finish with no streaks or residue left behind. By using these supplies, you can effectively clean glue from your car window without damaging the glass. If the adhesive is particularly tough, repeating the process with a windshield adhesive remover will ensure a spotless, residue-free surface. You can also read about car window repair in Austin. How to Clean Glue Residue from Car Window: The Essentials Removing glue residue from a car window requires the right approach to avoid damage while ensuring a spotless finish. Whether it’s leftover sticker adhesive, tape marks, or cleaning window tint glue, using the correct techniques will make the process easier. Follow this step-by-step guide for efficient glue removal. Step 1: Start with Warm, Soapy Water Mix a few drops of mild dish soap with warm water. Use a microfiber cloth to wipe the affected area, loosening the adhesive. Let it sit for a few minutes before gently scrubbing to see if the glue comes off. Step 2: Apply Rubbing Alcohol or Vinegar for Stubborn Residue If soap and water don’t work, soak a clean cloth in rubbing alcohol or white vinegar and press it onto the glue for a few minutes. These solutions help break down tougher adhesives, making them easier to wipe away. Step 3: Scrape Off Residue Using a Plastic Scraper or Old Credit Card Gently scrape the softened glue with a plastic scraper or an old credit card to avoid scratching the glass. Avoid using metal blades directly on the glass, as they can cause scratches. Step 4: Repeat if Necessary For stubborn cleaning window tint glue, reapply rubbing alcohol or vinegar and scrape again. Use a microfiber cloth to remove any leftover residue. Step 5: Finish with a Glass Cleaner Once the glue is fully removed, spray a glass cleaner on the window and wipe it down for a clear, streak-free finish. Safety Precautions Always use plastic scrapers or soft cloths to prevent scratching. Test rubbing alcohol or vinegar on a small area first to ensure compatibility. Work in a shaded area to prevent solutions from evaporating too quickly. By following these steps, you can effectively remove glue residue without damaging your car window. Whether dealing with old stickers or cleaning window tint glue, the right approach ensures a clean and polished finish. What Type of Cooking Oil Removes Window Sticker Residue? Cooking oils like olive oil, coconut oil, and vegetable oil can effectively break down adhesive and remove sticker residue from car windows. These oils work by softening the glue, making it easier to wipe away without damaging the glass. How Cooking Oils Help Remove Adhesive Cooking oils contain natural fats that penetrate the sticky residue, loosening its grip on the surface. Unlike harsh chemical removers, oils are non-toxic and safe to use, especially on delicate surfaces. Best Cooking Oils for Removing Window Sticker Residue Olive Oil – Penetrates adhesive quickly and is easy to wipe off. Coconut Oil – Has a thicker consistency, making it effective for stubborn glue. Vegetable Oil – A budget-friendly option that works well for general adhesive removal. Step-by-Step Guide to Removing Glue with Cooking Oil Step 1: Apply Cooking Oil Pour a small amount of your preferred cooking oil onto a clean microfiber cloth or paper towel. Dab the oil onto the sticker residue, ensuring full coverage. Step 2: Let It Sit Allow the oil to soak into the adhesive for 5–10 minutes to break down the glue. For tougher residue, leave it on longer or apply more oil. Step 3: Wipe Away the Glue Use the same cloth to rub the area gently. If needed, scrape off loosened residue with a plastic scraper or an old credit card. Step 4: Clean the Glass After the glue is gone, clean the window with warm, soapy water or a glass cleaner to remove any oily residue. Wipe with a dry microfiber cloth for a streak-free finish. Cooking Oil vs Chemical-Based Removers Feature Cooking Oils (Olive, Coconut, Vegetable) Chemical-Based Adhesive Removers Effectiveness Works well but may take longer Works faster on strong adhesives Safety
How To Clean Glue Residue From Car Window Read More »

Why Are My Car Windows Fogging Up Inside?

Why Are My Car Windows Fogging Up Inside? Quick Fix Guide

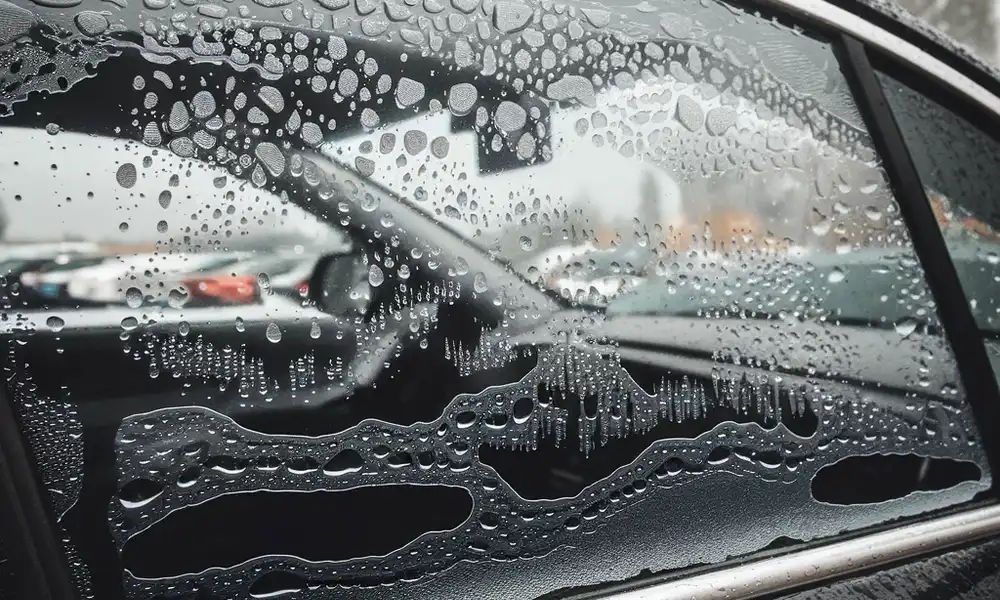
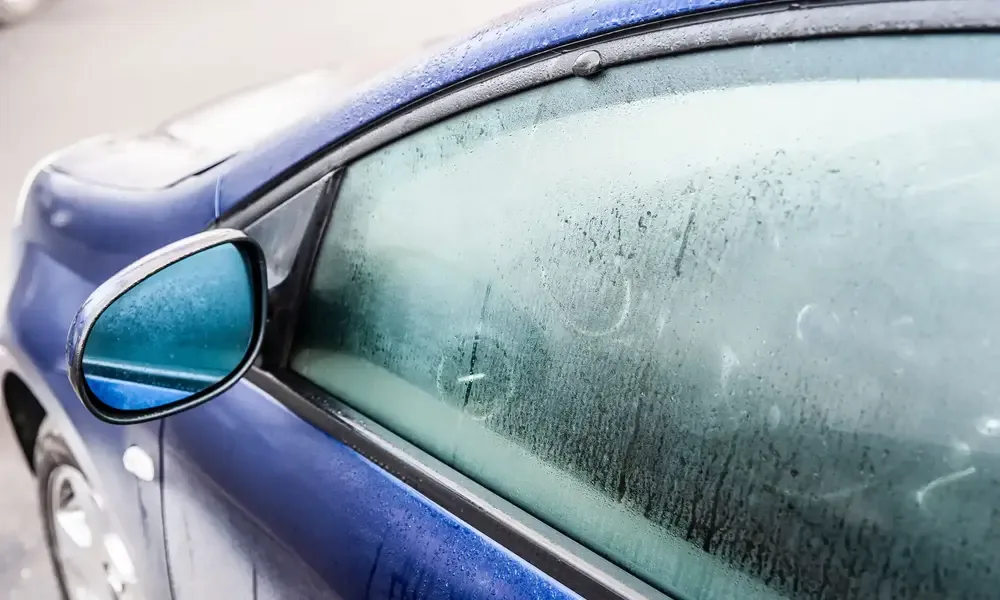
If you already opened this article because the car window fogged up! question, then you’re right this phenomenon is irritating on the road, where visibility is important for our own drivers and others. A lot of drivers have this question on their mind, Why Are My Car Windows Fogging Up Inside? It’s not just a nuisance when condensation shows up on the inside of your car’s windows, but it can also be a hazard by limiting your line of sight. So, indeed, it can occur in both summer and winter, and it’s a mystery to drivers, even if there is a possibility of causing the accident.  The good news is, once you know how window fog forms and what makes your car too moist, you’ll have an easier time stopping and dealing with it. What Causes Car Windows to Fog Up Inside? The main cause of car windows fogging up inside is warm, moist air in your vehicle. Many people notice their car windows fog up immediately after they start driving, and it’s easy to understand why moisture is constantly collecting on the inside of your cabin, even on the shortest of rides. You don’t realize how much moisture you carry into your car every day from doing daily things. Wet clothing, damp shoes, rain-soaked umbrellas, and even the humidity in your breath are all contributing factors to an over-moisturized cabin. Your car’s HVAC system is no exception. When the recirculation mode is on, it just raises the humidity inside the car and contributes to fog formation in the car. After identifying these issuers, you will see the effect of the wave and the Correction to expect will become clearer.  Why Are My Car Windows Fogging Up Inside Even With the AC On? You may long for the air conditioner when summer days come, but this is what nobody says: you still have to deal with fog. Why do windows fog up in car reviewers often ask this question, wondering if it’s related to the car using AC or heaters. It’s usually due to system imbalances or maintenance needs. Below are the leading drivers of this condition: 1. A Failing AC Compressor Now that you have tested the relay, let’s test the AC compressor motor. Your air conditioner does more than just blow cold air it also removes moisture from the air inside your car or truck. When your AC compressor isn’t working right and isn’t compressing air as it should, it can’t dry the air. Humid air gets trapped inside the car and condenses on the windows when temperature changes occur. It’s  one of the main reasons why even experienced drivers find their windows fogging up when the heat’s on. 2. Clogged Cabin Air Filter Smoky odors and particles linger in your ductwork and may eventually be released into your living space. When the cabin door doesn’t open to let fresh air in, the air inside gets humid and clings to the windows. No wonder you can even get fog on the glass when the AC is cranked up full blast, and it really won’t go away. 3. Blocked AC Drain Line While cooling the air in the vehicle, the air conditioner also generates water, which needs to be drained via a tube. When it is plugged in, moisture builds up in the vehicle, creating a very humid environment.  This is also because car windows fogging up inside can occur even on dry days, and it always has drivers scratching their heads.  Why Do Car Windows Fog Up During the Summer? People- get the fog up, fogging is a winter problem, but summer sports traffic, you get fogged up. Warm Side of the Windshield: Here is why this occurs on the warm side ofthe  windshield:     High Outdoor Humidity: The warmer the air is, the more water vapor it can hold. Humid air condenses so fast on the frozen glass as soon as humid air enters the car.     Rapid Temperature Drops: You may have a very hot inside of your car after leaving it out in the sun. With the sudden temperature change in the air conditioner, condensation is being produced on the cold glass.     Wet Items Inside the Car: Your gym bag, bath towel, swimming gear, and your dirty laundry all bring water into your vehicle when the windows are chilled, that moist fog up the windows. Other Lesser-Known Summer Causes Poor Internal Ventilation – Inside Car. When these are closed or covered, moist air is trapped inside your vehicle. No air circulation makes it condense on windows, particularly with the air conditioner in use. HVAC Problems – A coolant leaking heater core or blend dags, blower motors, and evaporator coils may also cause moisture within your air system. Lingering Moisture From Rain – That little bit of water you carry inside on your shoes and pants legs can evaporate inside a car with the windows up. It’s just moisture, which, at the end of the day, builds up on glass in a way that makes you wonder how you managed without it.  How to Clear Foggy Car Windows Fast Fog is dangerous because it can restrict visibility. How To Get Rid of It     Turn on the Defroster: Warm, dry air from your heater melts the ice on the inside of your windshield as warm air from outside works to defrost it on the outside. “That’s the best way to prevent fog from forming inside your car,” says Keating.     Turn Off Recirculation: Any time you shove a bunch of people into a small space, whether it’s a car or a room, moisture condenses on the cold surfaces. A fan and air conditioning can facilitate the taking down of the medicine as well.     Use Heater and AC Together: Use your heater to melt the ice on your windshield, and your AC to take the moisture out of the air. Several systems working together have a much greater combined effect in preventing moisture

Why Are My Car Windows Fogging Up Inside? Quick Fix Guide Read More »

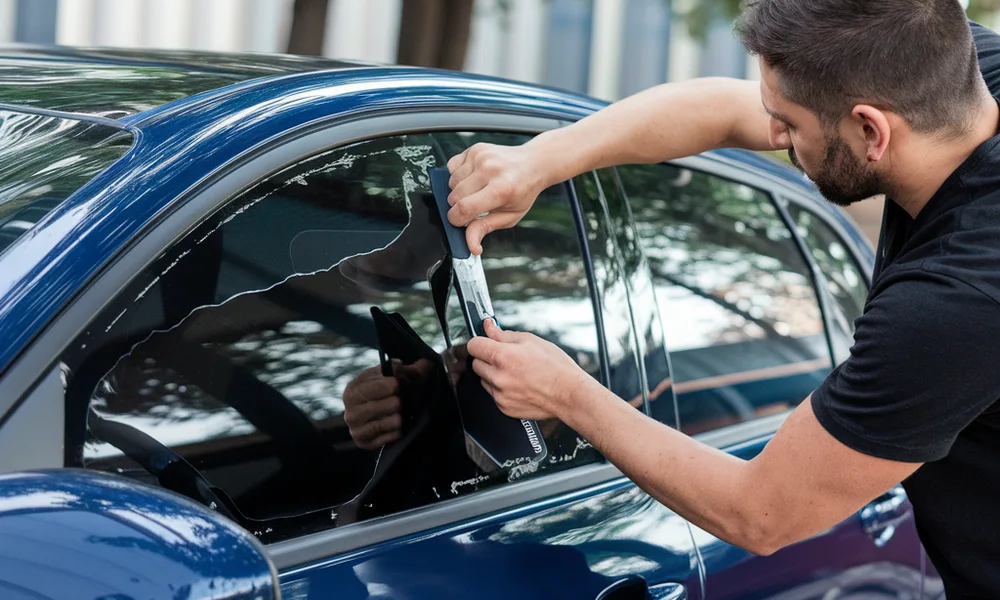
How to Remove Sticker from Car Window in 5 Simple Steps

How To Remove Sticker From Car Window

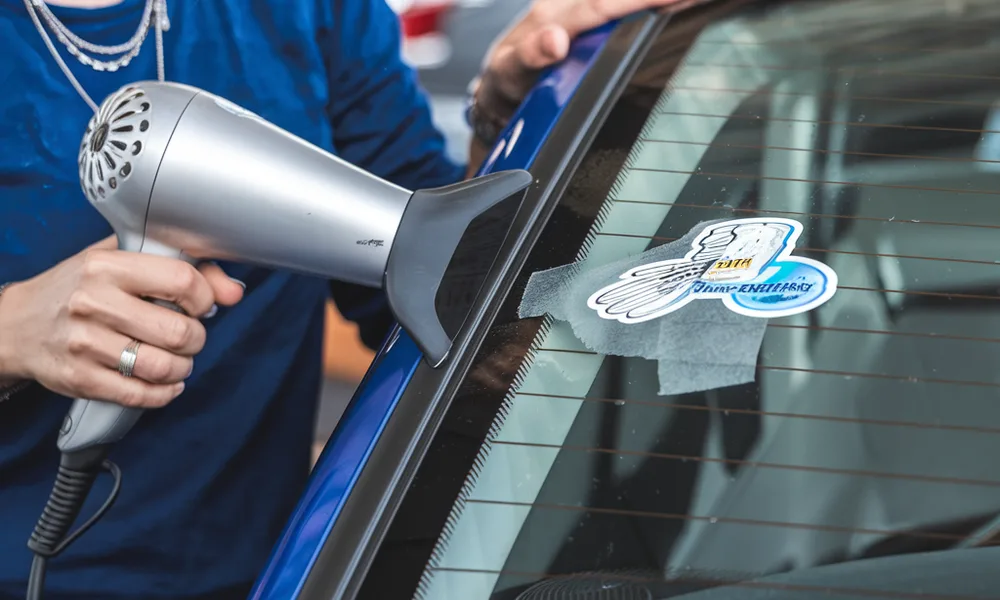
How to remove sticker from car window without causing damage is a common concern for car owners. Stickers are often placed on car windows for various reasons, such as parking permits, decorative decals, or promotional materials. However, over time, these stickers may become outdated, start peeling, or no longer serve a purpose, prompting the need for removal. Whether it’s an expired registration sticker or an old bumper sticker, removing them properly is essential to prevent scratches or residue buildup. Using the right techniques ensures that you can remove a sticker from a car window efficiently without harming the glass or leaving sticky residue behind. 5 Ways of How to Remove Sticker from Car Window Removing stickers from a car window requires the right technique to avoid leaving behind adhesive residue or damaging the glass. Here are five effective methods you can use: Method 1: Using Warm Soapy Water This method works best for paper-based stickers and stickers that haven’t been on the window for too long. Steps: Fill a bucket with warm water and add a few drops of dish soap. Mix until bubbles form. Soak a sponge or cloth in the soapy water and press it against the sticker for 5–10 minutes to soften the adhesive. Once the sticker starts loosening, try peeling it off gently using your fingers or a plastic scraper. If any adhesive remains, rub it with the sponge in circular motions until it dissolves. Wipe the window clean with a dry microfiber cloth to remove excess moisture. This method is safe and easy but may require patience if the sticker is strongly attached. Method 2: Applying Vinegar or Rubbing Alcohol Vinegar and rubbing alcohol work well because they break down the glue without damaging the glass. Steps: Soak a paper towel or clean cloth in white vinegar or rubbing alcohol. Place the damp cloth over the sticker and press it down for 5–10 minutes to allow the liquid to penetrate the adhesive. Start peeling the sticker from one corner. If it resists, apply more vinegar or alcohol and wait a little longer. Use a clean cloth to remove any leftover adhesive. Finish by cleaning the window with a glass cleaner to remove any streaks. This method is great for stubborn stickers, but be sure to avoid spilling alcohol on the car’s paint. Method 3: Using a Hair Dryer or Heat Gun Applying heat helps soften the glue, making it easier to remove the sticker without leaving residue. Steps: Plug in a hair dryer or heat gun and set it to a low or medium heat setting. Hold it about 3–5 inches away from the sticker and move it in circular motions for 30–60 seconds. As the adhesive warms up, use your fingers or a plastic scraper to slowly peel off the sticker. If needed, reheat stubborn areas and continue peeling. Use a cloth dampened with rubbing alcohol or soapy water to clean any leftover residue. Safety Tip: Avoid using high heat for too long to prevent cracking the glass, especially in cold weather. Method 4: Commercial Adhesive Removers If DIY methods don’t work, you can use a commercial adhesive remover like Goo Gone, WD-40, or 3M Adhesive Remover. Steps: Apply a small amount of adhesive remover to a clean cloth or directly onto the sticker. Let it sit for 1–2 minutes to break down the glue. Start peeling the sticker from one corner, using a plastic scraper if needed. Wipe away any remaining adhesive with a fresh cloth. Wash the window with glass cleaner to remove any greasy residue. Note: Always test the product on a small area first to ensure it doesn’t affect your car’s window tint (if applicable). Method 5: Razor Blade Scraper Technique For the toughest stickers, a razor blade can help remove them cleanly, but you must use it carefully to avoid scratches. Steps: Spray soapy water or rubbing alcohol over the sticker to loosen the adhesive. Hold a razor blade or a scraper designed for glass at a 45-degree angle. Gently slide the blade under the sticker and push forward in a smooth motion. Continue scraping until the sticker is completely removed. Clean any remaining residue with rubbing alcohol and a microfiber cloth. Precaution: Only use a razor blade on bare glass, not on tinted windows, as it can scratch or damage the tint film. You can also read about window repair in Austin. How to Remove Sticker Residue from Car Windows Removing stickers from car windows can be frustrating, especially when sticky residue remains after peeling them off. This residue is caused by adhesive that bonds with the glass over time, making it difficult to remove completely. Below, we’ll cover the best methods to remove sticker from car glass using common household items and professional products. Why Residue Remains After Sticker Removal When a sticker is exposed to sunlight and temperature changes, the adhesive melts and hardens repeatedly, making it difficult to peel off cleanly. This process leaves behind a sticky film that is resistant to basic cleaning methods. Using the wrong techniques, like scraping with sharp objects, can even damage the glass. Recommended Products to Remove Sticker from Car Glass To effectively remove sticker residue, you’ll need the right products. Here are some of the best options: Glass cleaner – Loosens the adhesive for easy removal. WD-40 – Works as a degreaser to break down sticky substances. Rubbing alcohol (Isopropyl alcohol) – Dissolves adhesive residue. Baking soda paste – A natural abrasive that lifts off stubborn glue. White vinegar – Softens the adhesive and makes it easier to wipe away. Plastic scraper or old credit card – Helps lift off residue without scratching the glass. Step-by-Step Process to Remove Sticker Residue from Car Glass Step 1: Peel Off as Much as Possible Use your fingers or a plastic scraper to remove as much of the sticker as possible. Be gentle to avoid damaging the glass. Step 2: Apply a Cleaning Solution Choose one of the recommended products

How To Remove Sticker From Car Window Read More »

How to Remove Tint from Car Windows – Best Methods

How to Remove Tint from Car Windows

How to remove tint from car windows properly is essential to avoid damage and ensure a clean finish. Many car owners consider removing tint from car windows due to issues like bubbling, discoloration, or fading, which can obstruct visibility and make the vehicle look worn out. In some cases, local laws require compliance with specific tinting regulations, prompting drivers to strip off illegal or overly dark tints. Using the right techniques, such as steam, ammonia, or soapy water, helps prevent scratches or damage to the glass. Proper removal also ensures no sticky residue is left behind, making it easier to reinstall new tint if desired. DIY Techniques for Removing Car Window Tint If your car’s window tint is peeling, bubbling, or fading, you can remove it yourself using simple methods. Below is a step-by-step guide on removing auto window tint using common tools. Tools Needed: Razor blade or utility knife Hairdryer or steamer Spray bottle Dish soap Ammonia (for the soapy ammonia method) Plastic wrap Microfiber cloth Method 1: Heat-Based Removal (Using a Hairdryer or Steamer) Step 1: Apply Heat Turn on the hairdryer or steamer and hold it a few inches away from the window tint. Start at one corner and heat the tint for about 30 seconds until the adhesive softens. Step 2: Peel Off Window Tint Use a razor blade or fingernail to lift a corner of the tint. Slowly pull it off in one piece while applying more heat as needed. Step 3: Clean Off Adhesive Residue Spray soapy water on the remaining adhesive. Use a razor blade or microfiber cloth to wipe it off. Method 2: Soapy Ammonia Method Step 1: Prepare the Surface Park the car in direct sunlight for better results. Spray ammonia on the tinted window and cover it with plastic wrap. Step 2: Let It Soak Leave it for at least 30 minutes to loosen the glue. Carefully remove the plastic wrap. Step 3: Peel Off Window Tint Use a razor blade to lift a corner and slowly remove the tint. Spray more ammonia if the tint sticks. Step 4: Remove Adhesive Residue Spray soapy water and wipe away any remaining glue with a microfiber cloth. Final Cleanup After removing auto window tint, clean the glass with a glass cleaner for a streak-free finish. These DIY methods make it easy to peel off window tint without damaging the glass. If the tint is difficult to remove, a professional auto glass service can help. You should read about Mobile Window Repair. Precautions and Best Practices When you remove car window tint, it’s important to follow safety measures to avoid damaging the glass or harming yourself. Below are key precautions and best practices to ensure a smooth and safe tint removal process. 1. Prevent Scratching or Damaging the Glass Use a plastic razor blade instead of a metal one to avoid scratching the window. Apply heat carefully—excessive heat from a steamer or hairdryer can weaken the glass. Avoid using sharp tools on defroster lines or embedded antennas, as they can be damaged easily. 2. Ensure Proper Ventilation When Using Chemicals When using ammonia or any strong cleaner, work in an open area or keep car doors open for airflow. Wear gloves and a mask to avoid inhaling fumes. Never mix ammonia with other household cleaners, as it can create toxic fumes. 3. Remove Residual Adhesive Without Leaving Streaks Spray a mixture of soapy water or rubbing alcohol onto the remaining adhesive. Use a microfiber cloth to wipe away residue without leaving streaks. If stubborn glue remains, a non-abrasive sponge or fine steel wool (0000-grade) can help remove it without scratching. Finish by cleaning the glass with auto glass cleaner to restore clarity. Alternate Window Tint Removal Methods If traditional methods don’t work or you want to try different techniques, here are some alternative ways to remove car window tint effectively. 1. Using Commercial Tint Removal Products Many auto parts stores sell window tint removal sprays that dissolve adhesive. Spray the product on the tint and let it sit for a few minutes. Use a razor blade or plastic scraper to peel off the tint carefully. Wipe away any remaining glue with a microfiber cloth and glass cleaner. 2. Vinegar and Baking Soda Technique Mix equal parts white vinegar and warm water in a spray bottle. Spray generously on the window tint and let it soak for at least 30 minutes. Sprinkle baking soda onto a damp cloth and gently scrub the tint to loosen it. Peel off the tint and clean the glass with soapy water to remove any residue. 3. Black Plastic Bag and Sunlight Method Cut a black plastic trash bag to fit the window and spray soapy water on the tint. Place the plastic bag over the wet window and press it down to remove air bubbles. Park the car in direct sunlight and let it sit for 30–60 minutes. The trapped heat softens the adhesive, making it easier to peel off the window tint in large sections. These alternative methods offer simple and effective ways to remove car window tint without using harsh chemicals. If the tint is still difficult to remove, professional auto glass services can help. Professional vs DIY Tint Removal If you need to remove car window tint, you can either do it yourself or hire a professional. Each option has its pros and cons, depending on your skill level, available tools, and the condition of the tint. 1. DIY Tint Removal: Pros and Cons Pros: Cost-Effective: Only requires basic tools like a razor blade, soap, and a hairdryer. Convenience: You can do it at home without scheduling an appointment. Good for Light Damage: If the tint is already peeling, DIY methods work well. Cons: Time-Consuming: Can take 1 to 3 hours depending on the method used. Risk of Damage: Using sharp tools or excessive heat may scratch or weaken the glass. Adhesive Residue: Removing glue completely without streaks can be challenging. 2. Professional Tint

How to Remove Tint from Car Windows Read More »

How to Clean Car Windows Without Streaks | Best Guide

How To Clean Car Windows Without Streaks

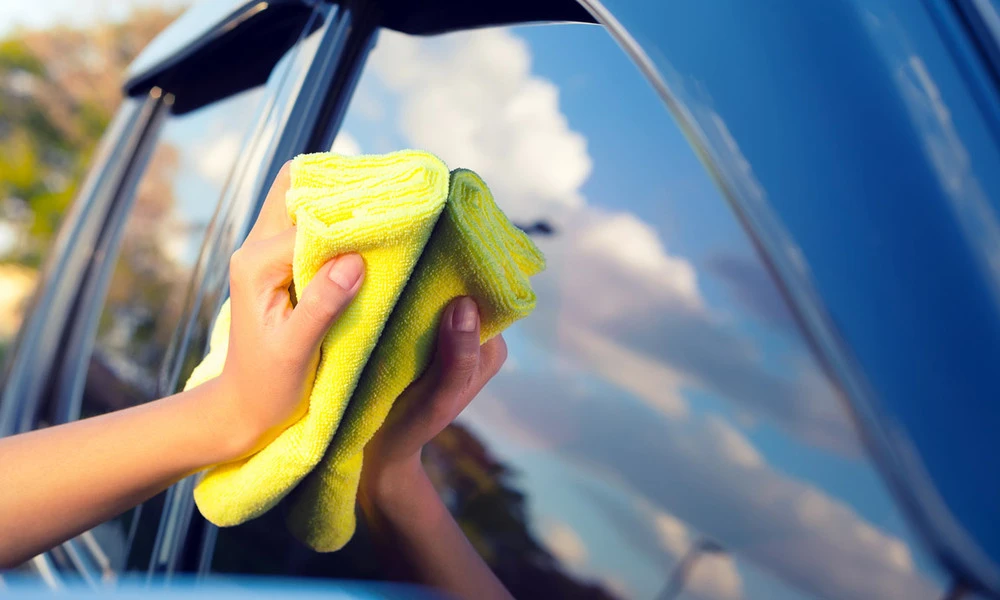
How to clean car windows without streaks starts with using the right cleaning method, tools, and products. Streak-free windows enhance visibility while driving and improve the overall appearance of your vehicle. Many car owners struggle with streaks because of improper techniques, using the wrong cleaners, or leaving behind residue. To achieve crystal-clear windows, it’s essential to use a high-quality glass cleaner, a microfiber cloth, and a proper wiping technique. Understanding why streaks appear—often due to residue from household cleaners, dirty towels, or hard water—can help you avoid them. With the right approach, you can keep your car windows spotless and free of streaks. Why Do Streaks on Car Windows Won’t Come Off? Streaks on car windows can be frustrating, especially when they don’t come off despite multiple cleaning attempts. The main reasons for stubborn streaks include poor-quality cleaning products, improper cleaning techniques, and environmental factors. To achieve cleaning car windows streak free, it’s important to understand and avoid these common mistakes: 1. Poor-Quality Cleaning Products Some glass cleaners contain harsh chemicals, ammonia, or wax-based formulas that leave behind a residue. This residue can cause streaking, making your windows appear dirty even after cleaning. Always use a high-quality, ammonia-free glass cleaner designed for automotive use. Homemade solutions like a mix of distilled water, vinegar, and a small amount of dish soap can also be effective in cutting through grime without leaving streaks. 2. Using the Wrong Type of Cloth or Paper Towels Regular paper towels or low-quality microfiber cloths can leave lint and fibers on the glass, contributing to streaks. Instead, use a clean, high-quality microfiber cloth that absorbs moisture efficiently and doesn’t shed particles. For best results, keep one cloth for wiping and another dry one for buffing the glass to a streak-free shine. 3. Cleaning Windows in Direct Sunlight Cleaning your car windows under direct sunlight causes the cleaning solution to evaporate too quickly, leaving behind streaks and water spots. Always clean your windows in a shaded area or during cooler parts of the day for better results. Cloudy days or early morning and evening hours are the best times to clean car windows. 4. Not Drying the Windows Properly Leaving excess cleaning solution on the glass without thoroughly drying it can result in streaks. After applying the cleaner, wipe the window in a circular motion first to break down grime and then finish with horizontal or vertical strokes to ensure complete coverage. Using a second dry microfiber cloth for a final wipe will remove any remaining moisture, preventing streaks. 5. Skipping Interior Window Cleaning Many drivers focus only on the exterior windows, forgetting that interior glass can also develop streaks due to dust, fingerprints, and off-gassing from car upholstery. Use a separate microfiber cloth and glass cleaner for the inside to avoid transferring dirt from the exterior. How to Ensure Cleaning Car Windows Streak Free Use an ammonia-free automotive glass cleaner. Choose a clean, high-quality microfiber cloth for both wiping and drying. Avoid cleaning in direct sunlight to prevent rapid evaporation. Wipe in one direction for the final pass (horizontal for side windows, vertical for the windshield). Don’t forget to clean the inside windows for a completely clear view. By following these tips, you can prevent streaks and keep your car windows crystal clear, ensuring a safer and more enjoyable driving experience. You can read about mobile window repair in Austin. 5 Steps of How to Clean Car Windows Without Streaks Having streak free car windows enhances visibility and improves your car’s overall appearance. However, many people struggle with streaks even after cleaning their windows. By following these five simple steps, you can achieve clean car windows without streaks every time. Step 1: Gather the Right Cleaning Supplies Using the right products is crucial for streak-free results. Choose an ammonia-free glass cleaner, as ammonia-based products can leave residue and damage window tint. If you prefer a DIY option, a mixture of distilled water, vinegar, and a small drop of dish soap works well. Recommended Cleaning Tools: High-quality microfiber cloths (avoid paper towels as they leave lint). A separate cloth for buffing to remove excess moisture. Alternatively, crumpled newspaper can provide a streak-free shine. Step 2: Choose the Right Time & Location Cleaning your car windows in direct sunlight or on a hot day can cause the cleaning solution to evaporate too quickly, leading to streaks. To achieve streak free car windows, always clean in a shaded area, preferably during the early morning or evening when temperatures are lower. Step 3: Wipe in a Specific Motion The way you wipe the glass plays a significant role in preventing streaks. For side windows, use an up-and-down motion to cover the surface evenly. For windshields and rear windows, use a circular motion to break down dirt, then finish with horizontal or vertical strokes for a clear finish. Work in sections to ensure thorough cleaning without missing spots. Step 4: Use a Two-Towel Method One of the best ways to clean car windows without streaks is by using a two-towel method: Towel 1: Apply the glass cleaner and wipe away dirt. Towel 2: Use a dry microfiber cloth to buff the glass and remove any leftover moisture or residue. This technique prevents streaking by ensuring no excess cleaner remains on the surface. Step 5: Check for Streaks and Buff If Necessary After cleaning, inspect your windows from different angles and lighting conditions. If you notice any streaks, use a dry microfiber cloth to buff the area gently. This final step guarantees streak free car windows, leaving them crystal clear. By following these five steps and using the right cleaning methods, you can clean car windows without streaks and enjoy a spotless, glare-free view every time you drive. You should read about How To Repair Window Tint Bubbles. Common Mistakes While Cleaning Car Windows Keeping your car windows clean enhances visibility and improves your vehicle’s overall appearance. However, many people unknowingly make mistakes that lead to streaks, haze, or even damage. Avoid

How To Clean Car Windows Without Streaks Read More »

How to Remove Water Spots from Car Windows | Easy Guide

How To Remove Water Spots From Car Windows

How to remove water spots from car windows is a common concern for car owners who want to maintain clear visibility and a spotless appearance. Water spots form when mineral-rich water dries on the glass, leaving behind stubborn deposits. If left untreated, these spots can become more difficult to remove and may even cause etching over time. Removing water spots is essential not only for maintaining a clean and polished look but also for ensuring safe driving by keeping the windshield and windows free from obstructions. These spots are often caused by hard water, acid rain, or sprinkler systems, and they require specific cleaning methods to be fully eliminated. In this guide, we’ll explore effective ways to remove water spots from car windows using both household and professional solutions. What Causes Water Spots on Car Windows? Water spots on car windows happen when water dries and leaves behind minerals or contaminants. These spots can make your windows look dirty and reduce visibility while driving. Here are the main causes of water spots and how to prevent them: 1. Hard Water Deposits High concentrations of minerals like calcium and magnesium are seen in hard water. When water from a hose, car wash, or even rain evaporates, these minerals stay behind, creating stubborn white or chalky spots on the glass. 2. Acid Rain Acid rain is rainwater mixed with pollutants from the air. When this water dries on your car windows, it leaves behind mineral deposits and acidic residue that can cause etching over time, making the glass look dull. 3. Sprinkler System Overspray If your car is parked near a sprinkler system, water droplets may land on the windows. Since sprinkler water often comes from underground sources, it contains minerals that dry into visible spots on the glass. 4. Contaminants in Rainwater Rainwater isn’t always clean—it can carry dust, dirt, pollen, and pollution from the air. When the water dries, these contaminants settle on the glass, leaving behind cloudy or spotted marks. 5. Improper Drying After Car Washes Washing your car is important, but if you let it air dry instead of wiping it down, water droplets will evaporate and leave behind mineral residue. Using a dirty or rough towel can also spread dirt, creating streaks and water spots. You can also read about Broken Car Glass Window Repair. How to Remove Water Spots from Car Windows by Yourself Water spots can make your car windows look dirty and reduce visibility. These spots form when minerals and dirt in water dry on the glass. Luckily, you can easily remove water spots from car windows using simple DIY methods or professional cleaners. Here’s how: 1. DIY Cleaning Solutions You can use household items to remove window water spots effectively. Vinegar and Water Solution: In a spray bottle, combine equal parts white vinegar and water. Spray it on the glass, let it sit for a few minutes, then wipe with a microfiber cloth. The vinegar breaks down the minerals, making it easy to remove water spots from car windows. Baking Soda Paste: After a few minutes of sitting, use a moist cloth to wipe it clean. Apply it to the spots and gently scrub with a soft cloth. Rinse with clean water and dry the window properly. Lemon Juice – The natural acidity of lemon juice helps dissolve mineral deposits. Squeeze fresh lemon juice onto a cloth and rub it over the water spots. Let it sit for a few minutes before wiping clean with a damp cloth. 2. Using Commercial Water Spot Removers If DIY methods don’t fully remove window water spots, you can try store-bought glass cleaners made for hard water stains. Choose the right cleaner – Look for a glass cleaner designed to remove water spots from car windows. Products with mild abrasives or acidic formulas work best. Apply safely – Spray the cleaner on the window and let it sit for a few seconds. Use a microfiber cloth to wipe it off in circular motions. Avoid using rough materials that could scratch the glass. 3. Clay Bar Treatment A clay bar is a great tool for removing stubborn water spots. It lifts mineral deposits and other contaminants from the glass surface. How to use a clay bar: Wash and dry your car windows first. Spray a clay bar lubricant or soapy water on the window. Gently rub the clay bar over the glass in circular motions. Wipe the surface with a clean microfiber cloth. Clay bars are also useful for removing other tough stains like tree sap and road grime. 4. Polishing and Buffing If water spots have been on your car windows for a long time, they may need a deeper cleaning with a polishing compound. When to use polish – If the spots don’t come off with regular cleaning, a mild polishing compound can help remove window water spots. Proper technique – Apply a small amount of polish to the window and use a clean cloth or a buffer pad to rub it in. To prevent scratches or streaks, move in circular motions. Final Tips to Keep Windows Spot-Free Dry your car windows after washing to prevent new spots. Use a glass sealant or water repellent to stop water from sticking. Clean your windows regularly to avoid mineral buildup. By following these steps, you can easily remove water spots from car windows and keep your glass clear for a better driving experience. Remove Hard Water Stains from Glass Windows (Alternative Methods) Hard water stains on glass windows can be tough to remove. These stains form when mineral-rich water dries and leaves behind deposits. If regular cleaning methods don’t work, try these alternative solutions to remove water spots on glass effectively. 1. Using Ammonia-Based Cleaners for Tough Stains For stubborn hard water stains, ammonia-based glass cleaners can help break down mineral buildup. How to Use: Mix one part ammonia with three parts water in a spray bottle. Spray the solution on the glass and let it sit

How To Remove Water Spots From Car Windows Read More »

What Is Windshield Calibration? Everything You Need to Know

What Is Windshield Calibration | Ultimate Guide

What is windshield calibration? It is the process of precisely adjusting the cameras and sensors mounted on a vehicle’s windshield to ensure they function correctly. Modern vehicles equipped with Advanced Driver Assistance Systems (ADAS) rely on these cameras for safety features like lane departure warnings, adaptive cruise control, and emergency braking. Without proper windshield ADAS calibration, these systems may not work as intended, increasing the risk of accidents. Whether due to a windshield replacement, accident, or sensor misalignment, calibration is essential to maintain the accuracy and reliability of your vehicle’s safety features. Process and Types of Windshield Calibration Talk To Windshield Calibration Expert Process of Recalibrating the ADAS Camera After Windshield Replacement Inspection – The technician checks the new windshield and the ADAS camera to ensure everything is properly installed. Connecting to the Vehicle’s System – A diagnostic tool is used to access the car’s computer and check the camera settings. Choosing the Right Calibration Method – Depending on the vehicle type, the technician will either perform static or dynamic calibration. Performing the Calibration – The camera is adjusted to make sure it aligns with the manufacturer’s specifications. Testing – The system is tested to confirm that all ADAS features are working correctly. Two Main Types of Calibration Static Calibration   This type of calibration is done in a controlled environment, like a workshop or service center. A technician places specific targets in front of the vehicle and uses a calibration tool to adjust the camera. The vehicle must remain still during this process. Dynamic Calibration   This type requires driving the vehicle on a straight road under specific conditions. The car’s system automatically adjusts the camera as it gathers real-time data from the road. The technician follows instructions provided by the manufacturer to ensure accurate calibration. Both methods are necessary depending on the vehicle model. Some vehicles require only one type, while others need both. If you need to calibrate the windshield, it is important to take your car to a professional who understands ADAS systems. Proper calibration ensures that safety features work as expected, keeping you and other drivers safe on the road. When Is Windshield Camera Calibration Necessary? The recalibration of windshield cameras is essential to ensure that ADAS (Advanced Driver Assistance Systems) functions correctly. If the camera is not properly aligned, features like lane departure warnings and automatic braking may not work as they should. Here are some situations where windshield camera recalibration is required: Windshield Replacement When replacing a windshield, the ADAS camera attached to it may shift, requiring recalibration. Even a slight misalignment can impact safety features. ADAS Sensor Misalignment Warnings If your vehicle displays a warning about ADAS sensor misalignment, it means the system has detected an issue with the camera’s position. Recalibration ensures accurate functioning. Vehicle Accidents or Collisions A crash, even a minor one, can affect the windshield camera’s position. Whether the impact is on the front, side, or rear of the vehicle, recalibration is necessary to restore accuracy. Suspension Modifications Affecting Camera Angles Changes to the vehicle’s height, such as new suspension parts or larger tires, can shift the camera’s viewing angle. This can interfere with how ADAS features operate, making recalibration essential. Ignoring the recalibration of windshield cameras can lead to faulty ADAS performance, increasing the risk of accidents. Always get your windshield camera recalibrated by a professional to ensure your safety on the road. How Adas Calibration Ensures Cameras And Sensors Work Accurately ADAS calibration ensures that the cameras and sensors in a vehicle are precisely aligned to function as intended. These systems play a key role in modern driving safety. When the windshield is replaced, windshield sensor calibration is critical, as sensors integrated into the windshield, like those for lane departure warning, adaptive cruise control, and automatic emergency braking, rely on precise calibration to operate effectively. Without it, even slight misalignments could compromise the performance of these systems. How Calibration Affects Safety Features Lane Departure Warning The lane departure warning system uses cameras and sensors to detect lane markings. If these sensors are not calibrated correctly, the system may fail to pick up on lane markings, resulting in incorrect warnings or no warnings at all. This can lead to unintentional lane drifts, increasing the risk of accidents, especially on highways or busy streets where lane discipline is crucial. Adaptive Cruise Control Adaptive cruise control relies on radar and cameras to monitor traffic conditions and adjust the vehicle’s speed accordingly. If the sensors are out of alignment, the system might not detect vehicles at the right distance or might make abrupt speed changes, causing erratic driving behavior. This could be dangerous, especially in heavy traffic, as the system may fail to respond properly to surrounding vehicles. Automatic Emergency Braking Automatic emergency braking is designed to detect imminent collisions and apply the brakes to avoid or reduce the impact. However, if the sensors are misaligned due to improper calibration, they may not detect obstacles or other vehicles in time. This can lead to delayed braking or failure to activate at all, significantly reducing the vehicle’s safety features in emergency situations. When to Perform Windshield Sensor Calibration To ensure that these safety systems function correctly, windshield sensor calibration should be performed any time the windshield is replaced, after a minor accident, or when any repair affects the sensors’ alignment. This calibration ensures that all ADAS features respond accurately, maintaining optimal safety and performance. Failing to calibrate the sensors could lead to unsafe driving conditions and undermine the effectiveness of the vehicle’s advanced safety systems. Proper calibration keeps these systems working as they were designed to, offering drivers peace of mind and a safer driving experience. You can also get a service of windshield replacement in Austin. How Do I Know If My Vehicle Has ADAS? Advanced Driver Assistance Systems (ADAS) are common in modern cars. Here’s how to identify if your vehicle is equipped with them. Common Indicators of ADAS Features Lane Departure Warning – Notifies you when you

What Is Windshield Calibration | Ultimate Guide Read More »

What Are the Black Dots on My Windshield? Find Out Now

What Are The Black Dots On My Windshield

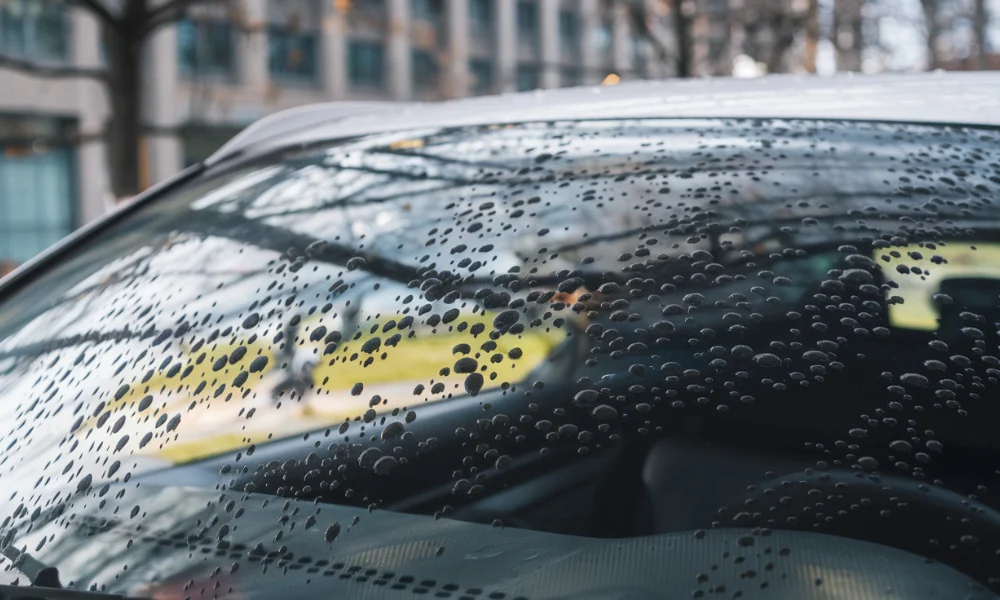
What are the black dots on my windshield? These small dots, known as the “frit,” are a ceramic paint layer baked into the glass during manufacturing. They serve both functional and aesthetic purposes, helping with even temperature distribution to reduce the risk of cracks and providing a smooth transition between the clear glass and the shaded band at the top. Many car owners worry when they notice these black dots, thinking they might be defects or signs of damage. However, the black dots windshield feature is intentionally designed to improve durability, enhance sun protection, and help adhesives bond securely when replacing the windshield. The Purpose of Black Dots on Windshields The black dots on car windshield serve both functional and aesthetic purposes. These dots, known as the “frit,” are part of the black ceramic border around the edges of the windshield. Functional Reasons for Black Dots on Car Windshield Helps in Temperature ControlWhen the windshield is exposed to sunlight, the glass can heat up quickly. The black border and dots create a gradual transition between the shaded edge and the clear glass, reducing the risk of sudden temperature changes that can cause cracks. Improves Adhesion of the WindshieldThe black border and dots help the adhesive used to hold the windshield in place bond better to the glass. This ensures a secure fit and prevents the windshield from loosening over time. Reduces Sun GlareThe black dots on car windshield help diffuse sunlight, reducing glare for the driver. This makes it easier to drive in bright conditions without being distracted by harsh light reflections. Aesthetic Reasons for Black Dots on Car Windshield Enhances Visual AppealThe dots create a smooth transition between the black border and the clear glass, making the windshield look more polished and integrated with the car’s design. Hides Manufacturing ImperfectionsThe black ceramic border and dots help mask small defects that may occur during the windshield production process, ensuring a cleaner look. The black dots on car windshield play an essential role in maintaining safety, improving durability, and enhancing the overall look of the vehicle. While they may seem like a minor detail, they contribute to both the function and appearance of the windshield. Different Dots Have Different Purposes on Your Windshield The dots on windshield are more than just a design feature. These dots, part of a gradient pattern called the “frit,” serve multiple functions that improve the windshield’s durability, safety, and overall performance. They help regulate temperature, reduce glare, and ensure proper adhesion of the windshield to the vehicle. Understanding the Gradient Pattern (Frit) and Its Functions The black border around the edges of a windshield, along with the gradual fading dots on windshield, is called the frit. This pattern is made of ceramic paint, which is baked onto the glass during manufacturing. Temperature Control and Crack Prevention The black border absorbs heat from the sun, and without a gradual transition, the clear glass next to it could expand unevenly, causing stress cracks. The dots on windshield create a gradient effect, which helps distribute heat more evenly and prevents the sudden expansion that can lead to glass damage. Sun Glare Reduction When sunlight hits the windshield, it can create a sharp contrast between the dark edge and the clear glass, which may cause distracting glare. The dots help diffuse this contrast, softening the transition and reducing eye strain for the driver. How Dots Improve Windshield Bonding and Adhesion Stronger Adhesive Grip The black ceramic frit, along with the dots on windshield, plays a critical role in ensuring that the windshield adhesive properly bonds to the frame of the car. Without these dots, the adhesive might not stick as securely, increasing the risk of windshield displacement over time. UV Protection for Adhesive Longevity Prolonged exposure to UV rays can weaken adhesives used to attach the windshield to the car. The frit and its dot pattern act as a shield, preventing UV rays from breaking down the adhesive and ensuring the windshield remains firmly in place. Other Aesthetic and Functional Benefits of Windshield Dots Enhancing Visual Appeal The dots on windshield create a smooth transition from the black border to the clear glass, making the windshield look more integrated with the car’s design. Hiding Manufacturing Imperfections The frit and dots help mask small inconsistencies or imperfections that may occur during the windshield production process, giving it a cleaner finish. You can also read about How To Clean The Inside Of Your Car Windshield. Black Dots’ Effects on the Windscreen The windshield dots are more than just a design feature. These small black ceramic dots, part of the frit pattern, play a crucial role in improving windshield durability, reducing glare, and enhancing driving comfort. Understanding their function can help drivers appreciate why they are an essential part of every vehicle’s windshield. How Windshield Dots Contribute to Durability Prevents Thermal Stress Cracks The black border around the windshield absorbs heat from sunlight, creating a temperature difference between the edges and the clear glass. The windshield dots create a gradual transition, helping to evenly distribute heat. This prevents sudden expansion that could lead to cracks in the glass. Protects the Windshield Adhesive The black frit and windshield dots help secure the windshield to the car frame by providing a better grip for the adhesive. These dots also block harmful UV rays, preventing the adhesive from deteriorating over time, which ensures that the windshield remains firmly in place. Enhances Longevity of the Windshield By reducing heat stress and protecting adhesive integrity, the windshield dots help extend the overall lifespan of the windshield, reducing the likelihood of early replacement. Impact on Driving Visibility and Comfort Reduces Sun Glare A sharp contrast between the dark border and clear glass can cause glare, which may be distracting while driving. The windshield dots help diffuse this contrast, softening the transition and reducing the amount of bright light entering the car. Minimizes Eye Strain By reducing sudden brightness changes, the dots prevent discomfort for the driver’s eyes, especially

What Are The Black Dots On My Windshield Read More »

What Is The Difference Between A Sunroof And A Moonroof

What Is The Difference Between A Sunroof And A Moonroof

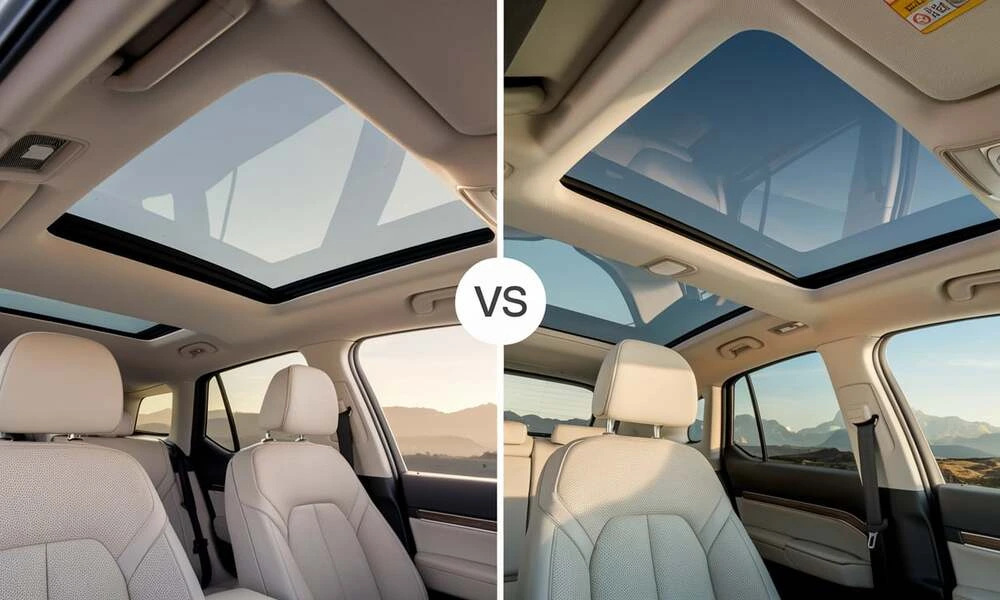
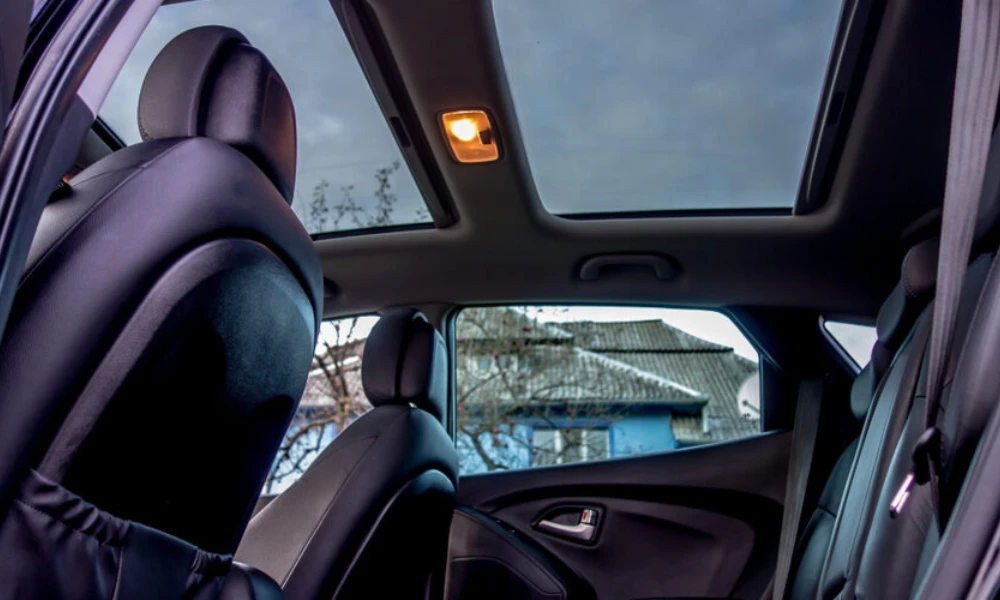
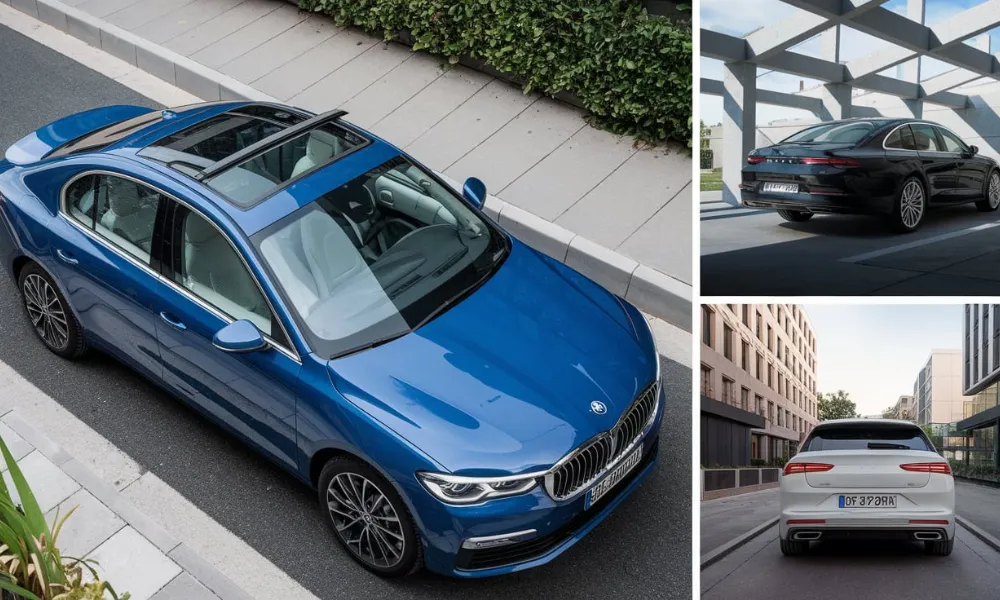
Sunroof or moonroof—which one is right for your vehicle? Many car buyers often confuse these two terms, assuming they mean the same thing. While both provide an opening in the vehicle’s roof to let in light and fresh air, there are key differences between them. A sunroof is typically a solid, opaque panel that can tilt or slide open, while a moonroof is a transparent or tinted glass panel that usually slides between the roof and the headliner. Understanding this distinction is crucial when purchasing a car, as it helps buyers make informed decisions based on their preferences for ventilation, aesthetics, and functionality. What Is a Sunroof? A sunroof is a movable panel on the roof of a vehicle that allows fresh air and natural light into the cabin. It can be manually or electronically operated, depending on the vehicle model. Materials Used in a Sunroof Sunroofs are typically made from: Tempered or laminated glass – Most modern vehicles use glass sunroofs, often tinted to reduce glare and UV exposure. Metal panels – Some older models or specific vehicle designs use metal sunroofs that slide open or tilt. Opaque composite panels – These are less common but provide a solid covering when closed. Functionality and How It Opens Sunroofs operate in different ways: Pop-up sunroof – A manually operated panel that tilts upward for ventilation. Spoiler sunroof – A panel that tilts up and slides back partially over the roof. Inbuilt sunroof – A sliding panel that retracts into the car’s roof. Panoramic sunroof – A large, multi-panel design covering most of the roof, usually made of glass. Common Vehicles with Sunroofs Many car manufacturers offer sunroofs in their models, including: Honda Accord Toyota Camry Ford Explorer BMW 3 Series Audi A4 Difference Between Sunroof and Moonroof People often use “sunroof” and “moonroof” interchangeably, but there is a key difference. A sunroof can be made of metal or glass and is designed to tilt or slide open. A moonroof is always made of tinted glass and typically slides between the vehicle’s roof and headliner. Moonroofs provide an open-air feel while still offering protection from sunlight. What Is a Moonroof? A moonroof is a type of glass panel on a vehicle’s roof that allows natural light and fresh air inside. Unlike a traditional sunroof, a moonroof is usually made of tinted glass and can tilt or slide open electrically. Differences in Design Compared to a Sunroof Feature Moonroof Sunroof Material Tinted glass Metal or opaque panel Operation Usually slides or tilts open Can be removed or flipped open Visibility Always visible even when closed Covered by a solid panel when closed Common Mechanism Power-operated Manual or power-operated A sunroof was originally a solid, body-colored panel that could be removed or tilted open. Modern cars mostly use moonroofs because they are more convenient, stylish, and allow for more natural light inside the cabin. Why Modern Cars Mostly Have Moonroofs Instead of Sunroofs Aesthetic Appeal – Glass moonroofs look more modern and luxurious. Convenience – Power-operated moonroofs are easier to use than manual sunroofs. Better Visibility – Even when closed, a moonroof allows light inside. Improved Technology – Tinted glass and UV protection make moonroofs more practical. Consumer Demand – Buyers prefer panoramic moonroofs over traditional sunroofs. Common Vehicles with Moonroofs Many manufacturers include moonroofs in their models, either as a standard or optional feature. Some popular vehicles with moonroofs include: Sedans: Honda Accord, Toyota Camry, BMW 3 Series SUVs: Toyota RAV4, Ford Explorer, Tesla Model Y Luxury Cars: Mercedes-Benz S-Class, Audi A6, Lexus RX Trucks: Ford F-150, RAM 1500, Chevrolet Silverado What is the Difference Between a Sunroof and a Moonroof? When it comes to car roof options, many drivers confuse moonroofs and sunroofs as the same feature. While both enhance ventilation and natural light, they have distinct structural, functional, and aesthetic differences. Let’s break down the moonroof vs sunroof comparison. 1. Structure and Material A sunroof is a solid, opaque metal panel that matches the car’s body. It can be manually or electronically tilted or removed to allow airflow. On the other hand, a moonroof is a transparent or tinted glass panel that slides or tilts open but cannot be removed. Sunroof: Metal panel, blends with the car’s roof Moonroof: Glass panel, provides a see-through view 2. Differences in How They Open and Operate Sunroof: Traditionally, a sunroof can either pop up slightly for ventilation or be fully removed in some models. Older sunroofs were often manually operated. Moonroof: Modern moonroofs are typically power-operated, sliding between the roof liner and car roof for seamless functionality. 3. Visibility and Aesthetic Differences One major difference in the moonroof vs sunroof debate is visibility. A sunroof remains closed when not in use, offering no extra visibility. A moonroof is made of glass, meaning even when shut, it allows natural light into the vehicle, often with a retractable sunshade for glare control. 4. Benefits of Each Sunroof Benefits Provides an open-air driving experience when fully removed Keeps the car interior cooler when open Ideal for those who want a traditional, removable panel Moonroof Benefits Enhances visibility with a glass panel Provides a sleek, modern aesthetic Power-operated, making it more convenient to use Which One Is Best for You? If you prefer a fully open-air experience, a sunroof is the better option. However, if you want a modern design with continuous natural light, a moonroof is the way to go. Most newer vehicles come equipped with moonroofs due to their stylish and functional design. Whether you’re considering a moonroof vs sunroof, the right choice depends on your preference for ventilation, visibility, and style! You can also read about sunroof repair in Austin. What Are the Different Types of Moonroofs and Sunroofs? When choosing between a moon roof vs sun roof, understanding the different types available can help you pick the best option for your vehicle. Both enhance ventilation and natural light, but their styles and functionalities vary. Below is a breakdown of the types of

What Is The Difference Between A Sunroof And A Moonroof Read More »

How Much Does It Cost to Tint a Sunroof? Find Out Here!

How Much Does It Cost To Tint A Sunroof

How much does it cost to tint a sunroof? This is a common question among car owners looking to enhance their vehicle’s aesthetics and functionality. Sunroof tinting has gained popularity due to its ability to reduce glare, block harmful UV rays, and maintain a cooler interior. As more drivers seek ways to improve comfort and protect their car’s interior, tinting has become a go-to solution. However, understanding the cost and benefits beforehand is crucial to making an informed decision. Factors such as tint type, installation quality, and local regulations can all impact the final price, making it essential to research before committing to the service. Understanding Car Sunroof Tinting Talk To Sunroof Repair Expert Sunroof tinting is the process of applying a thin film to the glass panel of a car’s sunroof to reduce heat, glare, and UV radiation. It enhances comfort, protects the interior from sun damage, and can improve the overall aesthetic of the vehicle. Proper tinting can also help in temperature regulation by keeping the car cooler, especially in sunny regions. Types of Tint Films Used for Sunroofs There are several types of tint films available for sunroofs, each offering different levels of heat resistance, durability, and appearance: Ceramic Tint – This is the highest-quality tint, offering superior heat rejection and UV protection without interfering with GPS, radio, or mobile signals. It is also known for its durability and clarity. Carbon Tint – Carbon film is a premium option that provides excellent heat rejection and fade resistance. It does not contain metal, so it won’t interfere with electronic signals. Dyed Tint – This is the most affordable option but offers limited heat resistance compared to ceramic or carbon tints. Over time, dyed films can fade or turn purple. Metallic Tint – This film includes small metal particles that reflect heat and UV rays effectively. However, it can interfere with electronic signals, which may affect GPS and radio reception. Legal Considerations for Sunroof Tinting Before tinting your sunroof, it’s essential to check local laws and regulations regarding visible light transmission (VLT). Some states have restrictions on how dark the tint can be, especially for sunroofs and windshields. In some areas, highly reflective or dark tints may not be allowed for safety reasons. Always ensure compliance with local tinting laws to avoid fines or penalties. Sunroof Tinting Cost The sunroof tinting cost varies depending on factors such as the type of tint film, the size of the sunroof, and professional installation fees. On average, the cost ranges from $100 to $400, with high-end ceramic tints costing more due to their superior performance. Opting for professional installation ensures proper application and longevity, preventing issues like bubbling or peeling. If you’re considering sunroof tinting, it’s essential to choose the right film type and ensure it meets legal requirements in your area. Investing in high-quality tint not only enhances your vehicle’s comfort but also adds to its longevity and appeal. You can also read about sunroof repairing in Austin. Factors That Affect the Cost of Sunroof Tinting The tinting sunroof cost varies based on multiple factors, including the size of the sunroof, the type of tint film used, and whether you choose professional installation or a DIY approach. Understanding these factors can help you make an informed decision when tinting your sunroof. 1. Type and Size of the Sunroof Sunroofs come in different sizes and styles, which impact the cost of tinting: Regular Sunroofs – Standard-sized sunroofs are smaller and typically cost less to tint. Panoramic Sunroofs – These larger sunroofs require more film and labor, increasing the overall tinting sunroof cost. Since they cover a wider area, they often need high-quality tint for better heat rejection. 2. Quality and Type of Tint Film Used The type of tint film you choose significantly affects the price: Ceramic Tint – The most expensive option, offering the best heat and UV protection without signal interference. Carbon Tint – A mid-range option that provides good heat rejection and durability. Dyed Tint – The most affordable option but prone to fading over time. Metallic Tint – Offers strong heat rejection but may interfere with GPS and radio signals. Higher-quality films generally increase the tinting sunroof cost, but they provide better longevity and performance. 3. Professional Installation vs. DIY Professional Installation – Hiring an expert ensures precision and durability, reducing the risk of bubbles, peeling, or improper application. Professional installation costs more but provides better results. DIY Tinting – A cheaper alternative, but it requires skill and the right tools. Mistakes can lead to an uneven finish, requiring a redo that increases costs. 4. Additional Features: UV Protection and Heat Rejection Premium tint films come with added features that impact cost: UV Protection – Helps prevent sun damage to your car’s interior and skin exposure. Heat Rejection – Reduces interior heat, keeping the car cooler and improving energy efficiency. Films with advanced technology for UV and infrared heat rejection tend to cost more but offer long-term benefits. How Much Does It Cost to Tint a Sunroof in Austin? If you’re considering tinting your sunroof in Austin, TX, you might be wondering about the sunroof tinting cost. The price varies depending on the type of tint, installation method, and service provider. Below, we break down the average cost, price comparisons, and differences between professional and mobile tinting services. Average Price Range for Sunroof Tinting in Austin, TX At Texas Reliable Auto Glass, we provide high-quality sunroof tinting services tailored to your needs. In Austin, the sunroof tinting cost typically falls within the following ranges: Standard Sunroof Tinting: $100 – $250 Panoramic Sunroof Tinting: $200 – $400 High-Performance Ceramic Tint: $250 – $500 The final cost depends on the size of the sunroof, the type of film used, and whether you opt for additional features like UV and infrared heat protection. Price Comparison Between Different Tinting Options The type of tint film you choose plays a major role in the sunroof tinting cost. Here’s a breakdown of different

How Much Does It Cost To Tint A Sunroof Read More »

Scroll to Top